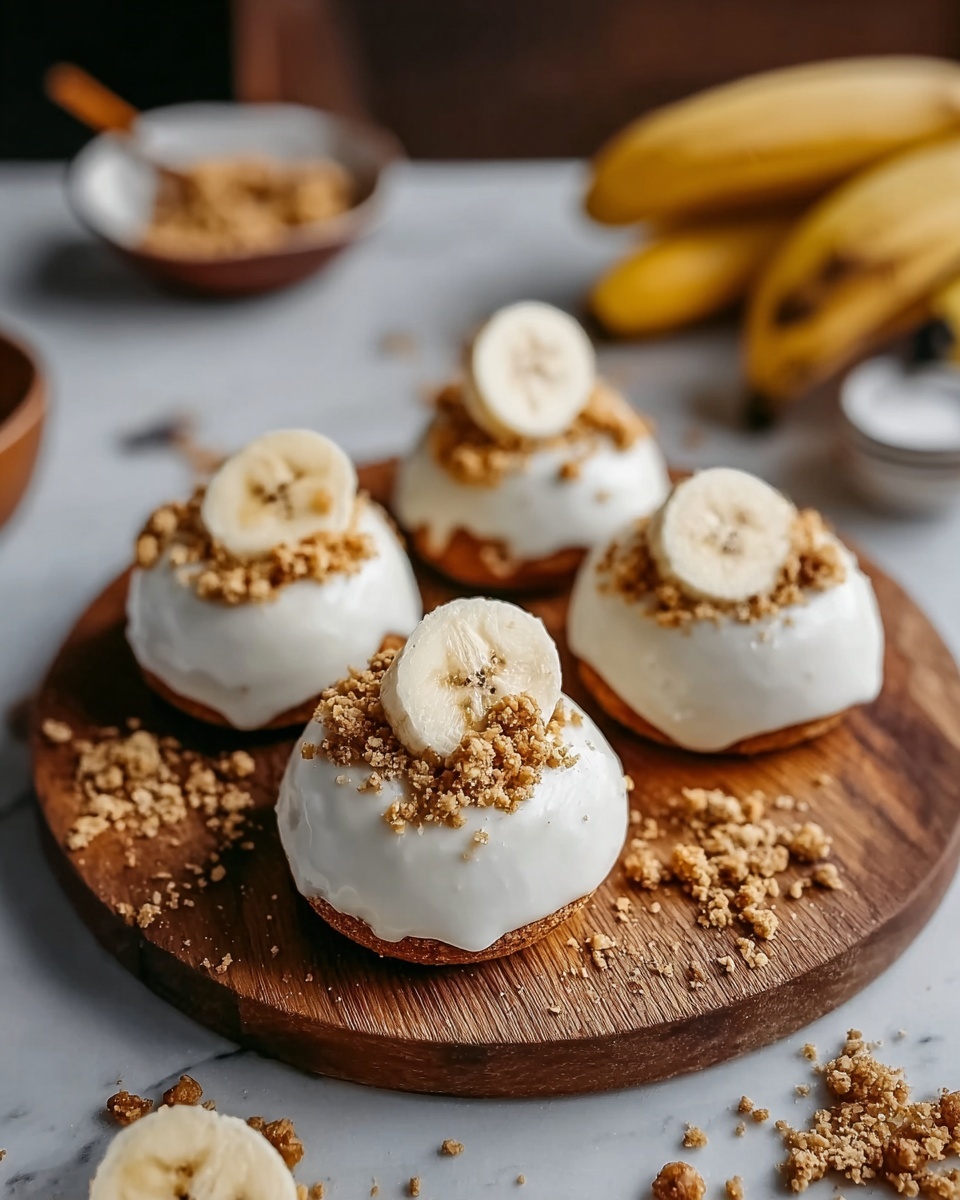
If you are looking for a delightful, bite-sized treat that captures the creamy, nostalgic flavor of a classic banana pudding, then this Banana Pudding Truffles Recipe is exactly what you need. These truffles combine the soft texture of vanilla wafer crumbs and banana pudding with the silky richness of white chocolate, creating a perfect snack or dessert to satisfy your sweet tooth. They are simple to make, irresistible to taste, and a guaranteed crowd-pleaser for any occasion.
Ingredients You’ll Need
Every ingredient in this Banana Pudding Truffles Recipe plays a vital role, contributing to the rich texture, smooth flavor, and delightful look of these truffles. With just a handful of straightforward components, you’ll craft a dessert that tastes like a little piece of homemade heaven.
- Vanilla wafer crumbs (1 ½ cups): Provides the essential crumbly base that adds texture and traditional banana pudding flavor.
- Banana pudding mix (½ cup, dry, instant): Delivers the iconic banana taste and a velvety creaminess important to the filling.
- Cream cheese (4 oz, softened): Brings richness and structure to the truffle base for easy rolling.
- Vanilla extract (1 tsp): Enhances the overall sweetness while deepening the flavor profile.
- White chocolate chips (1 cup): Used for coating, adding a smooth, sweet shell that balances the pudding center.
- Coconut oil (1 tbsp): Helps melt the chocolate smoothly and ensures an even, glossy coating on the truffles.
- Crushed vanilla wafers (¼ cup, optional): Perfect for sprinkling on top to add an inviting crunch and a pretty finish.
How to Make Banana Pudding Truffles Recipe
Step 1: Crush the Vanilla Wafers
Start by transforming those simple vanilla wafers into fine crumbs. You can use a food processor for a quick crush, or pop them into a zip-top bag and press down with a rolling pin. The goal is to get a fine, even texture that will blend beautifully with the other ingredients and form the base of your truffles.
Step 2: Mix the Filling
In a bowl, combine your fresh vanilla wafer crumbs with the dry banana pudding mix, softened cream cheese, and vanilla extract. Stir everything until smooth and thoroughly combined. You’ll notice the mixture becomes thick yet pliable—perfect for shaping.
Step 3: Shape Into Truffle Balls
Grab about a tablespoon of the mixture and roll it between your hands into small, uniform balls. This hands-on step is fun and really lets you feel the creamy, crumbly texture coming together.
Step 4: Chill to Firm Up
Place your truffle balls on a baking sheet lined with parchment paper, spacing them evenly. Pop them into the refrigerator for 30 minutes to one hour. Chilling firms them up, making them easier to dip in the next step and ensuring they hold their shape beautifully.
Step 5: Melt the White Chocolate
While your truffles chill, melt the white chocolate chips and coconut oil together in a microwave-safe bowl. Heat in 30-second bursts and stir in between until you achieve a smooth, lump-free coating that’s ready for dipping.
Step 6: Dip the Truffles
Using a fork or a dipping tool, gently dip each chilled truffle into the melted white chocolate. Hold it over the bowl to let the excess drip back down. This coating seals in the creamy banana pudding flavor and makes the truffles look glossy and irresistible.
Step 7: Add the Finishing Touch
Return the dipped truffles onto the parchment paper. Sprinkle the tops with some extra crushed vanilla wafers before the chocolate sets to add texture and a charming look that invites you to take a bite.
Step 8: Let the Truffles Set
Allow your Banana Pudding Truffles Recipe creations to harden naturally at room temperature or speed up the process by placing them in the fridge. When the chocolate shell is firm, your truffles are ready to enjoy.
Step 9: Enjoy or Store
Once finished, you can dive right in and savor the creamy, dreamy combination or store your truffles properly for later indulgence.
How to Serve Banana Pudding Truffles Recipe
Garnishes
These truffles shine on their own, but a sprinkle of crushed vanilla wafers on top adds a lovely crunch and visual appeal. For an extra festive touch, throw on some toasted coconut flakes or a light dusting of cinnamon to complement the banana flavor beautifully.
Side Dishes
Serve these Banana Pudding Truffles Recipe treats alongside fresh banana slices or a dollop of whipped cream to enhance that classic pudding experience. They also pair wonderfully with a cup of hot tea or strong coffee, which balances the sweetness perfectly.
Creative Ways to Present
Present your truffles on a pretty dessert platter lined with banana leaves for an exotic flair or in individual mini cupcake liners for easy grabbing. You can even dip half of each truffle in dark chocolate for a delightful visual contrast and added richness.
Make Ahead and Storage
Storing Leftovers
Keep leftover truffles fresh by storing them in an airtight container in the refrigerator. They hold up nicely for several days without losing their texture or flavor, making them a convenient treat for unexpected guests.
Freezing
These truffles freeze exceptionally well. Just place them in a freezer-safe container with parchment paper between layers to prevent sticking, and they’ll keep for up to one month. Thaw them in the refrigerator before serving to maintain their creamy center.
Reheating
Since these truffles are best enjoyed cold or at room temperature, reheating is generally not recommended. If you want to soften them slightly, leave them out at room temperature for 10-15 minutes to take the chill off before enjoying.
FAQs
Can I use homemade banana pudding instead of the dry mix?
While you could try, the dry instant banana pudding mix is essential for providing the right texture and binding properties that keep the truffles firm. Homemade pudding may be too wet, making rolling difficult.
What if I don’t have coconut oil?
You can substitute coconut oil with shortening or even a neutral vegetable oil. The key is to use something that helps achieve smooth melting and a shiny finish for the white chocolate coating.
How long do these truffles last?
Stored properly in the fridge, Banana Pudding Truffles Recipe treats will stay fresh for up to a week. Just make sure they are sealed tightly to prevent drying out or absorbing other fridge odors.
Can I use milk chocolate instead of white chocolate?
Absolutely! Milk chocolate will give a different flavor profile but still pairs wonderfully with the banana pudding filling. Adjust the amount of coconut oil if needed to maintain smooth melting.
Is this recipe suitable for kids to help with?
Yes! Rolling the truffles and dipping them in chocolate are fun, hands-on steps perfect for kids with supervision. It’s a great way to get them involved in the kitchen and excited about homemade desserts.
Final Thoughts
There is something truly special about making your own Banana Pudding Truffles Recipe and sharing the joy of these rich, creamy bites with loved ones. The ease of preparation combined with the nostalgic flavors makes this recipe a go-to for any dessert lover. So grab your ingredients, dive into the fun steps, and get ready to fall in love with your new favorite treat!
Print
Banana Pudding Truffles Recipe
- Prep Time: 10 minutes
- Cook Time: 0 minutes
- Total Time: 40-70 minutes (including chilling time)
- Yield: 18-20 truffles
- Category: Dessert
- Method: No-Cook
- Cuisine: American
- Diet: Vegetarian
Description
Delight in these creamy and bite-sized Banana Pudding Truffles, combining the nostalgic flavors of vanilla wafers and banana pudding with a smooth white chocolate coating. Perfect as a sweet treat or party dessert, these no-bake truffles offer a rich, creamy texture with a subtle banana flavor and a crunchy chocolate shell.
Ingredients
Base Ingredients
- 1 ½ cups vanilla wafer crumbs (about 30 crushed wafers)
- ½ cup banana pudding mix (dry, instant)
- 4 oz cream cheese, softened
- 1 tsp vanilla extract
Coating
- 1 cup white chocolate chips (or melting wafers)
- 1 tbsp coconut oil (or shortening, for smooth melting)
Garnish
- ¼ cup crushed vanilla wafers (optional)
Instructions
- Crush Wafers: Use a food processor or place vanilla wafers in a zip-top plastic bag and crush them with a rolling pin until you achieve fine crumbs.
- Mix Ingredients: In a medium-sized bowl, combine the vanilla wafer crumbs, dry banana pudding mix, softened cream cheese, and vanilla extract. Stir thoroughly until smooth and fully incorporated into a cohesive dough.
- Form Balls: Scoop approximately 1 tablespoon of the mixture and roll it between your palms to create small, uniform balls.
- Chill Truffles: Lay the formed balls evenly on a parchment-lined baking sheet. Place them in the refrigerator for 30 minutes to 1 hour to allow them to firm up and become easier to dip.
- Melt Chocolate Coating: In a microwave-safe bowl, combine the white chocolate chips and coconut oil. Heat in 30-second intervals, stirring well after each, until the mixture is completely smooth and melted.
- Dip Truffles: Using a fork or dipping tool, carefully dip each chilled truffle into the melted white chocolate, ensuring it is fully coated. Let any excess chocolate drip off.
- Place and Garnish: Transfer the coated truffles back onto the parchment paper-lined tray. While the coating is still wet, sprinkle crushed vanilla wafers on top for added texture and decoration.
- Set the Truffles: Allow the chocolate coating to harden at room temperature or place the tray in the refrigerator until the truffles are firm and fully set.
- Serve or Store: Enjoy your banana pudding truffles immediately or store them in an airtight container in the fridge for later enjoyment.
Notes
- For easier rolling, chilling the dough mixture briefly beforehand may help.
- Use high-quality white chocolate for a smoother, more flavorful coating.
- The coconut oil helps the white chocolate to melt smoothly and set with a nice sheen.
- These truffles can be stored refrigerated for up to one week.
- Optional garnish with crushed vanilla wafers adds a crunchy texture contrast.
