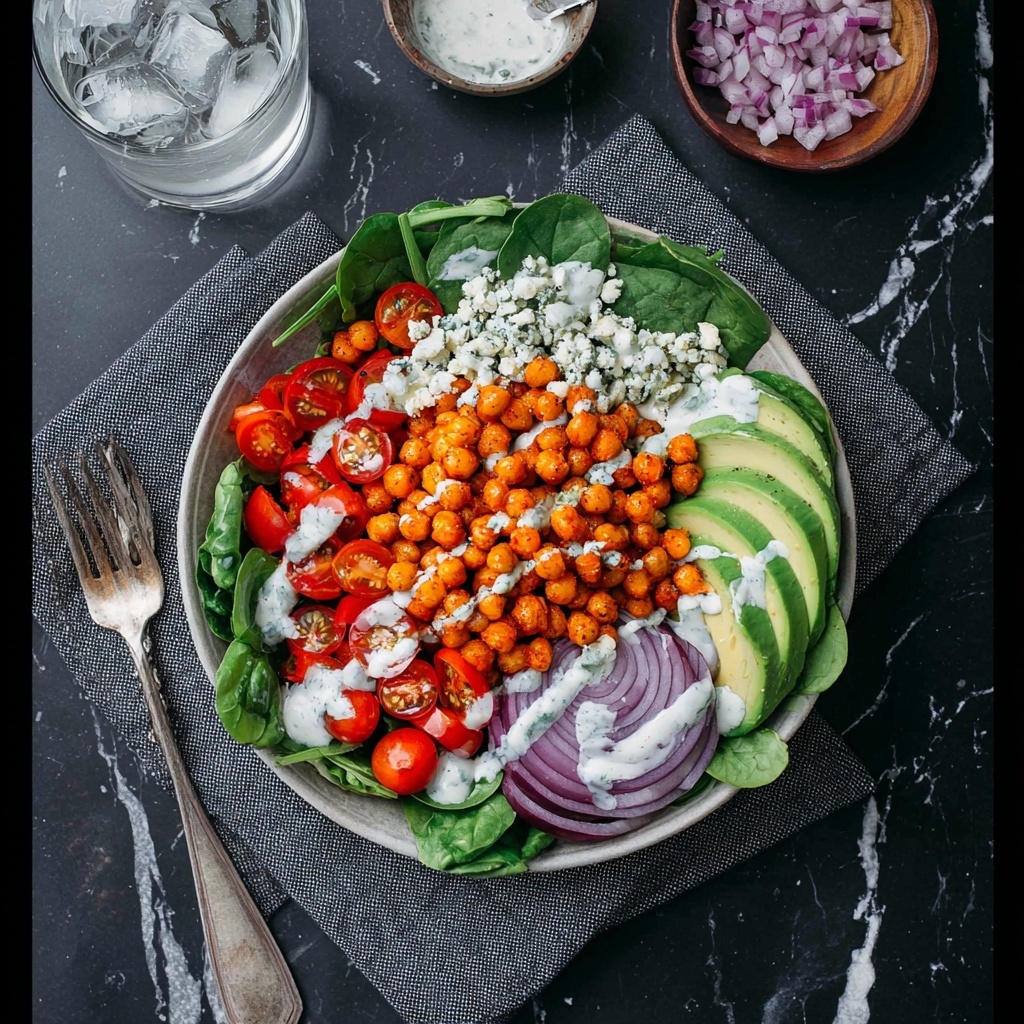
If you’re craving something that packs a punch of flavor with a fresh, hearty bite, the Buffalo Chickpea Salad Recipe is an absolute must-try. This vibrant salad combines crispy buffalo-spiced chickpeas with creamy avocado, tangy blue cheese, and crisp baby spinach to create a mouthwatering dish that feels indulgent yet wholesome. Whether you want a quick lunch or a vibrant dinner option, this recipe blends spicy, creamy, and crunchy textures in a way that’ll have you coming back for seconds without any guilt.
Ingredients You’ll Need
Gathering your ingredients for this salad is delightfully simple, but each one plays an essential role in balancing heat, creaminess, freshness, and texture. From the earthy, crispy chickpeas to the bright, juicy tomatoes, every component adds its own magic to the final dish.
- Baby spinach: This leafy green forms the fresh base and adds vibrant color and nutrients.
- Diced red onion: Adds a sharp, slightly sweet crunch that cuts through the richness.
- Avocado: Creamy and buttery, it mellows the spicy buffalo flavors perfectly.
- Blue cheese crumbles: The tangy, pungent bites bring classic buffalo-style flavor and richness.
- Cherry tomatoes: Their juicy bursts offer a sweet contrast and bright color.
- Ranch or blue cheese dressing: Creates a cool, creamy coating that ties everything together.
- Chickpeas (1 15-ounce can): The star protein here, crispy when roasted, they soak up the buffalo sauce beautifully.
- Olive oil: Helps the chickpeas roast to crispy perfection.
- Buffalo or hot sauce: Provides the iconic spicy, tangy kick that defines this salad.
- Optional toppings: Banana peppers, pickled jalapeños, olives, feta cheese, and cucumber add extra layers of flavor and texture.
How to Make Buffalo Chickpea Salad Recipe
Step 1: Prepare the Chickpeas
Begin by preheating your oven to 400º F. Drain the chickpeas thoroughly and use a clean towel to pat them as dry as possible. Removing moisture is key to achieving that perfect crispiness when they roast.
Step 2: Toss Chickpeas in Oil and Sauce
Place the dried chickpeas in a mixing bowl and drizzle with olive oil, tossing well to coat every chickpea. Next, add the buffalo sauce and toss again until every chickpea is evenly coated with the spicy goodness.
Step 3: Roast the Chickpeas
Spread the buffalo-coated chickpeas out on a baking sheet in a single layer to ensure even roasting. Reserve any leftover sauce in the bowl for later use. Pop the tray in the oven to cook for 10 minutes.
Step 4: Toss and Continue Cooking
After the first 10 minutes, pull out the chickpeas and give them a good toss to crisp up all sides. Return them to the oven for another 10 minutes. They should come out delightfully crunchy and ready to add a fiery punch to your salad.
Step 5: Finish with Sauce
Once roasted, transfer the chickpeas back into the mixing bowl and toss with any reserved sauce for extra flavor. If you love your salad extra spicy, drizzle on a little more buffalo sauce and toss to coat evenly.
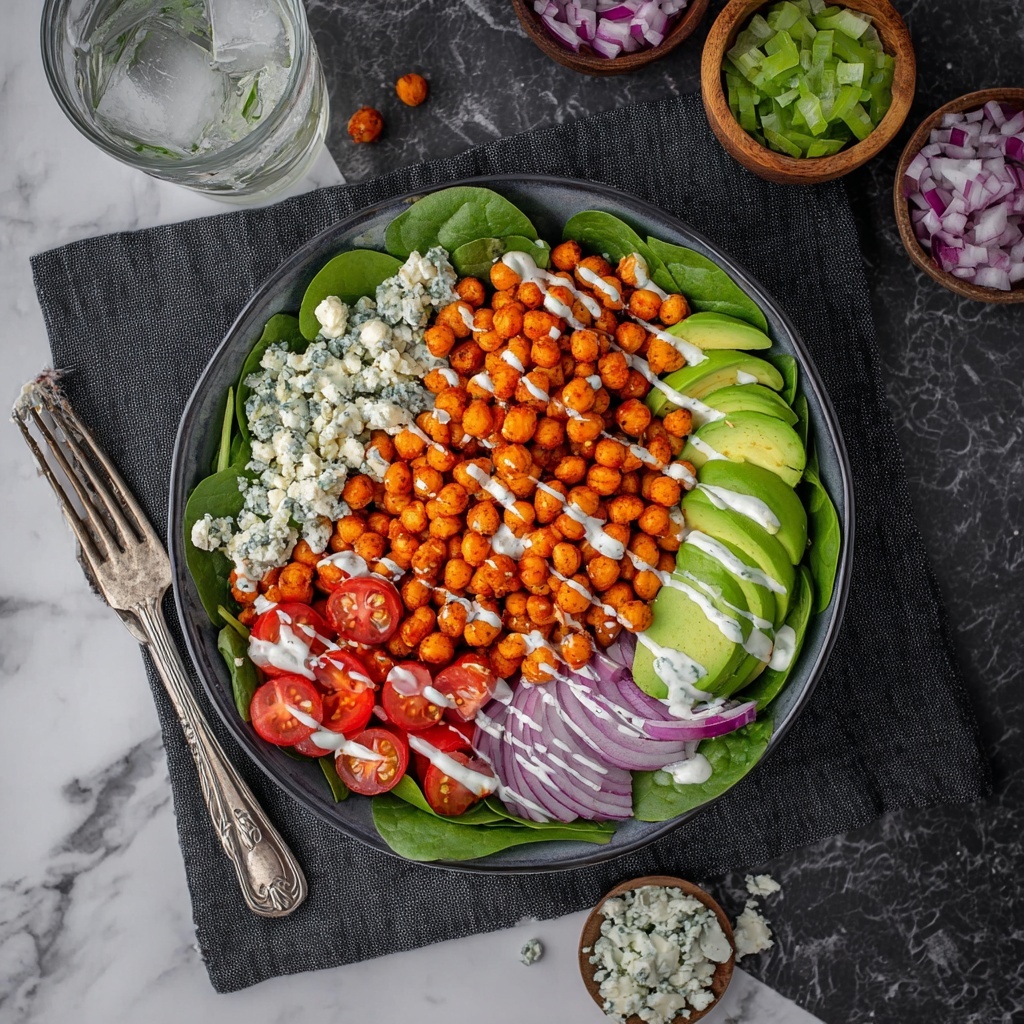
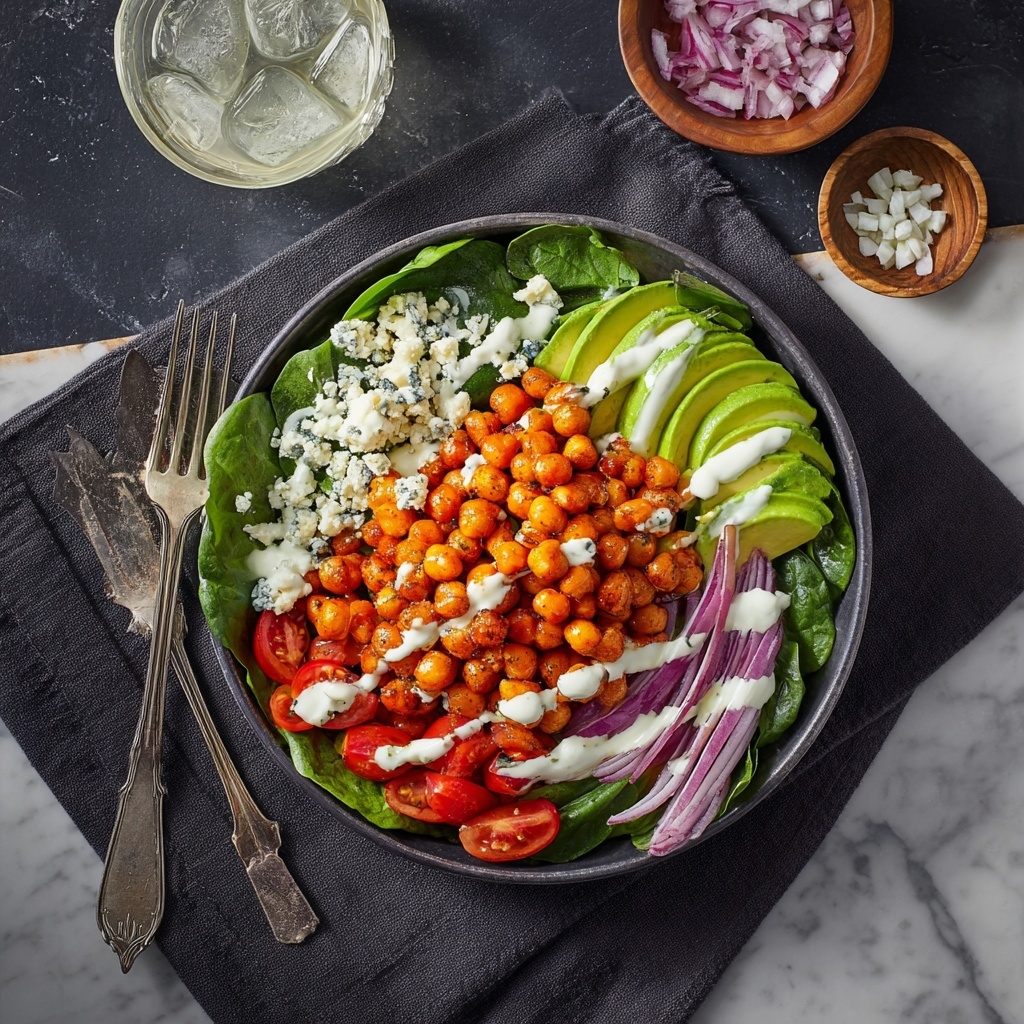
Step 6: Build Your Salad Base
If you want to keep things simple, enjoy the chickpeas as they are! For the full Buffalo Chickpea Salad Recipe, layer your salad by adding fresh baby spinach, diced red onion, sliced avocado, blue cheese crumbles, and quartered cherry tomatoes into a large bowl. Feel free to mix in any additional toppings like banana peppers or olives for your preferred twist.
Step 7: Combine and Dress
Top the fresh veggies with the warm, crispy buffalo chickpeas and drizzle on your favorite ranch or blue cheese dressing. Give everything a gentle toss so the flavors meld together beautifully. Serve it up and get ready for a salad experience loaded with zest and texture.
How to Serve Buffalo Chickpea Salad Recipe
Garnishes
To elevate your Buffalo Chickpea Salad Recipe even more, consider adding fresh herbs such as chopped cilantro or parsley. A sprinkle of extra blue cheese crumbles or a few pickled jalapeños can add delightful bursts of flavor and visual appeal, making each bite delightful and exciting.
Side Dishes
This salad shines brilliantly as a standalone meal but pairs wonderfully with warm, crusty bread or pita chips for scooping. If you’re serving it at a gathering, offering a spicy cornbread or a cool cucumber salad on the side balances the heat perfectly.
Creative Ways to Present
Try serving your Buffalo Chickpea Salad Recipe in a hollowed-out avocado half for an Instagram-worthy presentation. Alternatively, pile it into a wrap or taco shell for a handheld version that’s perfect for lunches on the go. Mason jar salads with layers of ingredients also make great, portable meals.
Make Ahead and Storage
Storing Leftovers
Store any leftover Buffalo Chickpea Salad Recipe in an airtight container in the refrigerator. It’s best enjoyed within 2 days for freshness. Keep the crispy chickpeas separate from the dressing and greens if possible to prevent sogginess.
Freezing
While the roasted chickpeas freeze well on their own, it’s not recommended to freeze the complete salad as the fresh vegetables and dressing don’t thaw well. Freeze roasted chickpeas in a zip-top bag and re-crisp in the oven when ready to use.
Reheating
To bring life back to leftover chickpeas, spread them on a baking sheet and warm in a preheated 350º F oven until crisp again, about 5–7 minutes. Avoid microwaving as it can make them soggy. Refresh the salad greens and toppings before serving.
FAQs
Can I make this salad vegan?
Absolutely! Simply swap the blue cheese and ranch dressing for vegan-friendly alternatives or use a tangy tahini dressing. The buffalo-spiced chickpeas still pack all the flavor you’re looking for.
How spicy is this Buffalo Chickpea Salad Recipe?
The heat level depends largely on how much buffalo or hot sauce you add. You can adjust the spice from mild to fiery by adding more or less sauce, making it perfect for all heat preferences.
What other toppings work well with this salad?
Feel free to experiment with pickled vegetables like banana peppers or jalapeños, olives, cucumbers, or even a handful of crispy bacon bits for an extra savory twist.
Can I use dried chickpeas instead of canned?
Yes, but you’ll need to soak and cook dried chickpeas beforehand, which takes longer. Canned chickpeas are convenient and give the same delicious results when roasted.
Is this salad suitable for meal prep?
Definitely! Keep the chickpeas and dressing separate from the greens to maintain freshness, and combine them just before eating for the best texture and flavor.
Final Thoughts
There’s something truly special about the Buffalo Chickpea Salad Recipe that makes it feel like a celebration in every bite. It’s spicy, creamy, crunchy, and fresh all at once, proving salads can be both exciting and satisfying. Give this recipe a whirl—you might just find your new favorite way to enjoy chickpeas!
Print
Buffalo Chickpea Salad Recipe
- Prep Time: 5 minutes
- Cook Time: 20 minutes
- Total Time: 25 minutes
- Yield: 1 serving
- Category: Salad
- Method: Baking
- Cuisine: American
- Diet: Vegetarian
Description
This Buffalo Chickpea Salad is a vibrant, protein-packed dish perfect for a healthy lunch or dinner. Crispy buffalo-seasoned chickpeas bring a spicy kick to a fresh salad filled with baby spinach, creamy avocado, tangy blue cheese, and juicy cherry tomatoes. Topped with a ranch or blue cheese dressing and optional flavorful add-ins like pickled jalapeños and olives, this recipe combines bold flavors and satisfying textures in a nutritious and easy-to-make meal.
Ingredients
Salad Ingredients
- 2 handfuls baby spinach
- 1 tablespoon diced red onion
- ½ avocado, sliced
- 2 tablespoons blue cheese crumbles
- ¼ cup quartered cherry tomatoes
- 2 tablespoons ranch or blue cheese dressing
- Optional toppings: banana peppers, pickled jalapeños, black or kalamata olives, feta cheese, cucumber
Buffalo Chickpeas
- 1 (15 ounce) can chickpeas, drained and patted dry
- ½ teaspoon olive oil
- 2 tablespoons buffalo or hot sauce, plus more to taste
Instructions
- Preheat oven and prep chickpeas: Preheat your oven to 400ºF (200ºC). Drain the chickpeas thoroughly and pat them dry using a clean towel to remove excess moisture, which helps them crisp up in the oven.
- Toss chickpeas with oil and buffalo sauce: Place the dried chickpeas in a mixing bowl. Drizzle with ½ teaspoon olive oil and toss them to coat evenly. Add 2 tablespoons of buffalo or hot sauce and toss again until the chickpeas are fully coated.
- Arrange chickpeas on baking sheet: Spread the buffalo-coated chickpeas out in a single layer on a baking sheet. Keep the bowl with any leftover buffalo sauce for later use.
- Bake chickpeas for crispiness: Bake the chickpeas for 10 minutes, then remove the sheet and toss the chickpeas to flip them for even cooking. Return to the oven and bake for another 10 minutes until crispy and golden.
- Toss chickpeas with remaining sauce: Transfer the crispy chickpeas back into the reserved bowl and toss with any remaining buffalo sauce. For extra sauciness, drizzle additional buffalo or hot sauce to taste and toss again.
- Serve plain or build the salad: You can enjoy the buffalo chickpeas on their own or proceed to make the salad by combining fresh ingredients.
- Assemble the salad: In a large bowl, combine the baby spinach, diced red onion, sliced avocado, blue cheese crumbles, and quartered cherry tomatoes. Add any optional toppings you like such as banana peppers, pickled jalapeños, black or kalamata olives, feta cheese, or cucumber.
- Add warm chickpeas and dressing: Top the salad with the warm buffalo chickpeas, drizzle with ranch or blue cheese dressing, and toss everything together gently until well combined. Serve immediately and enjoy the flavorful contrast of spicy chickpeas and fresh vegetables.
Notes
- Pat chickpeas very dry before roasting for maximum crispiness.
- Adjust buffalo sauce amount to your preferred spice level.
- Warm roasted chickpeas add a nice contrast when combined with cool salad ingredients.
- Try turning the salad into a wrap using your favorite tortilla for a portable meal.
- Blue cheese can be substituted with feta for a different tangy flavor.
- Leftover chickpeas keep well refrigerated for up to 2 days; reheat for best texture.


