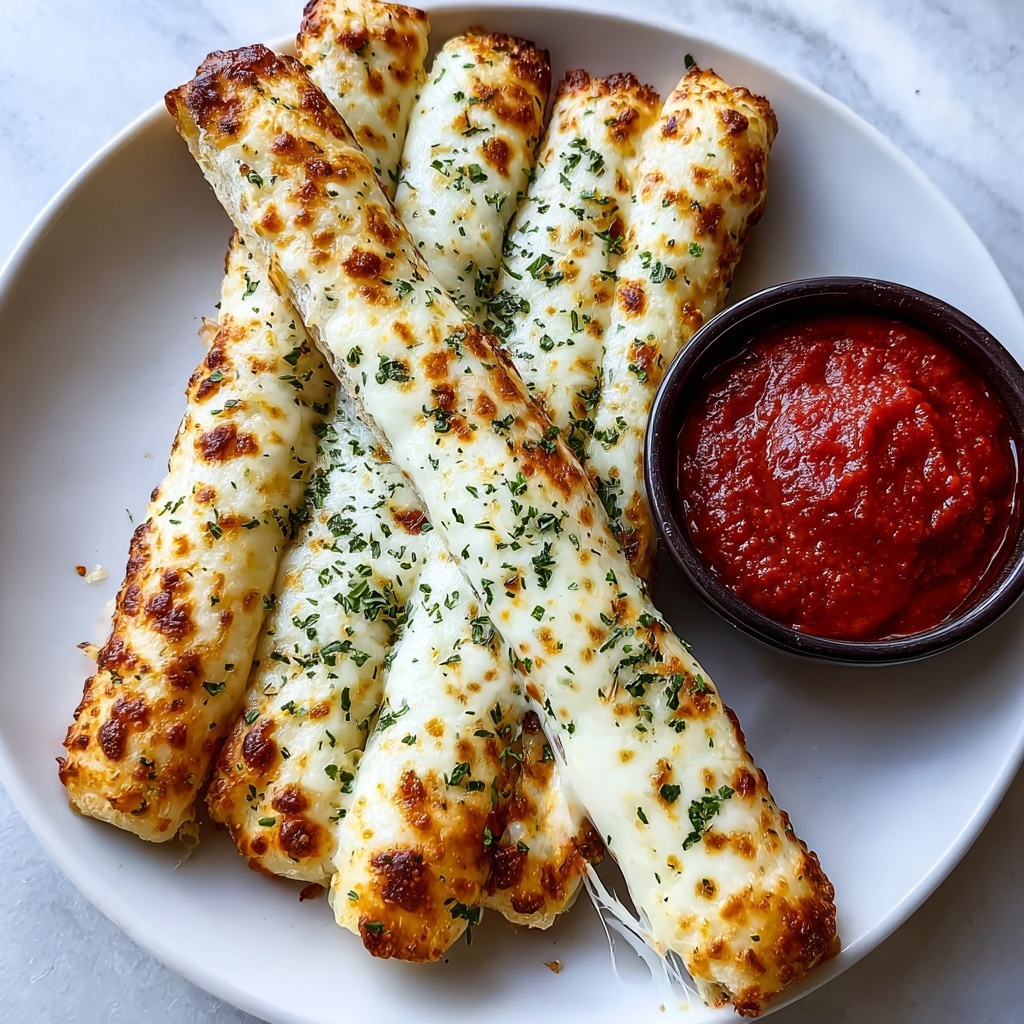
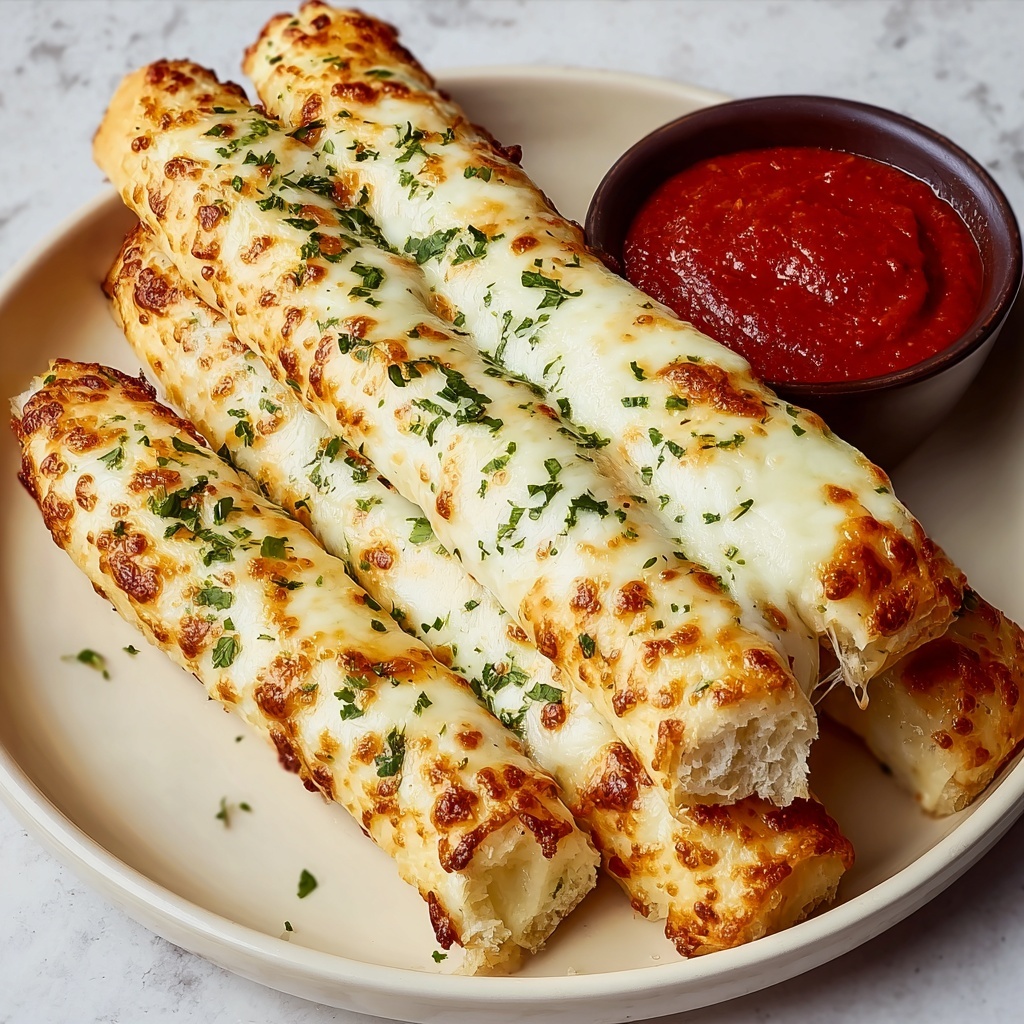
If you are looking for a fun, irresistibly tasty snack that combines the gooey charm of melted cheese with the crispy comfort of breadsticks, then this Cheesy Breadstick Bones Recipe is exactly what you need. Perfect for gatherings, Halloween parties, or just a cozy night in, these cheddar-filled treats bring a playful twist to classic breadsticks, shaped like bones and bursting with cheesy goodness that will have everyone reaching for more.
Ingredients You’ll Need
Ingredients You’ll Need
This Cheesy Breadstick Bones Recipe uses simple ingredients that come together beautifully to create a snack that balances flavor, texture, and aroma. Each component enhances the dish, from the soft pizza dough that forms a golden base to the blend of cheeses and seasonings that elevate every bite.
- 1 (13.8 oz) can refrigerated pizza dough: The perfect soft and pliable dough to easily shape into bone-like breadsticks.
- 1 cup shredded mozzarella cheese: Melts perfectly, providing that signature gooey cheese pull.
- ¼ cup grated Parmesan cheese: Adds a sharp, nutty depth of flavor.
- 1 tablespoon olive oil: Brushed on top for a golden, crispy finish.
- 1 teaspoon dried Italian seasoning: Brings a herbaceous aroma that complements the cheeses beautifully.
- ½ teaspoon garlic powder: Gives a subtle kick without overpowering the flavors.
- Marinara sauce (for dipping): A classic pairing that adds a tangy, savory note to each cheesy bite.
How to Make Cheesy Breadstick Bones Recipe
Step 1: Prepare Your Base
Start by preheating your oven to 375 degrees Fahrenheit (190 degrees Celsius), and line a baking sheet with parchment paper so clean-up stays effortless. The warmth sets the stage for perfectly baked breadsticks with a crispy crust.
Step 2: Shape the Dough
Unroll the refrigerated pizza dough onto the lined baking sheet, then cut it into strips about 6 inches long and 1 inch wide. These measurements help you achieve breadsticks that are the perfect size for both finger food and fun presentation.
Step 3: Form the Bone Shape
Gently stretch each dough strip just a little to elongate it, then tie a loose knot at each end. This simple shaping trick gives the breadsticks their iconic “bone” look, which adds a playful and festive vibe to your appetizer table.
Step 4: Add Olive Oil for Crispness
Brush each breadstick bone generously with olive oil. This step is key to ensuring that the breadstick bones turn out golden brown and crispy around the edges, making every bite satisfyingly crunchy.
Step 5: Mix the Cheesy Topping
In a small bowl, combine shredded mozzarella, grated Parmesan, dried Italian seasoning, and garlic powder. This flavorful blend of cheeses and spices brings a mouthwatering punch to the dish, making it far from your average breadstick.
Step 6: Sprinkle the Cheese Mixture
Generously cover the dough strips with the cheesy mixture, making sure to get all parts of the bone-shaped breadsticks coated. This step guarantees that every bite will be packed with that rich, cheesy flavor that keeps you coming back for more.
Step 7: Bake to Golden Perfection
Place the baking sheet in your preheated oven and let the breadstick bones bake for 10 to 12 minutes, or until they are golden brown and crispy. The aroma at this point is simply irresistible and will have everyone hovering around the kitchen.
Step 8: Cool Slightly
Once baked to perfection, remove the breadstick bones from the oven and let them cool for a few minutes on the baking sheet. This brief rest helps the cheese set slightly while keeping the breadsticks warm and ready to enjoy.
Step 9: Serve with Marinara Dipping Sauce
Warm breadstick bones deserve a classic companion—marinara sauce. Serve them with a side of tangy marinara for dipping, adding a lovely tomato contrast that complements the cheesy, crispy breadsticks beautifully.
How to Serve Cheesy Breadstick Bones Recipe
Garnishes
To add an extra pop of color and flavor, consider garnishing your cheesy breadstick bones with a sprinkle of chopped fresh parsley or a pinch of red pepper flakes. These simple touches brighten the dish and offer a fresh contrast to the rich cheese.
Side Dishes
This Cheesy Breadstick Bones Recipe pairs wonderfully with salads, fresh veggies, or even a hearty bowl of soup. The breadsticks add a comforting, cheesy crunch that complements lighter dishes or balances out richer meals perfectly.
Creative Ways to Present
For a festive party, arrange the breadstick bones on a platter lined with Halloween-themed napkins or decorations. You can also serve them standing upright in a tall glass filled with marinara sauce for an eye-catching and interactive appetizer display.
Make Ahead and Storage
Storing Leftovers
If you have any leftover cheesy breadstick bones, store them in an airtight container at room temperature for up to two days. This keeps them fresh and preserves their crisp crust and melty cheese inside.
Freezing
To freeze, let the breadstick bones cool completely, then wrap them individually in plastic wrap and place in a freezer-safe bag. They can be frozen for up to a month, making it easy to enjoy this cheesy delight anytime you want.
Reheating
Reheat frozen or refrigerated breadstick bones in an oven preheated to 350 degrees Fahrenheit until warmed through and crispy again, about 8 to 10 minutes. Avoid microwaving, which can make them soggy and lose their irresistible texture.
FAQs
Can I use homemade pizza dough instead of refrigerated dough?
Absolutely! Homemade dough works beautifully and allows you to customize flavors, but keep in mind that refrigerated dough offers convenience and consistent results, especially for busy days.
What kind of cheese works best for this recipe?
Mozzarella and Parmesan are classic choices for this recipe because mozzarella melts well and Parmesan adds flavor complexity. Feel free to experiment with provolone or cheddar for a different twist.
Can I make these breadstick bones gluten-free?
Yes, using a gluten-free pizza dough substitute will work. Just ensure the dough is pliable enough to tie knots without breaking, as this helps create the bone shape perfectly.
How spicy can I make this recipe?
To add some heat, toss in a pinch of crushed red pepper flakes with the cheese mixture or sprinkle cayenne pepper on top before baking. This creates a spicy kick that pairs wonderfully with the cheesy flavors.
Is marinara the only dipping sauce option?
Not at all! While marinara is classic, you can also offer ranch, garlic butter, or even a spicy sriracha mayo for creative dipping options that delight different tastes.
Final Thoughts
This Cheesy Breadstick Bones Recipe is a joyful way to bring friends and family together, combining simple ingredients into an unforgettable snack that everyone will love. Whether you’re gearing up for a holiday, party, or just craving some comforting cheesy bread, these breadstick bones deliver big flavor and fun in every bite. I can’t wait for you to try them and watch how fast they disappear from your plate!
Print
Cheesy Breadstick Bones Recipe
- Prep Time: 0h 15m
- Cook Time: 0h 12m
- Total Time: 0h 27m
- Yield: 8-10 breadstick bones
- Category: Appetizer
- Method: Baking
- Cuisine: Italian-American
Description
These Cheesy Breadstick Bones are a fun and festive twist on classic breadsticks, perfect for Halloween or any themed party. Made with soft pizza dough, stuffed with a flavorful cheese blend, and baked to golden perfection, they are crispy on the outside, cheesy on the inside, and served with a savory marinara sauce for dipping.
Ingredients
Base
- 1 (13.8 oz) can refrigerated pizza dough
Cheese Mixture
- 1 cup shredded mozzarella cheese
- ¼ cup grated Parmesan cheese
- 1 teaspoon dried Italian seasoning
- ½ teaspoon garlic powder
Other
- 1 tablespoon olive oil
- Marinara sauce (for dipping)
Instructions
- Preheat Oven: Preheat your oven to 375°F (190°C). Line a baking sheet with parchment paper for easy cleanup to ensure the breadsticks don’t stick and for effortless cleanup.
- Prepare Dough: Unroll the pizza dough onto the prepared baking sheet. Cut the dough into strips approximately 6 inches long and 1 inch wide to create the perfect size for shaping into bones.
- Shape the Bones: Gently stretch each strip to elongate them slightly. At each end of the strip, tie a loose knot, forming the iconic bone shape that adds a playful touch to this snack.
- Brush with Olive Oil: Lightly brush the shaped dough strips with olive oil, which helps them achieve a beautiful golden brown color when baked.
- Mix Cheese and Seasoning: In a small bowl, combine shredded mozzarella, grated Parmesan, dried Italian seasoning, and garlic powder to create a flavorful, cheesy topping.
- Add Cheese Topping: Generously sprinkle the cheese mixture over the prepared dough strips, making sure the entire bone shape is covered to maximize cheesy flavor.
- Bake: Place the baking sheet in the preheated oven and bake for 10-12 minutes, until the breadstick bones are golden brown and crispy on the edges.
- Cool Slightly: Remove from the oven and let them cool slightly on the baking sheet to firm up and avoid burning your mouth.
- Serve: Serve warm with a side of marinara sauce for dipping, enhancing the savory, cheesy flavor and adding a delicious tangy contrast.
Notes
- You can substitute pizza dough with homemade dough if desired for a fresher taste.
- For extra flavor, sprinkle some red pepper flakes over the cheese before baking.
- Use fresh herbs like basil or oregano instead of dried Italian seasoning for a fresher aroma.
- Ensure not to tie knots too tightly to let the dough expand and bake evenly.
- Serve immediately for best texture, as breadsticks can become less crispy when cooled.
