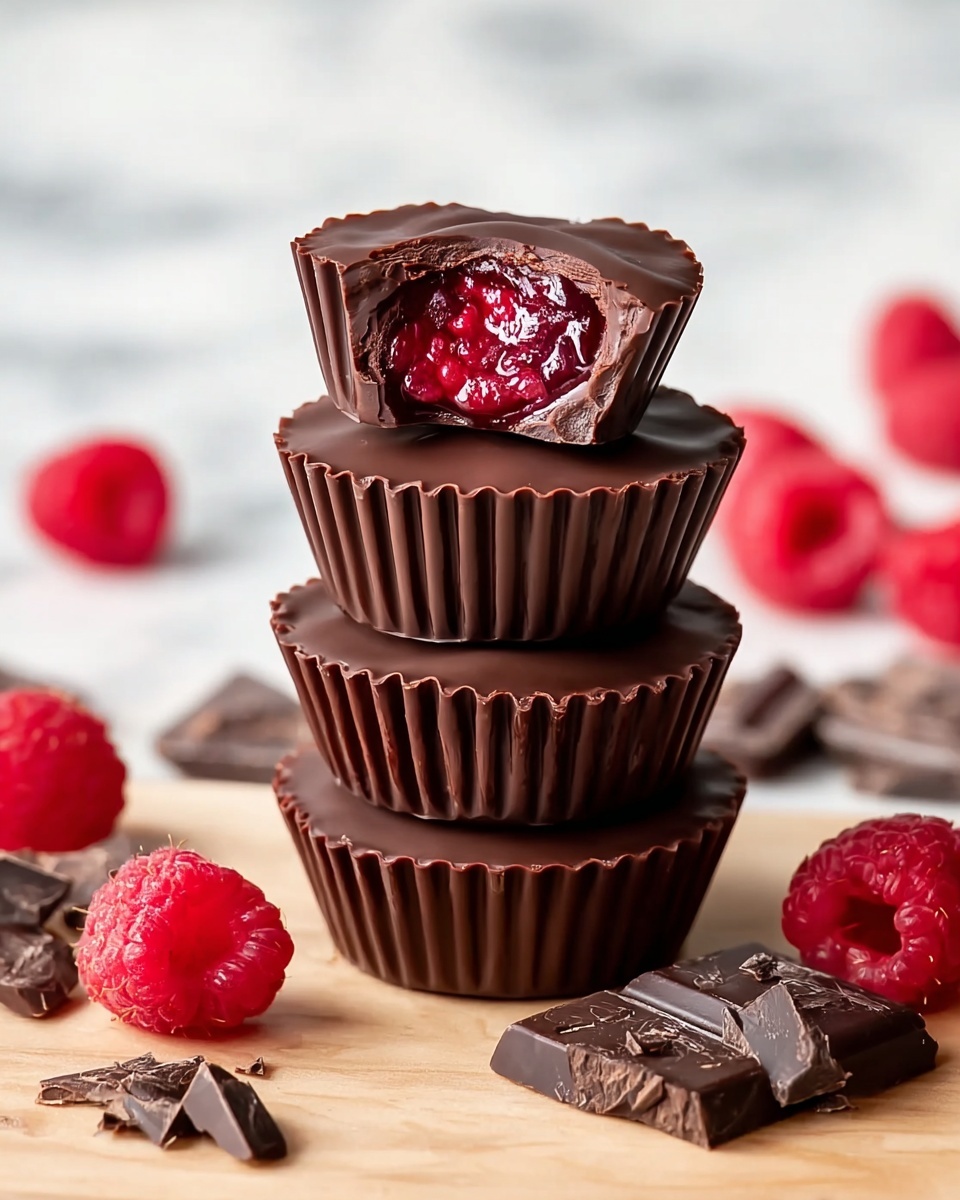
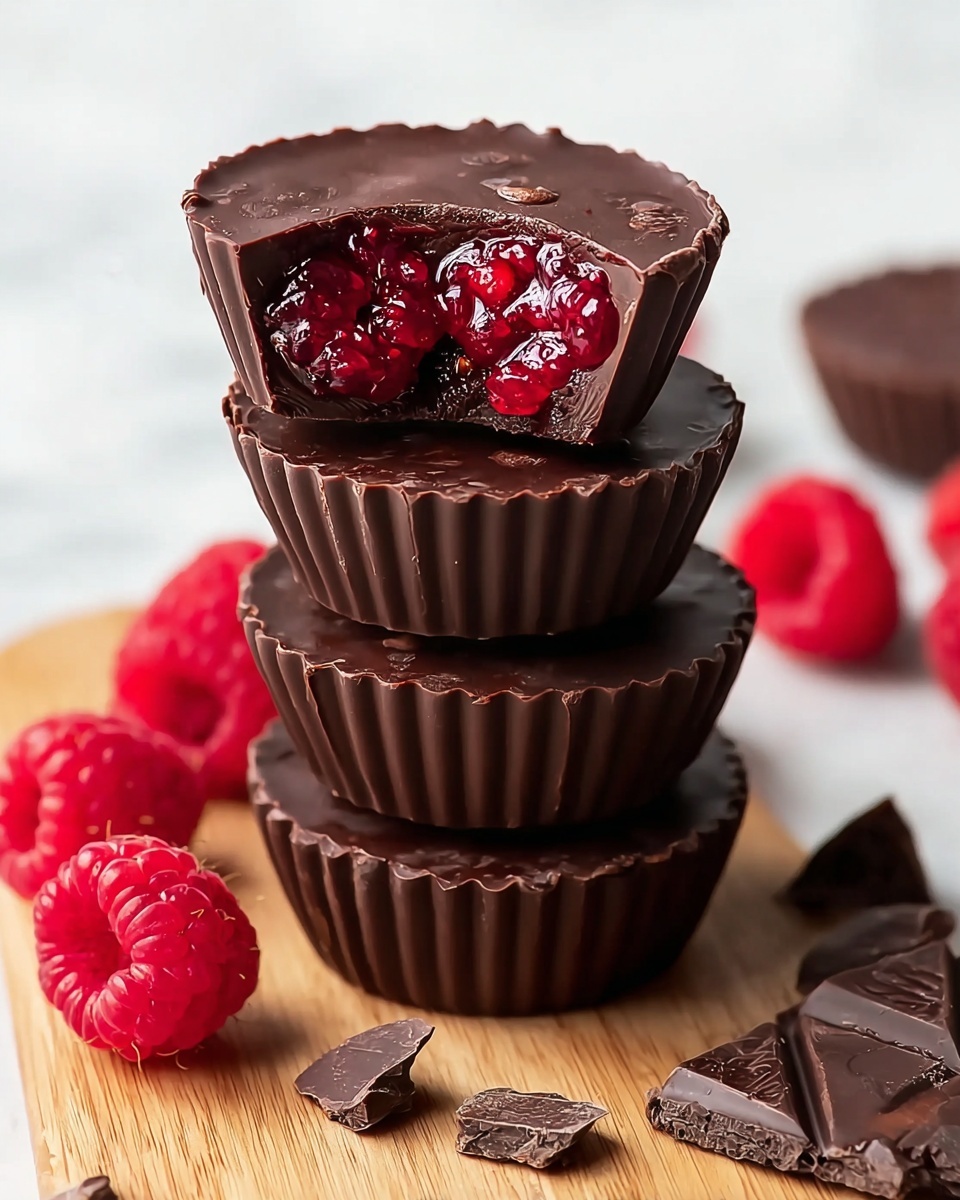
If you have a sweet tooth and adore the refreshing spark of berries combined with rich, silky chocolate, then this Chocolate Raspberry Cups Recipe is about to become your new favorite treat. Imagine bite-sized cups filled with luscious raspberry filling, encased in a smooth chocolate shell that perfectly balances tartness and sweetness. This delightful dessert is not only irresistibly delicious, it’s also surprisingly simple to make, and perfect for sharing with friends or enjoying as a special indulgence anytime you crave something extra special.
Ingredients You’ll Need
This recipe keeps things delightfully straightforward with just a handful of ingredients, each bringing a crucial element to the final taste and texture. From the fresh tartness of raspberries to the creamy richness of melted chocolate, every component plays its part beautifully.
- 6 oz raspberries (fresh or frozen): The star fruit providing natural tang and vibrant color, perfect for the filling.
- 1 tbsp chia seeds: Adds a natural thickener and a slight crunch, helping the raspberry filling set nicely.
- 2 tsp sweetener of choice: Balances the tartness of the berries with a touch of sweetness; you can use sugar, honey, or a sugar substitute.
- 6 oz chocolate chips or chopped chocolate bars (about 1 cup): For the luscious shell that envelops the raspberry filling in a rich, smooth hug.
- Optional: 1 tsp vegetable oil or melted coconut oil: Helps melt the chocolate to a silky texture and gives the cups a beautiful shine.
How to Make Chocolate Raspberry Cups Recipe
Step 1: Prepare the Raspberry Filling
Start by mashing your fresh or frozen raspberries until they break down into a juicy pulp. Transfer the mash to a small saucepan over low heat and add chia seeds along with your chosen sweetener. Stir gently and let the mixture warm until it bubbles lightly, allowing the chia seeds to absorb the juice and thicken the filling. Then remove it from heat and let it cool slightly so it’s ready to go into your chocolate cups without melting them.
Step 2: Melt the Chocolate
Next is the magic of chocolate melting. Use a microwave-safe bowl or a double boiler to gently melt your chocolate chips or chopped bars until completely smooth. For an extra glossy finish and a slightly softer texture, stir in your optional teaspoon of vegetable or coconut oil. This step ensures the chocolate is fluid enough to easily coat the molds and seal your raspberry centers.
Step 3: Form the Chocolate Cups
Line a mini muffin tin with paper liners or prepare candy molds for shaping your cups. Spoon about a teaspoon of melted chocolate into each liner, then use the back of a spoon to push the chocolate up the sides, creating a thin shell. Place the tin in the fridge or freezer to quickly set the chocolate, giving you a sturdy base for the raspberry filling.
Step 4: Add the Raspberry Filling
Once the chocolate shells have hardened, it’s time to add the silken raspberry mixture. Carefully spoon approximately two teaspoons of the thickened raspberry filling into each chocolate cup, filling them generously but leaving room for the chocolate seal.
Step 5: Seal the Cups
Finally, top each raspberry-filled cup with a spoonful of the remaining melted chocolate, smoothing the tops so they completely encase the filling. Return the cups to the fridge or freezer and chill until the chocolate is fully set and firm to the touch. Then you’re ready to enjoy those gorgeous, homemade Chocolate Raspberry Cups.
How to Serve Chocolate Raspberry Cups Recipe

Garnishes
For a feast for the eyes as well as the palate, try garnishing your chocolate raspberry cups with a fresh raspberry on top or a sprinkle of finely chopped pistachios. A tiny dusting of cocoa powder or a fresh mint leaf can add an elegant finish that makes these treats look like they came from a boutique chocolatier.
Side Dishes
These cups are versatile for a variety of occasions and can be paired beautifully with light sides like vanilla bean ice cream or a dollop of whipped cream. If you want to dress things up further, serve them alongside a glass of chilled sparkling wine or rosé for a delightful contrast of flavors and textures.
Creative Ways to Present
If you’re hosting a party or want to impress with presentation, try arranging the cups on a decorative platter lined with fresh raspberry leaves or edible flowers. Another fun idea is to use colorful mini cupcake liners to match the occasion or to stack them in a clear glass jar layered with crushed cookies or nuts for a layered dessert experience.
Make Ahead and Storage
Storing Leftovers
You can easily store any leftover Chocolate Raspberry Cups in an airtight container in the fridge for up to one week. Make sure they are kept cool to maintain the integrity of the chocolate shell and the freshness of the raspberry filling.
Freezing
If you want to keep these treats longer, freezing is totally doable. Place the cups on a baking sheet in a single layer first, allowing them to freeze solid before transferring them to a freezer-safe container. They can last up to three months frozen and will thaw beautifully in the fridge before serving.
Reheating
Since these treats are best enjoyed cold or at room temperature, reheating is not recommended as it can alter the texture of both the chocolate and raspberry filling. Instead, simply let them thaw at room temperature for about 15 minutes if you’ve taken them out of the fridge or freezer.
FAQs
Can I use frozen raspberries for this recipe?
Absolutely! Frozen raspberries work perfectly. Just be sure to thaw and drain any excess liquid before mashing, so your filling isn’t too watery and sets nicely.
What kind of chocolate is best for the cups?
High-quality chocolate chips or bars with at least 50-60% cocoa content are ideal to balance the tartness of the raspberries. You can use milk, dark, or even white chocolate depending on your preference.
Can I make these cups vegan?
Yes! Use dairy-free chocolate and a plant-based sweetener to make the recipe fully vegan-friendly while still deliciously creamy and satisfying.
Do I have to use chia seeds in the filling?
Chia seeds help thicken the raspberry filling and add a slight texture, but if you prefer, you can substitute with a bit of cornstarch or simply let the filling reduce longer to thicken naturally.
How long do these cups last at room temperature?
They should be kept cool and are best enjoyed within a few hours at room temperature. Leaving them out too long might cause the chocolate to soften and the raspberry filling to become less firm.
Final Thoughts
Treating yourself and your loved ones to the homemade delight of this Chocolate Raspberry Cups Recipe is such a rewarding experience. It’s a perfect combination of effortless elegance and fantastic flavor that’s sure to brighten any day. Give this recipe a try—you’ll love how something so simple can taste like a special celebration in every bite.
Print
Chocolate Raspberry Cups Recipe
- Prep Time: 15 minutes
- Cook Time: 5 minutes
- Total Time: 20 minutes
- Yield: 12–14 chocolate cups
- Category: Dessert
- Method: No-Cook
- Cuisine: International
- Diet: Vegetarian
Description
Delight in these luscious Chocolate Raspberry Cups, featuring a rich chocolate shell filled with a sweet-tart raspberry chia filling. This easy no-bake treat combines fresh or frozen raspberries with chia seeds and a touch of sweetener for a naturally thickened, fruity center encased in smooth, melted chocolate. Perfect for a decadent yet wholesome dessert or snack.
Ingredients
Raspberry Filling
- 6 oz raspberries (fresh or frozen)
- 1 tbsp chia seeds
- 2 tsp sweetener of choice
Chocolate Shell
- 6 oz chocolate chips or chopped chocolate bars (about 1 cup)
- Optional: 1 tsp vegetable oil or melted coconut oil
Instructions
- Prepare the raspberry filling: Thoroughly mash the raspberries to release their juices. In a small saucepan over low heat, combine the mashed raspberries, chia seeds, and your chosen sweetener. Stir intermittently until the mixture becomes hot and starts to bubble. Remove from heat and allow it to cool slightly, enabling the chia seeds to thicken the filling.
- Melt the chocolate: Gently melt the chocolate chips or chopped chocolate using a microwave-safe bowl in short bursts or a double boiler. Once melted, if desired, stir in the vegetable or coconut oil to create a smooth, glossy texture.
- Form the chocolate cups: Line a mini muffin tin with paper liners or prepare candy molds. Spoon about one teaspoon of the melted chocolate into each liner, carefully spreading it up the sides to create a chocolate shell. Place the tray in the refrigerator or freezer for a few minutes to let the shells set firmly.
- Add the raspberry filling: After the chocolate shells have hardened, spoon approximately two teaspoons of the raspberry filling into each chocolate cup, filling them just below the rim.
- Seal the cups: Cover each raspberry-filled cup with the remaining melted chocolate, smoothing the tops evenly. Return the cups to the refrigerator or freezer and chill until the chocolate is fully set and firm, creating a delicious chocolate raspberry treat.
Notes
- Use fresh or frozen raspberries; if frozen, thaw and drain excess water before mashing.
- Adjust the sweetener quantity according to your preferred level of sweetness.
- Adding oil to the chocolate helps achieve a glossy finish and smoother texture.
- Store the chocolate raspberry cups refrigerated in an airtight container for up to one week.
- For a firmer shell, freeze the cups for 10-15 minutes instead of refrigerating.
