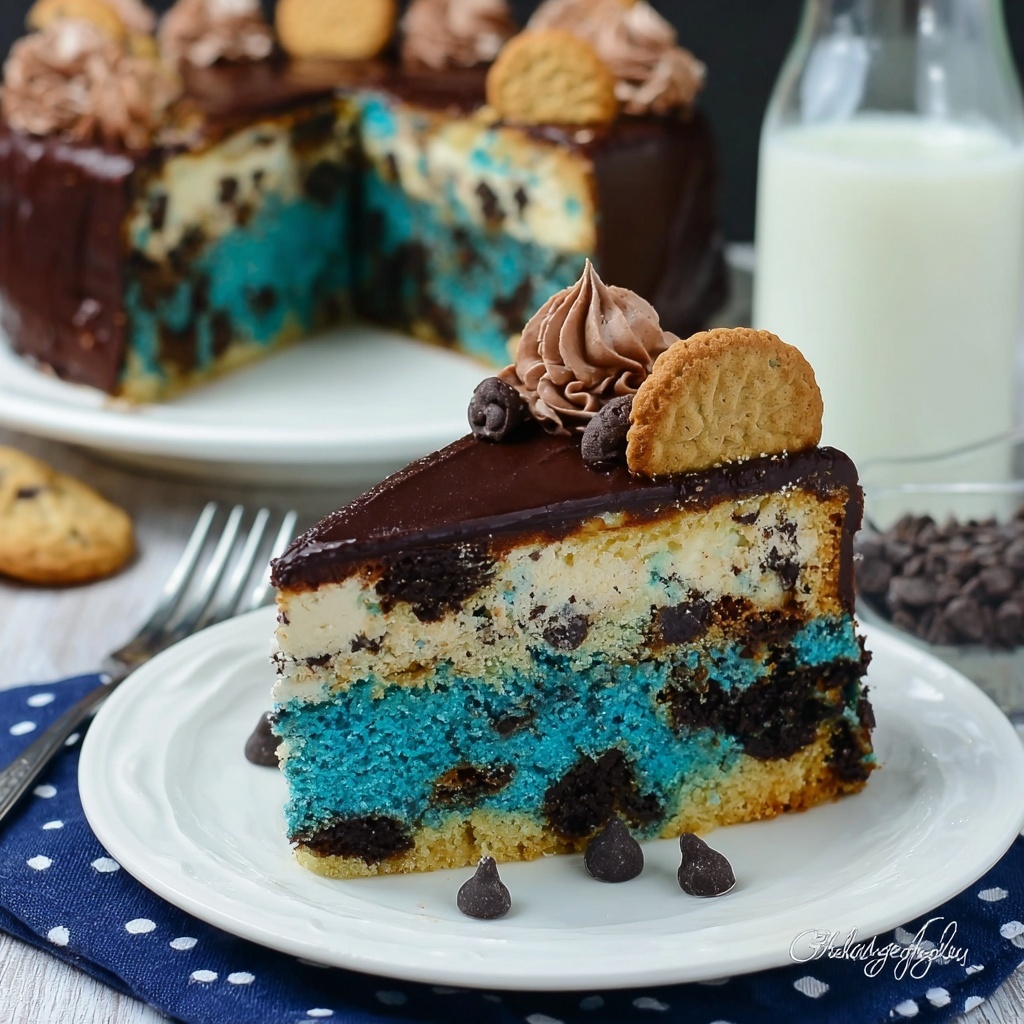
If you are on the hunt for a dessert that will bring out your inner child’s joy, the Cookie Monster Cheesecake Recipe is your ultimate answer. This vibrant, fun, and indulgent cheesecake combines the rich creaminess of classic cheesecake with the nostalgic crunch of cookies, all whipped up with a playful blue twist inspired by everyone’s favorite cookie-loving monster. Every bite is a luscious mix of smooth, sweet, and satisfyingly chocolaty, making this recipe an absolute showstopper for parties, special occasions, or simply a treat to brighten your day.
Ingredients You’ll Need
Getting the ingredients right is the first secret to nailing this Cookie Monster Cheesecake Recipe. Each component is simple yet essential, contributing to the creamy texture, cookie crunch, and that iconic blue color that makes this cheesecake stand out.
- Unsalted sweet cream butter (1/2 cup, softened): Adds richness and the perfect buttery base for the crust.
- Salt (1/2 teaspoon): Balances sweetness and enhances flavor.
- Brown sugar (1/3 cup): Brings a deep caramel note to the crust.
- Egg (1): Binds the crust ingredients together.
- Vanilla (1 teaspoon): Adds warm, aromatic flavor throughout the cheesecake.
- Flour (1 cup): Provides structure to the cookie crust.
- Mini chocolate chips (2/3 cup): Adds bursts of melty chocolate in the crust.
- Cream cheese (2 packs, softened): The creamy foundation of the cheesecake filling.
- Cornstarch (2 teaspoons): Helps set the filling without toughness.
- Granulated sugar (1/2 cup): Sweetens the cheesecake filling just right.
- Pinch of salt: Enhances the overall flavor.
- Whipping cream (1/2 cup plus 1 cup heavy whipping cream): Creates the luscious, velvety texture typical to cheesecake.
- Blue gel food coloring: Gives that iconic Cookie Monster vibrant blue hue.
- Additional eggs (3): Provide structure and richness to the filling.
- Oreo cookies (15, crushed): Bring that unmistakable cookie crunch in the cheesecake layers.
- Semisweet chocolate chips (1 cup): Folded into the cheesecake for chocolate bursts.
- Cocoa powder (1/4 cup): Adds depth and slight bitterness to balance sweetness.
- Powdered sugar (1/4 cup): Sweetens whipped cream topping.
- Mini chocolate chip cookies (whole): For decorating with fun cookie flair.
- Disposable piping bag with star tip: Essential for those pretty finishing touches.
How to Make Cookie Monster Cheesecake Recipe
Step 1: Prepare the Cookie Crust
Start by preheating your oven and preparing the crust to get that perfect base. In a bowl, cream together the softened unsalted sweet cream butter and brown sugar until fluffy. Add the egg and vanilla, mixing well to combine. Slowly fold in the flour, salt, and mini chocolate chips until you have a soft dough. Press this dough evenly into a springform pan, making sure to cover the bottom and sides slightly to create a sturdy crust. Bake until golden and fragrant, then let it cool completely—this crust gives the Cookie Monster Cheesecake Recipe that crispy, buttery foundation you’ll adore.
Step 2: Make the Blue Cheesecake Filling
In a large mixing bowl, beat the softened cream cheese until smooth and creamy. Add in the granulated sugar and cornstarch, then blend in the eggs one at a time for perfect texture. Mix in the pinch of salt, 1/2 cup whipping cream, vanilla, and a generous squirt of blue gel food coloring until you reach that iconic Cookie Monster hue. The blue filling pops out vibrantly, promising a cheesecake experience that’s as fun as it is delicious.
Step 3: Incorporate Oreo and Chocolate Chips
Gently fold the crushed Oreo cookies and semisweet chocolate chips into the blue filling. These chunks add the perfect textural contrast and classic cookie flavor throughout every slice.
Step 4: Bake the Cheesecake
Pour the filling over the cooled cookie crust and smooth the top. Bake the cheesecake slowly at a moderate temperature, often around 325°F (160°C), to help it set perfectly without cracking. Baking typically takes about 90 minutes, and you’ll know it’s done when the edges are set but the center still jiggles slightly when you gently shake the pan. Allow it to cool gradually before chilling it fully to lock in that creamy, dreamy texture.
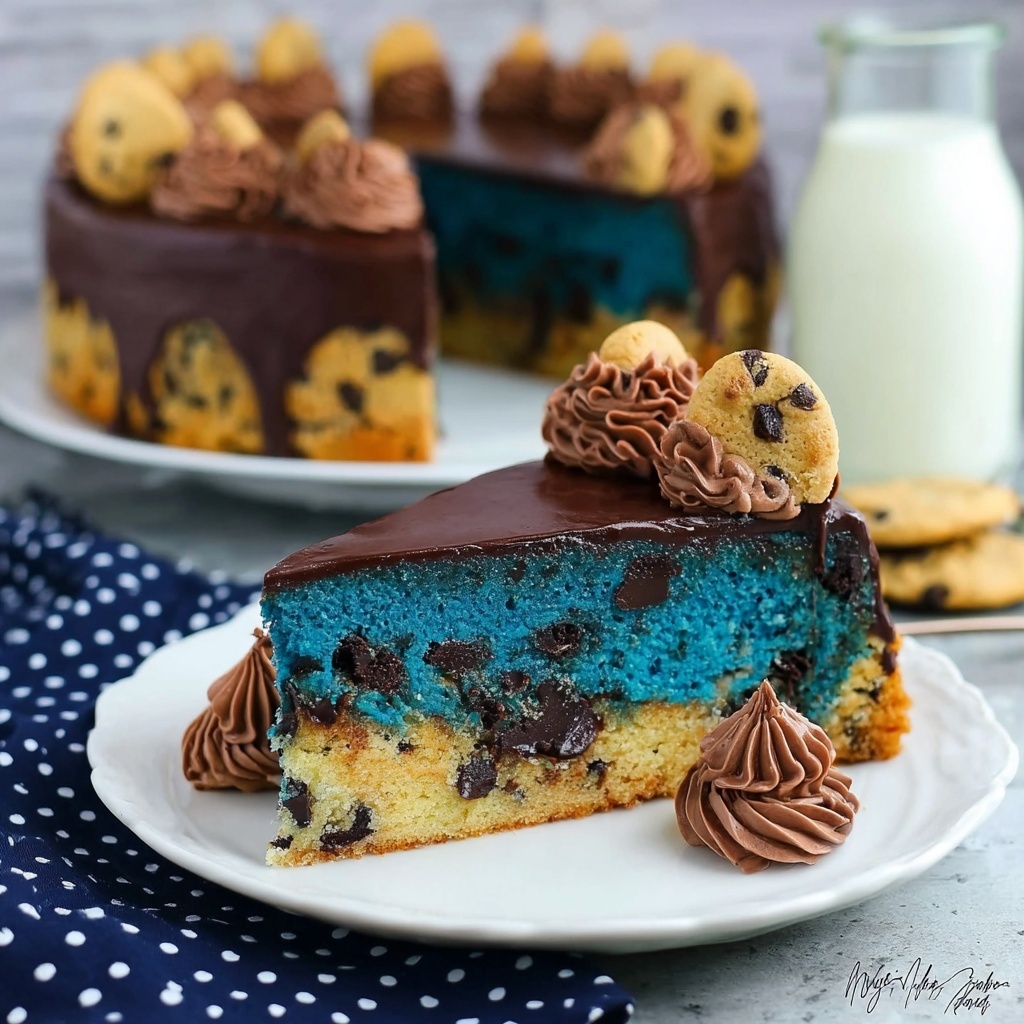
Step 5: Whip the Topping and Decorate
While the cheesecake chills, whip together the heavy whipping cream, cocoa powder, powdered sugar, and vanilla until you get soft peaks. Using your piping bag fitted with a star tip, pipe whimsical dollops of chocolate whipped cream along the edges of the cheesecake. Garnish with mini chocolate chip cookies to echo the Cookie Monster theme and add a playful finishing touch.
How to Serve Cookie Monster Cheesecake Recipe
Garnishes
Enhance the presentation by adding extra Oreo crumbs or sprinkling mini chocolate chips over the whipped cream dollops. For an extra fun twist, you can even place some cookie crumbs in the center to mimic the “cookie crumbs trail” the Cookie Monster might leave behind. These garnishes not only elevate the look but also amp up the cookie flavor in every bite.
Side Dishes
Serve alongside fresh berries like raspberries or strawberries to add a refreshing, tangy element that balances the sweetness. A small cup of cold milk or rich espresso pairs beautifully to complete the dessert experience, making this cheesecake feel both nostalgic and indulgent.
Creative Ways to Present
For parties, serve the Cookie Monster Cheesecake Recipe in individual mini jars with layers of crushed cookies on the bottom for an adorable grab-and-go dessert. You can also create a dessert platter with cookie-themed treats like chocolate chip cookie sandwiches or iced sugar cookies for a cohesive cookie monster party vibe.
Make Ahead and Storage
Storing Leftovers
Leftover cheesecake keeps best when stored in the refrigerator, tightly covered with plastic wrap or in an airtight container. It will stay fresh for up to 5 days, maintaining its rich texture and flavor.
Freezing
You can freeze this cheesecake, wrapped well in plastic wrap and foil, for up to 2 months. Thaw it overnight in the fridge before serving for the best texture and taste.
Reheating
Cheesecake is traditionally served chilled, so reheating isn’t necessary. If desired, let slices sit at room temperature for 15-20 minutes to soften slightly before enjoying.
FAQs
Can I use regular food coloring instead of gel?
While you can use regular food coloring, gel food coloring is preferred for this Cookie Monster Cheesecake Recipe because it provides a more vibrant blue without altering the texture of the cheesecake.
Do I need a springform pan for this recipe?
Yes, a springform pan is highly recommended for easy release of the cheesecake without damaging its delicate edges or crust.
Can I substitute Oreos with another cookie?
Absolutely! You can swap Oreos for any chocolate sandwich cookie, or even chocolate chip cookies for a different twist in the cheesecake texture.
How long should I wait before slicing the cheesecake?
For the best texture, chill the cheesecake overnight or at least 6 hours before slicing. This lets the filling set properly and makes cutting cleaner.
Is it possible to make this cheesecake ahead for a party?
Definitely! The Cookie Monster Cheesecake Recipe is perfect for making a day or two ahead and storing in the fridge, letting you focus on the fun parts of your event.
Final Thoughts
There is something truly magical about the Cookie Monster Cheesecake Recipe that brings smiles and satisfied sighs every single time. Its playful blue color, combined with the luscious creaminess and cookie crunch, creates a dessert that feels like a warm hug on a plate. So go ahead, dive into this recipe with excitement and share the joy—your family and friends will thank you for it!
Print
Cookie Monster Cheesecake Recipe
- Prep Time: 30 minutes
- Cook Time: 90 minutes
- Total Time: 6 hours 30 minutes
- Yield: 12 servings
- Category: Dessert
- Method: Baking
- Cuisine: American
Description
This indulgent Cookie Monster Cheesecake combines a decadent chocolate chip cookie crust with a creamy, vibrant blue cheesecake filling packed with crushed Oreos and chocolate chips. Finished with rich chocolate ganache, whipped cream, and adorable mini chocolate chip cookie decorations, this dessert is perfect for parties and special occasions, delighting both cheesecake and cookie lovers alike.
Ingredients
Cookie Crust
- 1/2 Cup unsalted sweet cream butter, softened
- 1/2 Teaspoon salt
- 1/3 Cup brown sugar
- 1 egg
- 1 Teaspoon vanilla extract
- 1 Cup all-purpose flour
- 2/3 Cup mini chocolate chips
Cheesecake Filling
- 2 packs (16 oz total) cream cheese, softened
- 2 Teaspoons cornstarch
- 1/2 Cup granulated sugar
- Pinch of salt
- 1/2 Cup whipping cream
- Blue gel food coloring (as needed for vibrant color)
- 1 Teaspoon vanilla extract
- 3 eggs
- 15 regular Oreo cookies, crushed into small pieces
- 1 Cup semisweet chocolate chips
Chocolate Ganache Topping
- 1/2 Cup whipping cream
- 1 Cup heavy whipping cream
- 1/4 Cup cocoa powder
- 1 Teaspoon vanilla extract
- 1/4 Cup powdered sugar
Decoration
- Mini chocolate chip cookies (whole)
- 1 disposable piping bag fitted with a star tip
Instructions
- Prepare Cookie Crust: In a mixing bowl, cream together softened butter, salt, and brown sugar until light and fluffy. Add the egg and vanilla extract, mixing well. Gradually blend in the flour, then fold in mini chocolate chips. Press this dough evenly into the bottom of a springform pan to form the crust. Chill in the refrigerator while preparing the filling.
- Make Cheesecake Filling: In a large bowl, beat softened cream cheese until smooth. Add cornstarch, granulated sugar, and a pinch of salt, blending thoroughly. Mix in whipping cream, blue gel food coloring until the desired blue shade is achieved, and vanilla extract. Incorporate eggs one at a time, mixing gently after each addition. Fold in the crushed Oreos and semisweet chocolate chips evenly.
- Assemble and Bake: Pour the cheesecake filling over the chilled cookie crust in the springform pan. Smooth the top with a spatula. Bake in a preheated oven at 325°F (163°C) for approximately 90 minutes, or until the edges are set and the center slightly jiggles. Turn off the oven and leave the cheesecake inside with the door slightly open for 1 hour to prevent cracking. Then, allow it to cool completely at room temperature before refrigerating for at least 4 hours or overnight.
- Prepare Chocolate Ganache: In a saucepan, combine whipping cream, heavy whipping cream, and cocoa powder. Heat gently, stirring until smooth and heated through but not boiling. Remove from heat and whisk in vanilla extract and powdered sugar until glossy. Let ganache cool to room temperature, then pour over the chilled cheesecake for a smooth, even layer.
- Decorate: Fill a disposable piping bag fitted with a star tip with remaining whipped cream and pipe decorative swirls or dollops around the edges of the cheesecake. Garnish with mini chocolate chip cookies placed atop the whipped cream for the classic ‘Cookie Monster’ look. Chill the finished cheesecake until ready to serve.
Notes
- Ensure cream cheese and butter are softened to room temperature for a smooth batter and dough.
- Use blue gel food coloring sparingly to achieve vibrant color without altering flavor.
- Baking the cheesecake at a low temperature and using the oven cooldown method helps prevent cracks.
- Crush Oreos to medium-small pieces to retain texture without overpowering the filling.
- Allow the cheesecake to chill thoroughly before slicing for clean servings.


