
“`html
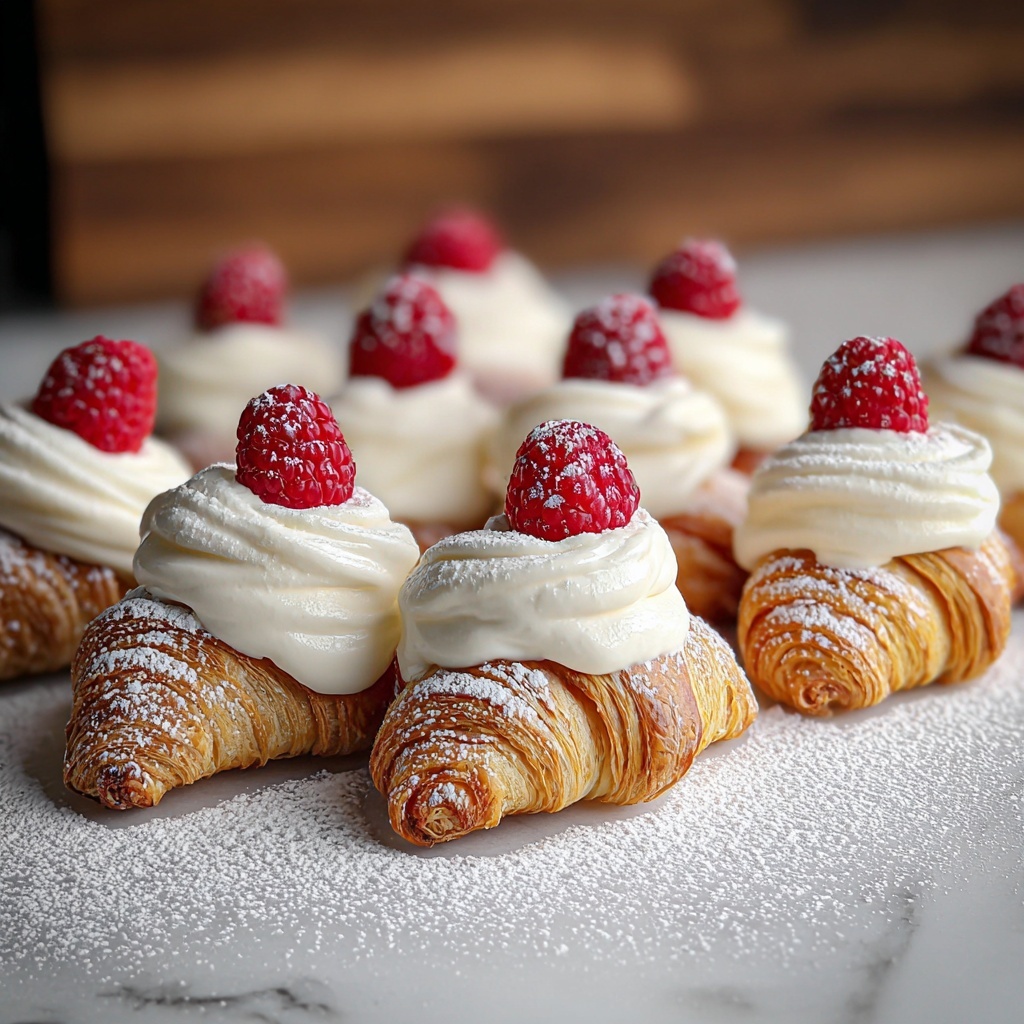
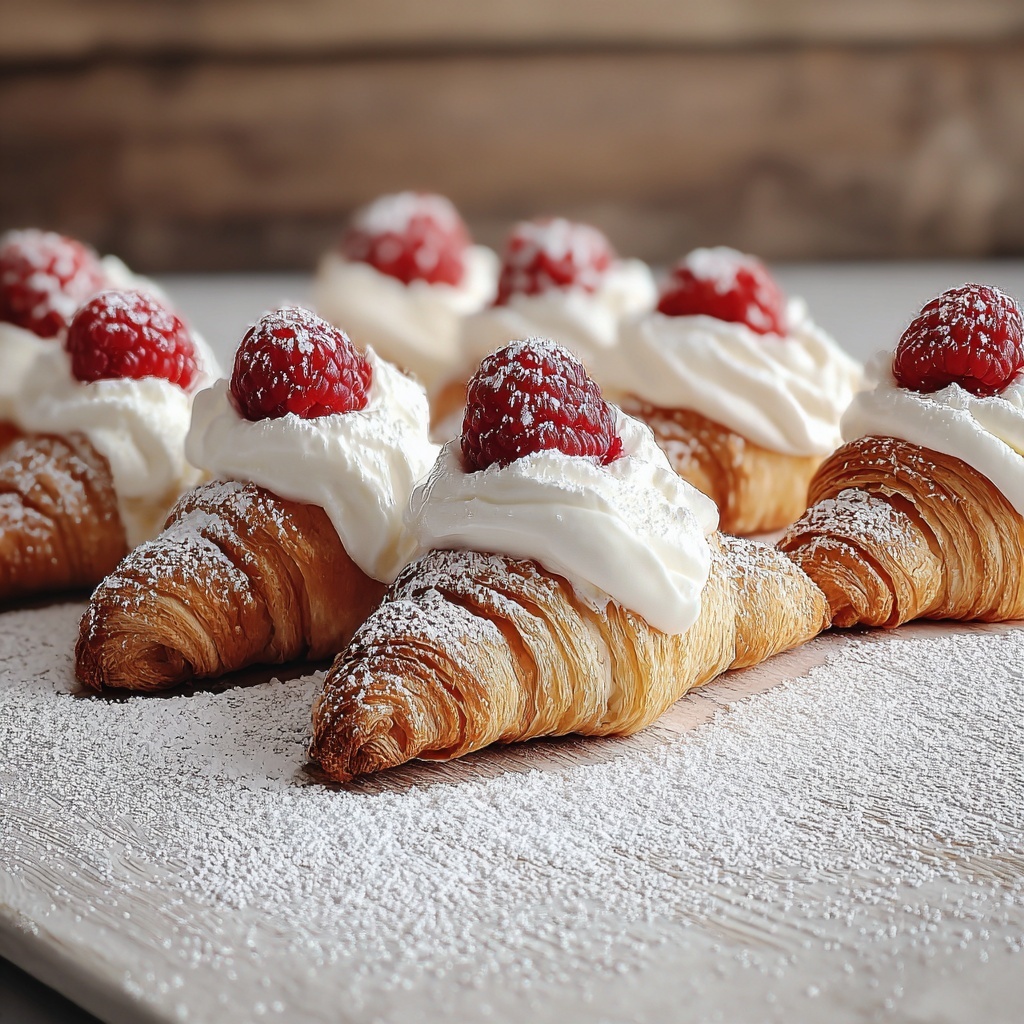
If you have a sweet tooth and love classic pastries that bring a little elegant charm to your dessert table, you absolutely have to try this Cream Horns Recipe. These delightful, crispy puff pastry tubes filled with luscious whipped cream are light, airy, and packed with flavor, making them the perfect treat for afternoon tea, a special occasion, or just because you deserve a little indulgence. The contrast between the buttery, flaky exterior and the smooth, creamy filling is simply irresistible, and once you master this Cream Horns Recipe, it’ll surely become one of your favorite go-to desserts.
Ingredients You’ll Need
Don’t let the simplicity of these ingredients fool you; each one is essential in creating the perfect balance of texture, flavor, and appearance for your cream horns. Freshness and quality shine through in every bite, so here’s what you’ll gather before diving in.
- Puff pastry sheets (17.3 oz, 2 sheets): This buttery, flaky dough forms the crisp and golden shell that gives cream horns their signature crunch.
- Heavy cream (1 cup): Whipped until fluffy, it provides the rich and velvety filling that balances the crisp pastry beautifully.
- Powdered sugar (½ cup): Sweetens the whipped cream while giving a delicate dusting to finish off the horns with a touch of elegance.
- Vanilla extract (1 tsp): Adds a warm, comforting depth to the whipped cream that makes every bite more flavorful.
- Almond extract (1 tsp, optional): For a subtle nuttiness that pairs wonderfully with the puff pastry if you’re feeling a bit adventurous.
- Cocoa powder (2 tbsp, optional): A great twist to dust or mix in if you want to add a hint of chocolate richness.
How to Make Cream Horns Recipe
Step 1: Prepare the Puff Pastry
Start by preheating your oven to 400°F (200°C) to ensure it’s ready for baking. Roll out your puff pastry sheets gently to about 1/8 inch thickness—this thickness ensures the pastry can bake evenly while staying crisp and flaky without burning. If you want extra evenness, use a ruler or straight edge as a guide.
Step 2: Shape the Horns
Cut the sheets into 1-inch-wide strips. This width gives you nicely sized horns—big enough for a good cream filling but small enough to be perfectly bite-sized. Wrap each strip around cream horn molds, overlapping the edges slightly so they hold their shape during baking. Don’t worry if your wraps aren’t perfect; the baked horns turn out beautifully rustic.
Step 3: Bake to Golden Perfection
Place the wrapped molds onto a parchment-lined baking sheet for easy cleanup and bake for 12 to 15 minutes. Watch for that beautiful golden brown color—that toasty hue means your horns are perfectly baked with flakey layers inside crisp shells.
Step 4: Cool Before Filling
Once baked, let the cream horns cool just enough so you can remove them gently from the molds without breaking. Then allow them to cool completely on a wire rack. This step is crucial; if they’re too warm, the filling can melt the shells, ruining that crisp texture.
Step 5: Whip the Cream Filling
In a chilled bowl, beat the heavy cream until soft peaks form—this is when the cream holds a slight curve but isn’t too stiff. Add powdered sugar and vanilla extract, continuing to whip until stiff peaks form. This ensures your filling is sweet, fluffy, and able to keep its shape inside the pastry horns. If you love the almond twist, add a touch of almond extract here for a delicate aroma.
Step 6: Fill and Finish Your Cream Horns
Using a piping bag, fill each cooled horn with the luscious whipped cream mixture, aiming for a generous but neat filling. For an extra special touch, lightly dust the finished cream horns with powdered sugar or cocoa powder if you want a hint of chocolate flair. Now they’re ready to serve!
How to Serve Cream Horns Recipe
Garnishes
To elevate the presentation, consider dusting your cream horns with extra powdered sugar, or use a sprinkle of finely chopped toasted almonds for added crunch and nuttiness. Fresh berries on the side add a refreshing pop of color and flavor that pairs wonderfully with the creamy sweetness.
Side Dishes
Cream horns are excellent alongside a cup of hot tea or coffee, making them perfect for brunch or afternoon tea gatherings. You can also serve them with fresh fruit salad or a light sorbet to contrast the richness of the pastry and cream.
Creative Ways to Present
Try arranging your cream horns in a circle on a platter with some edible flowers rubbed with a bit of powdered sugar. For a festive touch, drizzle some melted chocolate over the tops or fill the horns with flavored whipped cream, like coffee or strawberry, to surprise your guests.
Make Ahead and Storage
Storing Leftovers
If you have any leftover cream horns, store them in an airtight container in the refrigerator. Because the puff pastry shells will soften over time due to moisture from the cream, it’s best to enjoy leftovers within a day or two to maintain the crispy texture.
Freezing
While baked cream horns filled with whipped cream don’t freeze well, you can freeze the unbaked puff pastry strips wrapped around molds for up to one month. Thaw and bake as usual, then whip fresh cream to fill before serving for the best texture and flavor.
Reheating
Reheating cream horns is tricky because the cream filling doesn’t do well with heat. If you want to warm the pastry, remove the cream filling first if possible and heat the shells separately in a 350°F oven for a few minutes to regain some crispness. Then refill with freshly whipped cream before serving.
FAQs
Can I use store-bought puff pastry for this Cream Horns Recipe?
Absolutely! Store-bought puff pastry works perfectly and makes the recipe quick and accessible, especially when you’re short on time.
What can I substitute for heavy cream in the filling?
For the best texture and taste, heavy cream is recommended. However, you can try whipping a non-dairy alternative like coconut cream, but results may vary slightly.
How do I make cream horns without baking molds?
You can craft your own molds by rolling thick aluminum foil into cone shapes or using empty, food-safe cone-shaped containers to wrap pastry around.
Can I add other flavors to the whipped cream?
Definitely! Try adding a teaspoon of citrus zest, coffee extract, or even a splash of liqueur for a fun twist on the classic cream filling.
How long does it take to make this Cream Horns Recipe from start to finish?
This recipe typically takes about 45 minutes from prepping the pastry to filling the cooled horns, making it an achievable yet impressive dessert.
Final Thoughts
There’s something truly special about making cream horns from scratch—they look stunning, taste incredible, and carry that lovely homemade vibe that guests adore. I can’t wait for you to try this Cream Horns Recipe and see how effortlessly it transforms simple ingredients into an elegant treat that everyone will rave about. Trust me, once you make these, you’ll find plenty of excuses to bake them over and over!
“`
Print
Cream Horns Recipe
- Prep Time: 15 minutes
- Cook Time: 15 minutes
- Total Time: 45 minutes
- Yield: 8 servings
- Category: Dessert
- Method: Baking
- Cuisine: European
- Diet: Vegetarian
Description
Cream Horns are delightful, flaky puff pastry treats filled with luscious whipped cream flavored with vanilla and optionally almond extract. These classic pastries feature crisp golden shells wrapped around molds and filled with sweetened cream, making them perfect for dessert or a special teatime treat.
Ingredients
Puff Pastry
- 1 package (17.3 oz) puff pastry sheets (2 sheets)
Filling
- 1 cup heavy cream
- ½ cup powdered sugar
- 1 tsp vanilla extract
- 1 tsp almond extract (optional)
Optional Topping
- 2 tbsp cocoa powder (optional, for dusting or flavoring)
Instructions
- Preheat Oven: Preheat your oven to 400°F (200°C) to ensure a hot baking environment that will crisp the puff pastry beautifully.
- Prepare Puff Pastry: Roll out the puff pastry sheets to about 1/8 inch thickness, creating an even surface for wrapping around molds.
- Cut and Wrap: Cut the rolled puff pastry into approximately 1 inch wide strips. Take cream horn molds and wrap each strip around the molds, making sure to overlap slightly to prevent gaps during baking.
- Bake Puff Pastry: Place the wrapped molds on a parchment-lined baking sheet. Bake for 12-15 minutes or until the pastry is puffed up and golden brown in color.
- Cool Shells: Allow the baked pastry shells to cool slightly before gently removing them from the molds. Place them on a wire rack to cool completely, maintaining crispness.
- Whip Cream: In a chilled bowl, whip the heavy cream until soft peaks form. Gradually add the powdered sugar and vanilla extract (plus almond extract if using), and continue whipping until stiff peaks form, ensuring a stable filling.
- Fill Pastry Shells: Use a piping bag to fill the cooled pastry shells with the whipped cream filling, making sure to fill generously without breaking the shells.
- Finish and Serve: Optionally dust the filled cream horns with powdered sugar or cocoa powder for extra flavor and presentation before serving.
Notes
- You can substitute almond extract with other extracts like lemon or orange to vary the flavor of the cream filling.
- If you don’t have cream horn molds, you can fashion cones from aluminum foil as a substitute.
- Ensure the whipped cream is stiff enough to hold its shape inside the shells without collapsing.
- For a chocolate-flavored filling, gently fold cocoa powder into the whipped cream after soft peaks form.
- Serve cream horns fresh for best texture; if stored, keep them in the refrigerator and fill just before serving.


