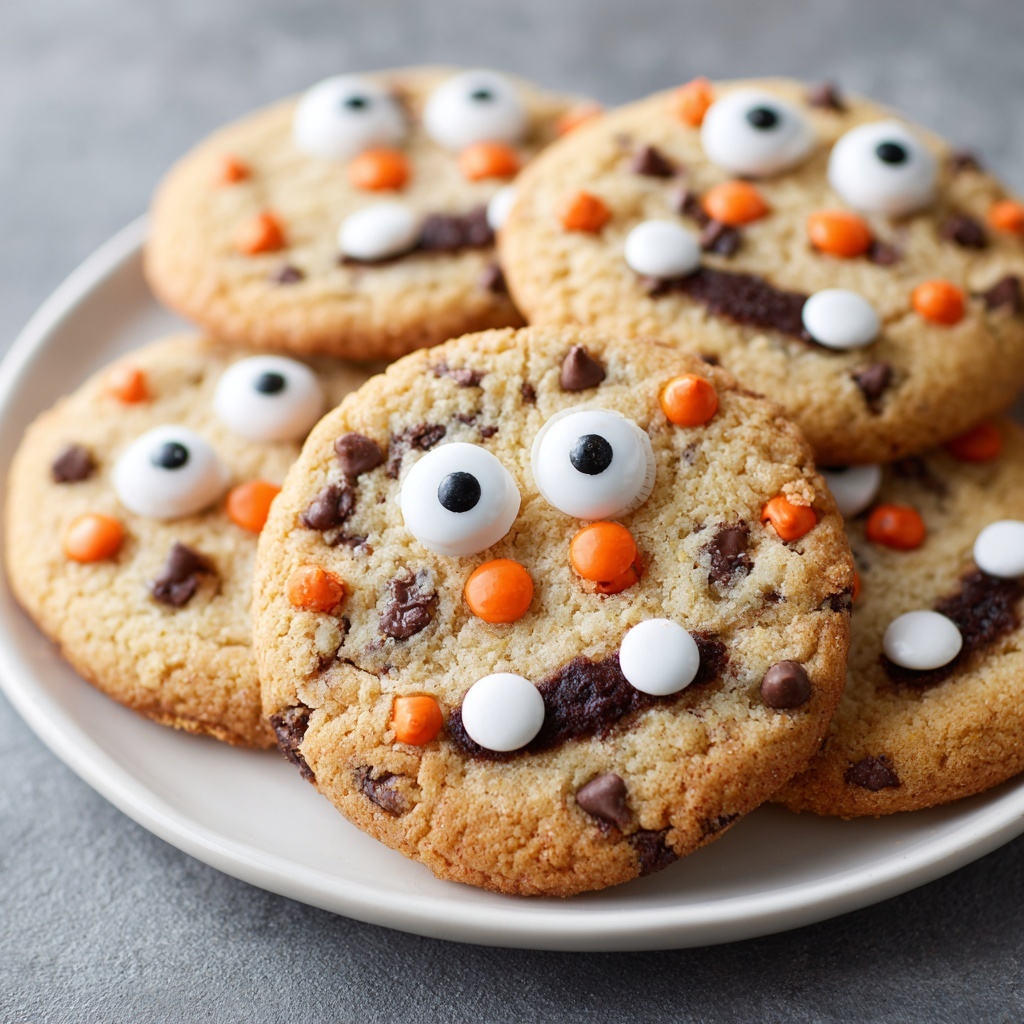
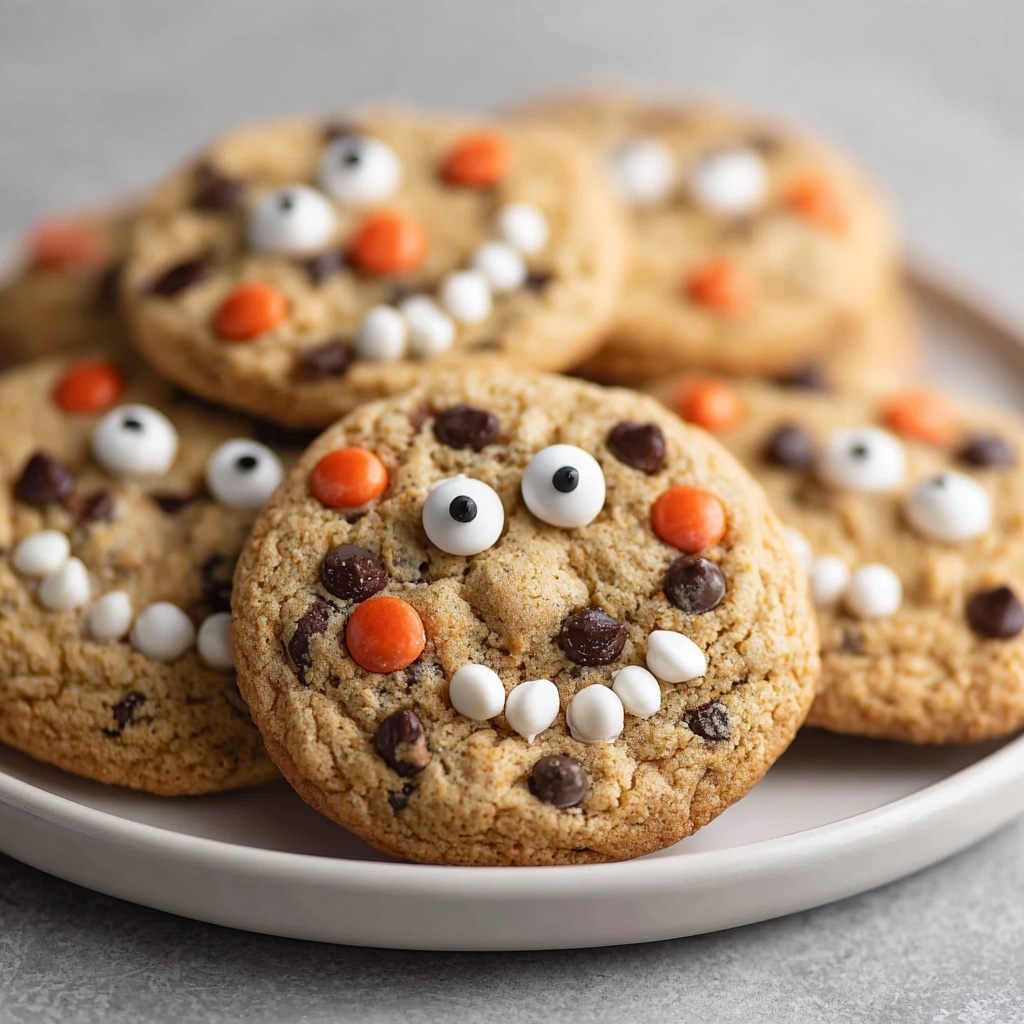
If you’re looking to bring a burst of festive joy to your Halloween celebrations, this Halloween Chocolate Chip Cookies Recipe is an absolute must-try. These cookies combine the classic, comforting taste of chocolate chip cookies with whimsical Halloween flair thanks to bright-colored candies and candy eyes that make each bite as fun as it is delicious. With a tender chew, perfectly melty chocolate chips, and a playful spooky vibe, these cookies are perfect for sharing with friends, family, or even little ghouls and goblins at your next party.
Ingredients You’ll Need
This Halloween Chocolate Chip Cookies Recipe relies on simple, everyday ingredients that come together to create a spectacularly tasty treat. Each ingredient plays a crucial role to ensure the texture is soft, the flavor is rich, and the colors really pop against the golden cookie base.
- 2 1/4 cups all-purpose flour: Provides the perfect structure for tender yet sturdy cookies.
- 1 teaspoon baking soda: Helps the cookies rise and achieve that ideal chewy texture.
- 1/2 teaspoon salt: Balances sweetness and enhances all the flavors.
- 1 cup unsalted butter, softened: Adds rich flavor and keeps cookies moist and tender.
- 3/4 cup brown sugar, packed: Brings caramel notes and chewy goodness.
- 1/2 cup granulated sugar: Adds sweetness and helps achieve a lightly crisp edge.
- 2 large eggs: Binds everything together and adds moisture for softness.
- 2 teaspoons vanilla extract: Elevates the flavor with a warm, aromatic note.
- 1 1/2 cups semisweet chocolate chips: The classic melty, gooey pockets of chocolate everyone loves.
- 1/2 cup Halloween-colored candies (orange and purple candy-coated chocolates): Adds festive color and fun crunch.
- 1/4 cup candy eyes: Delivers a playful, spooky look that’s perfect for Halloween.
How to Make Halloween Chocolate Chip Cookies Recipe
Step 1: Preparing Your Oven and Dry Ingredients
Begin by preheating your oven to 350°F (175°C) and lining two baking sheets with parchment paper to prevent sticking and ensure even baking. Meanwhile, whisk together the flour, baking soda, and salt in a medium bowl; this step ensures the dry ingredients are well combined and evenly distributed, setting the stage for a perfectly textured cookie.
Step 2: Creaming Butter and Sugars
In a large mixing bowl, cream the softened butter, brown sugar, and granulated sugar until the mixture is light and fluffy. This process incorporates air into your dough, creating cookies that are soft with just the right amount of rise. Your arm might get a little workout if you’re mixing by hand, but the end result is totally worth it!
Step 3: Adding Eggs and Vanilla
Add the eggs one at a time, beating well after each addition to keep the mixture smooth and well combined. Then, stir in the vanilla extract, which deepens the flavor and brings warmth to every cookie bite.
Step 4: Combining Wet and Dry Ingredients
Gradually add your dry mixture to the wet ingredients, mixing just until combined. Overmixing here can lead to tough cookies, so keep it gentle. Once everything is combined, you have the perfect dough ready for mix-ins.
Step 5: Stirring in Chocolate Chips and Halloween Candies
Fold the semisweet chocolate chips and Halloween-colored candies into the dough for that iconic chocolate chip cookie indulgence, with a festive twist. The candy-coated chocolates contribute fun pops of seasonal color and a bit of crunch, making your cookies as visually appealing as they are yummy.
Step 6: Baking and Adding Candy Eyes
Scoop tablespoon-sized portions of dough onto the prepared baking sheets, spacing them about two inches apart so they can spread without merging. Bake for 10 to 12 minutes, watching for golden edges while the centers remain soft. Immediately upon removing from the oven, press candy eyes into the warm cookies to create that signature spooky Halloween expression. Let the cookies cool on the sheets for 5 minutes before transferring to wire racks to cool completely.
How to Serve Halloween Chocolate Chip Cookies Recipe

Garnishes
For extra festive flair, sprinkle some Halloween-themed sprinkles or edible glitter on the cookies just before baking. This will add a little sparkle and make them look even more magical and inviting on your dessert table.
Side Dishes
These cookies pair perfectly with a glass of cold milk or a warm cup of spiced pumpkin latte. For parties, serving them alongside bowls of popcorn or a charcuterie board with nuts and dried fruits balances sweet with savory, pleasing all kinds of taste buds.
Creative Ways to Present
Arrange the cookies on a platter decorated with mini pumpkins and fake cobwebs for an eye-catching Halloween display. You can also package them in clear treat bags tied with orange and black ribbons for delightful party favors kids and adults will adore.
Make Ahead and Storage
Storing Leftovers
Store any leftover Halloween Chocolate Chip Cookies in an airtight container at room temperature. They will stay fresh and delicious for up to five days, making them a great make-ahead option for a midweek treat or extending your Halloween celebrations.
Freezing
If you want to save a batch for later, these cookies freeze beautifully. Place cooled cookies in a single layer on a baking sheet and freeze until firm, then transfer to a freezer-safe bag or container. They can be frozen for up to three months without losing their delightful taste and texture.
Reheating
To enjoy your cookies warm from the freezer or leftovers, pop them into a preheated oven at 300°F for about 5–7 minutes or microwave for 15 seconds. This little heat brings back the softness and melty chocolate chip goodness like fresh-baked.
FAQs
Can I substitute butter with margarine or oil?
While margarine or oil can be used, they might slightly alter the flavor and texture. Butter is preferred for its richness and the way it helps cookies hold their shape while remaining tender.
What if I don’t have Halloween-colored candies?
No worries! You can use any candy-coated chocolates or colorful M&Ms you have on hand. Even plain chocolate chips with candy eyes still make adorable spooky cookies.
Can I make these cookies gluten-free?
Yes, you can swap the all-purpose flour with a gluten-free baking blend, but be sure it includes xanthan gum or another binder to keep the texture right.
How do I prevent candy eyes from melting during baking?
The trick is to add the candy eyes immediately after baking while the cookies are warm but off the heat. This prevents melting while helping the eyes stick perfectly.
Can I add other mix-ins like nuts or dried fruit?
Absolutely! Chopped nuts or dried cranberries can add delicious texture and flavor. Just be mindful not to overload the dough to keep the cookies tender.
Final Thoughts
This Halloween Chocolate Chip Cookies Recipe is such a joyful and easy way to infuse your celebration with sweet fun and charm. Whether you’re baking for kids, parties, or just because, these cookies deliver that perfect balance of classic comfort and seasonal spirit. I can’t wait for you to whip up a batch and watch everyone’s faces light up with delight!
Print
Halloween Chocolate Chip Cookies Recipe
- Prep Time: 15 minutes
- Cook Time: 12 minutes
- Total Time: 27 minutes
- Yield: 24 cookies
- Category: Dessert
- Method: Baking
- Cuisine: American
- Diet: Vegetarian
Description
These Halloween Chocolate Chip Cookies are a festive twist on a classic favorite. Soft and chewy cookies loaded with semisweet chocolate chips and colorful Halloween candies, topped with fun candy eyes to make them spooky and delightful treats perfect for holiday celebrations.
Ingredients
Dry Ingredients
- 2 1/4 cups all-purpose flour
- 1 teaspoon baking soda
- 1/2 teaspoon salt
Wet Ingredients
- 1 cup unsalted butter, softened
- 3/4 cup brown sugar, packed
- 1/2 cup granulated sugar
- 2 large eggs
- 2 teaspoons vanilla extract
Add-ins
- 1 1/2 cups semisweet chocolate chips
- 1/2 cup Halloween-colored candies (such as orange and purple candy-coated chocolates)
- 1/4 cup candy eyes
Instructions
- Preheat and Prepare: Preheat your oven to 350°F (175°C) and line two baking sheets with parchment paper to prevent sticking and for easy cleanup.
- Mix Dry Ingredients: In a medium bowl, whisk together the all-purpose flour, baking soda, and salt to evenly distribute the leavening agents and seasoning throughout the flour.
- Cream Butter and Sugars: In a large mixing bowl, beat the softened butter with the brown sugar and granulated sugar until the mixture is light and fluffy, which helps to incorporate air for a tender cookie.
- Add Eggs and Vanilla: Add the eggs one at a time to the butter mixture, beating well after each addition, then mix in the vanilla extract for flavor.
- Combine Wet and Dry: Gradually add the dry flour mixture into the wet ingredients and mix gently until just combined, being careful not to overmix to maintain a soft texture.
- Add Chocolate Chips and Candies: Stir in the semisweet chocolate chips and Halloween-colored candies, distributing them evenly throughout the dough.
- Scoop Dough: Use a tablespoon to scoop portions of dough onto the prepared baking sheets, spacing the cookies about 2 inches apart to allow for spreading.
- Bake: Bake the cookies in the preheated oven for 10 to 12 minutes, or until the edges are golden but the centers remain soft for a perfect chewy texture.
- Add Candy Eyes: Immediately upon removing the cookies from the oven, gently press the candy eyes into the tops of the warm cookies to create the spooky Halloween look.
- Cool: Allow the cookies to cool on the baking sheets for about 5 minutes to set, then transfer to a wire rack to cool completely.
Notes
- For extra festive cookies, add Halloween sprinkles to the dough before baking.
- Store cookies in an airtight container at room temperature for up to 5 days to maintain freshness.

