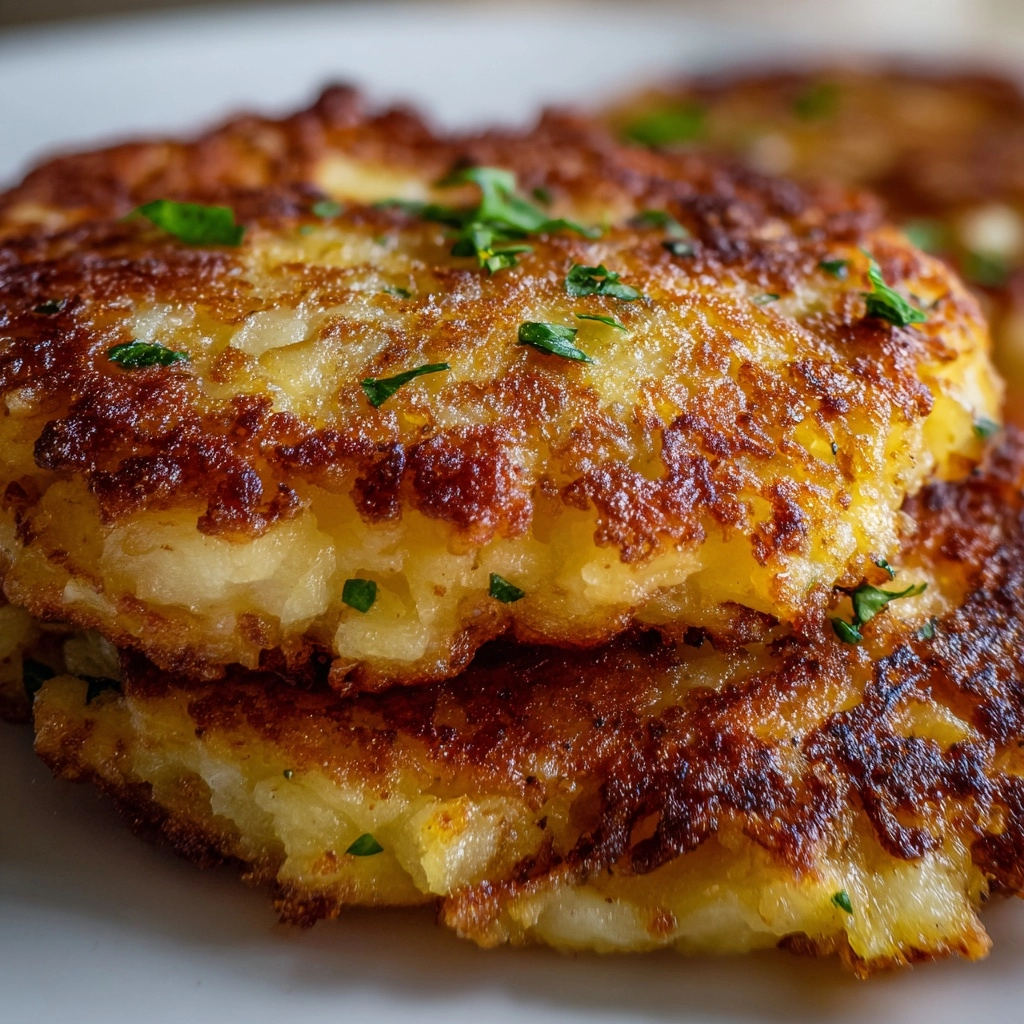
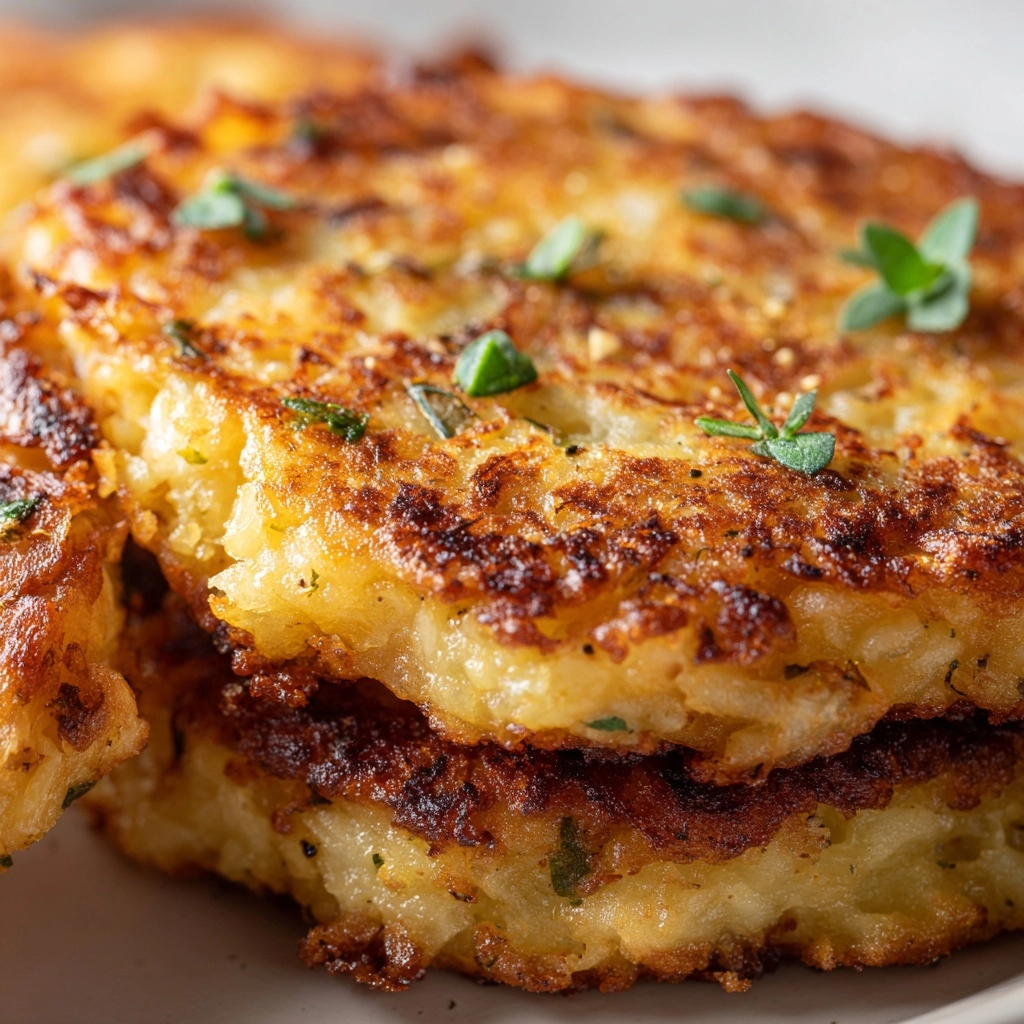
If there’s a dish that can instantly whisk you back to memories of cozy weekend breakfasts or bustling diners, it’s Hash Browns. Perfectly crisp on the outside and soft within, these golden potato patties are both comfort food and kitchen magic. You’ll be amazed at how easy it is to whip up a batch at home using just a few staple ingredients, yielding results that are incredibly satisfying. Whether you’re craving a hearty breakfast or a crave-worthy side, homemade Hash Browns deliver on every front—taste, texture, and pure nostalgia.
Ingredients You’ll Need
Ingredients You’ll Need
Each ingredient in these classic Hash Browns earns its place—no extras, just the basics that absolutely make the dish sing. The combination creates that craveable crunch, flavor depth, and irresistible golden color.
- Russet potatoes: Their high starch content makes them ideal for achieving that sought-after crispiness.
- Onion: Adds a savory sweetness and subtle punch, giving the Hash Browns more character.
- All-purpose flour: Just enough to help bind the mixture without making it cakey.
- Egg: Acts as the glue, ensuring your patties hold together beautifully while cooking.
- Salt: Brings out all the natural flavors and keeps the potatoes from tasting flat.
- Black pepper: A touch of bite for a little depth and warmth.
- Garlic powder (optional): Lends a gentle background note of savory flavor—try it if you love garlic.
- Vegetable oil: Perfect for frying, its high smoke point lets your Hash Browns get golden and crispy without burning.
How to Make Hash Browns
Step 1: Prep the Potatoes
Start by peeling your russet potatoes and shredding them using a box grater or food processor. The key here is to keep the shreds long and even—they’ll crisp up better. Immediately after shredding, wrap the potatoes in a clean kitchen towel and squeeze out as much moisture as possible. This step is the secret to ultra-crispy Hash Browns, so don’t skip it!
Step 2: Mix the Ingredients
In a large mixing bowl, combine the shredded potatoes, finely chopped onion, all-purpose flour, egg, salt, black pepper, and garlic powder if you’re using it. Mix everything together until thoroughly combined. You want the mixture to look cohesive but not overly wet.
Step 3: Heat the Oil
Pour the vegetable oil into a large skillet and heat it over medium-high heat. The oil is ready when a tiny pinch of the potato mixture sizzles immediately upon contact. Properly heated oil will create that signature golden crust on your Hash Browns.
Step 4: Shape and Fry
Scoop out about 1/4 cup of the potato mixture and gently flatten it into a patty right in the skillet. Give each patty a little breathing room so they crisp up instead of steaming. Cook for 3 to 4 minutes on each side, or until both sides are gloriously golden and crispy. Don’t rush—let the crust develop!
Step 5: Drain and Serve
Transfer the cooked Hash Browns to a plate lined with paper towels to absorb excess oil. Repeat with the rest of the mixture, adding a dash more oil if needed. Serve your homemade Hash Browns piping hot for the best texture and flavor.
How to Serve Hash Browns
Garnishes
Top your Hash Browns with a sprinkle of chopped fresh chives or parsley for a pop of color and herbal zing. A little extra cracked black pepper or a dusting of smoked paprika also adds a gourmet finish. If you love decadence, try a dollop of sour cream on the side.
Side Dishes
Hash Browns love company! Pair them with fluffy scrambled eggs, sizzling bacon, or juicy breakfast sausages. They’re also wonderful beside avocado slices or as a tasty base for a breakfast bowl with sautéed greens, roasted tomatoes, and feta.
Creative Ways to Present
Try stacking Hash Browns like a savory cake and layering them with smoked salmon and crème fraîche for a brunch showstopper. Or use mini Hash Browns as a base for bite-sized canapés topped with herbed cheese and roasted peppers for a party platter everyone will remember.
Make Ahead and Storage
Storing Leftovers
Leftover Hash Browns keep well in an airtight container in the fridge for up to 3 days. Let them cool completely before storing to preserve their texture. They may lose a bit of crispiness, but reheating the right way brings it right back.
Freezing
Want to enjoy crispy potatoes on demand? Cool cooked Hash Browns completely, then layer them with parchment paper in a freezer-safe bag or container. Freeze for up to 2 months. They make for an excellent make-ahead breakfast option!
Reheating
For best results, reheat Hash Browns in a hot skillet with a splash of oil, or pop them in a preheated oven at 400°F until sizzling and crisp. Avoid the microwave for reheating, as it tends to make them soggy rather than crunchy.
FAQs
Why do my Hash Browns sometimes turn out soggy?
Excess moisture is the culprit! Be sure to squeeze out as much liquid as possible from the shredded potatoes before mixing. The drier your potatoes, the crispier your Hash Browns will be.
Can I use a different type Breakfast
Russet potatoes work best for Hash Browns because of their starch content and texture, but in a pinch, Yukon Golds can be used for a slightly creamier center (though less crispiness).
How do I prevent my Hash Browns from sticking to the skillet?
Make sure the oil is hot before adding the potato mixture and avoid overcrowding the pan. A good quality nonstick or seasoned cast iron skillet can also make the process easier.
Is it possible to make Hash Browns without eggs or flour?
Yes! You can skip the egg and flour, and simply use well-drained potatoes and onion, though the patties may be more delicate. Press them firmly and handle with care while turning.
Can I add cheese or veggies to my Hash Browns?
Absolutely! Mix in a handful of shredded cheddar, or fold in diced bell peppers or zucchini for extra flavor and color. Make sure any additions are not too wet, or your Hash Browns may not crisp up as well.
Final Thoughts
If there’s one homemade breakfast classic you absolutely must try, it’s these golden, crispy Hash Browns. Grab your ingredients and treat yourself to a morning plateful—you’ll never look at diner potatoes the same way again. Happy cooking!