
If you have a bounty of apples and want to turn them into something delightfully sweet and spreadable, this Homemade Apple Jelly Recipe is just the treat you need. It captures the crisp, fresh flavor of apples in a shimmering jelly that’s perfect on toast, dolloped on yogurt, or even wrapped in cheese for an easy appetizer. Making apple jelly at home is not only incredibly satisfying but also a wonderful way to preserve the essence of autumn all year long. Each spoonful bursts with that familiar warmth and brightness you love from fresh apples, balanced with just the right amount of tang and sweetness. Trust me, once you try this recipe, your pantry will be begging for jars of this golden goodness.
Ingredients You’ll Need
Gathering the right ingredients is the first step to nailing this recipe. Each component plays an essential role, from the fruit’s natural essence to the sugar’s sweetness and the pectin’s jelly-setting magic.
- Apples (5 pounds, any variety, cored and chopped): Choose a mix of sweet and tart apples for the best flavor depth in your jelly.
- Water (6 cups): Helps extract the apple juice gently without diluting the flavor too much.
- Lemon juice (1/4 cup): Adds brightness and balances the sweetness while providing natural pectin activation.
- Granulated sugar (7 cups): Sweetens the jelly and helps with preservation and gel formation.
- Powdered fruit pectin (1 package, 1.75 oz): Essential for setting the jelly, ensuring it’s firm yet spreadable.
How to Make Homemade Apple Jelly Recipe
Step 1: Cook the Apples
Start by placing your chopped apples in a large pot, pouring in the water and lemon juice. Bring everything up to a boil over medium-high heat, then lower to a simmer. Cooking the apples for about 40 minutes lets the natural juices gradually infuse the water, starting the transformation into that delicious jelly base.
Step 2: Mash and Strain the Juice
Once the apples are softened, gently mash them right in the pot to coax out even more juice without breaking down the fruit too much. Next, line a colander with two layers of cheesecloth and set it over a large bowl. Pour in your apple mixture and allow it to strain naturally for several hours or overnight. The key here is patience—no pressing—so your jelly stays beautifully clear and not cloudy.
Step 3: Prepare the Jelly Base
Measure out exactly 5 cups of the strained apple juice and return it to a large pot. Stir in the powdered fruit pectin thoroughly, then bring the mixture to a rolling boil over high heat. This ensures the pectin activates fully, setting up the jelly’s signature firmness.
Step 4: Add Sugar and Boil Hard
Now comes the sweet part: quickly add the 7 cups of sugar all at once. Stir constantly until the sugar is completely dissolved, and bring the mixture back to a strong, rolling boil for 1 to 2 minutes. This boiling stage thickens the jelly and develops that bright, tangy-sweet flavor you crave. Don’t forget to skim off any foam that gathers on top to keep your jelly crystal clear.
Step 5: Jar and Process
Pour your hot jelly carefully into sterilized jars, leaving about 1/4 inch of headspace at the top. Wipe the rims clean, secure the lids, and then process the jars in a boiling water bath for 10 minutes. This step seals the jars and helps your jelly stay fresh for months, giving you plenty of reasons to savor it slowly.
How to Serve Homemade Apple Jelly Recipe
Garnishes
Enhance your apple jelly by serving it with a simple garnish of freshly grated apple peel or a sprinkle of fragrant cinnamon. These little touches add a pop of color and an inviting aroma that take your experience to the next level.
Side Dishes
Homemade apple jelly pairs beautifully with a range of dishes. Try it alongside warm buttered biscuits, as a glaze for roasted pork, or even as a sweet counterpart on a cheese board featuring sharp cheddar or creamy brie. It’s a versatile companion that complements both savory and sweet flavors.
Creative Ways to Present
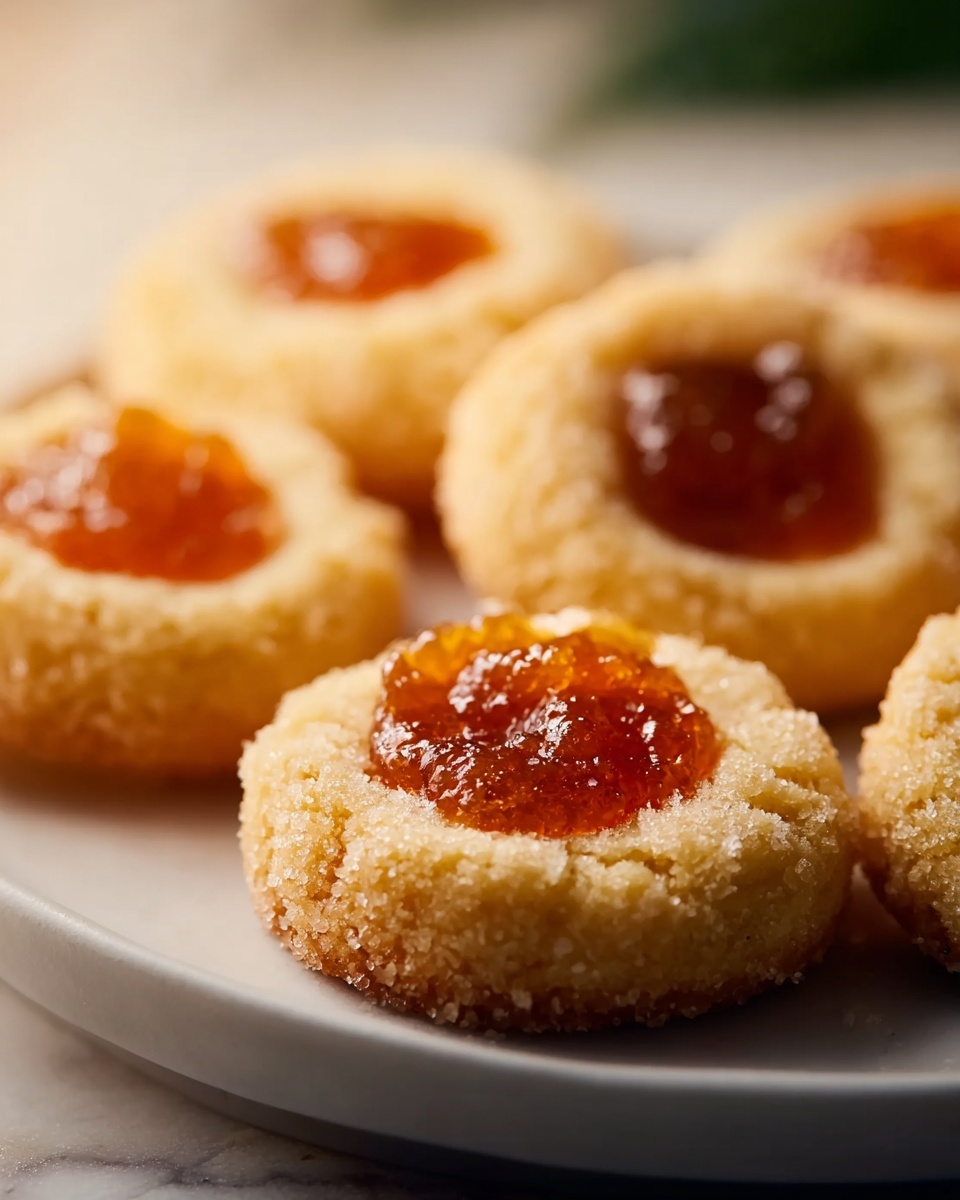
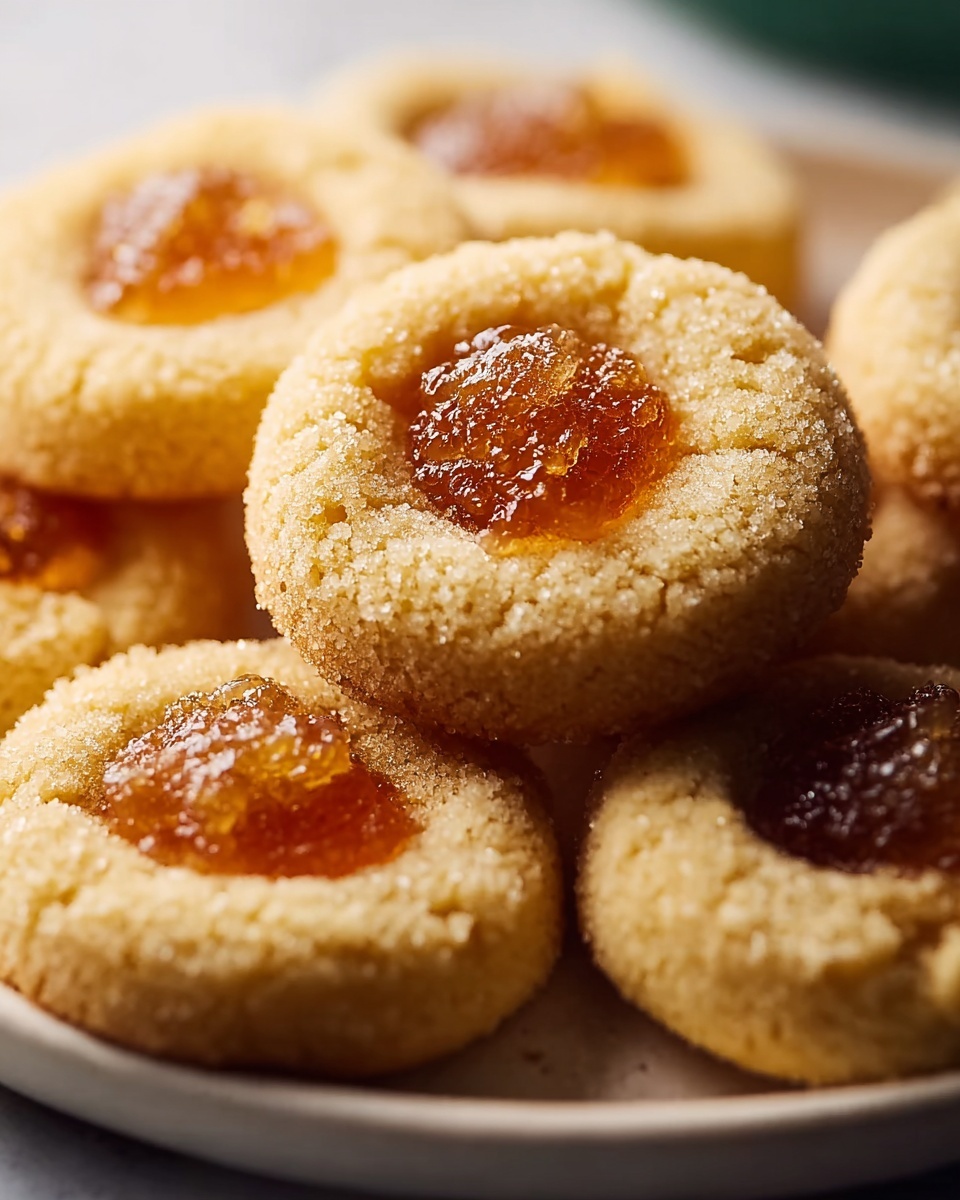
For parties or special breakfasts, serve the jelly in small ramekins topped with a sprig of fresh mint or a few sliced almonds. You can also dollop it onto pancakes, swirl it into yogurt, or make thumbprint cookies filled with your jelly to showcase your homemade masterpiece in delightful new ways.
Make Ahead and Storage
Storing Leftovers
If you happen to have leftover jelly after tasting some straight from the jar (which almost never happens!), store any opened jars in the refrigerator. Properly sealed jars can last several weeks chilled without losing their bright apple flavor or texture.
Freezing
You can freeze apple jelly by transferring it to freezer-safe containers, leaving some space at the top for expansion. While freezing may slightly alter the jelly’s texture, it’s an excellent method to extend its life and have a sweet treat ready whenever you want.
Reheating
Reheating apple jelly isn’t usually necessary, but if you want to loosen it up for drizzling or mixing into recipes, warm it gently in a small saucepan over low heat, stirring frequently to prevent scorching. Once warmed, it becomes wonderfully aromatic and pourable again.
FAQs
Can I use only one type of apple for this Homemade Apple Jelly Recipe?
Absolutely, but using a blend of sweet and tart apples results in a more balanced and flavorful jelly. Tart apples provide natural pectin and brightness, while sweet apples add depth and richness.
Do I really need powdered pectin to make jelly?
Powdered pectin is crucial for jam and jelly that set properly and have that classic gel consistency. While natural pectin levels vary in apples, using a reliable packet ensures your jelly will firm up nicely every time.
Why shouldn’t I press the apple pulp during straining?
Pressing forces through solids, which can make your jelly cloudy and affect the texture. Letting the juice drain naturally through the cheesecloth keeps it clear and clean, resulting in a pretty, translucent jelly.
How long does homemade apple jelly last?
Sealed jars stored in a cool, dark place last up to a year. Once opened, keep the jelly refrigerated and consume within a few weeks for best taste and safety.
Can I reduce the sugar in this recipe?
Reducing sugar is possible but tricky since sugar not only sweetens but also helps the jelly set and preserves it. If you want less sweetness, consider pectin products designed for low-sugar recipes and adjust accordingly.
Final Thoughts
Making your own Homemade Apple Jelly Recipe is such a joyful and rewarding kitchen adventure that brings a little sunshine into every meal. Whether you’re gifting jars to friends or enjoying it yourself, this jelly delivers comforting nostalgia and pure apple flavor in every spoonful. Don’t hesitate to dive in and fill your pantry with this golden delight—you’ll be so glad you did!
Print
Homemade Apple Jelly Recipe
- Prep Time: 20 minutes
- Cook Time: 1 hour
- Total Time: 1 hour 20 minutes
- Yield: About 6 half-pint jars
- Category: Condiment
- Method: Stovetop
- Cuisine: American
- Diet: Gluten Free, Vegan
Description
This Homemade Apple Jelly recipe captures the pure, sweet essence of apples in a clear, flavorful jelly perfect for spreading on toast or using in desserts. Made from simple ingredients including fresh apples, lemon juice, sugar, and fruit pectin, this classic American condiment is cooked on the stovetop and carefully canned to preserve its fresh taste. The recipe yields about six half-pint jars of delicious apple jelly that is gluten-free and vegan, offering a delightful sweet treat with no added preservatives.
Ingredients
Apple Jelly Ingredients
- 5 pounds of apples (any variety, cored and chopped)
- 6 cups of water
- 1/4 cup of lemon juice
- 7 cups of granulated sugar
- 1 package (1.75 oz) of powdered fruit pectin
Instructions
- Prepare and Cook Apples: Place chopped apples into a large pot and add water and lemon juice. Bring to a boil over medium-high heat, then reduce to a simmer and cook for 40 minutes, stirring occasionally. Mash the softened apples gently to release more juice.
- Strain the Apple Mixture: Line a colander with a double layer of cheesecloth and set it over a large bowl. Pour the apple mixture into the cheesecloth and let it strain for several hours or overnight without pressing to extract clear juice.
- Boil Apple Juice with Pectin: Measure 5 cups of the strained juice into a large pot. Stir in the powdered pectin and bring to a rolling boil over high heat.
- Add Sugar and Cook Jelly: Add the sugar all at once and stir to dissolve. Return to a full boil and boil hard for 1 to 2 minutes, stirring constantly to ensure proper gelling.
- Remove Foam and Jar the Jelly: Remove the pot from heat and skim off any foam from the surface. Pour the hot jelly into sterilized jars, leaving 1/4 inch headspace.
- Seal and Process Jars: Wipe jar rims clean, apply lids, and process jars in a boiling water bath for 10 minutes to ensure preservation and safe storage.
- Cool and Store: Let jars cool completely on a towel or cooling rack before storing in a cool, dark place.
Notes
- Use a mix of sweet and tart apples for the best flavor complexity.
- For a clearer jelly, avoid pressing the fruit pulp when straining to prevent cloudiness.
- Ensure jars and lids are properly sterilized before filling and processing to avoid spoilage.
- If you prefer a firmer jelly, you can slightly increase the pectin amount or boiling time.

