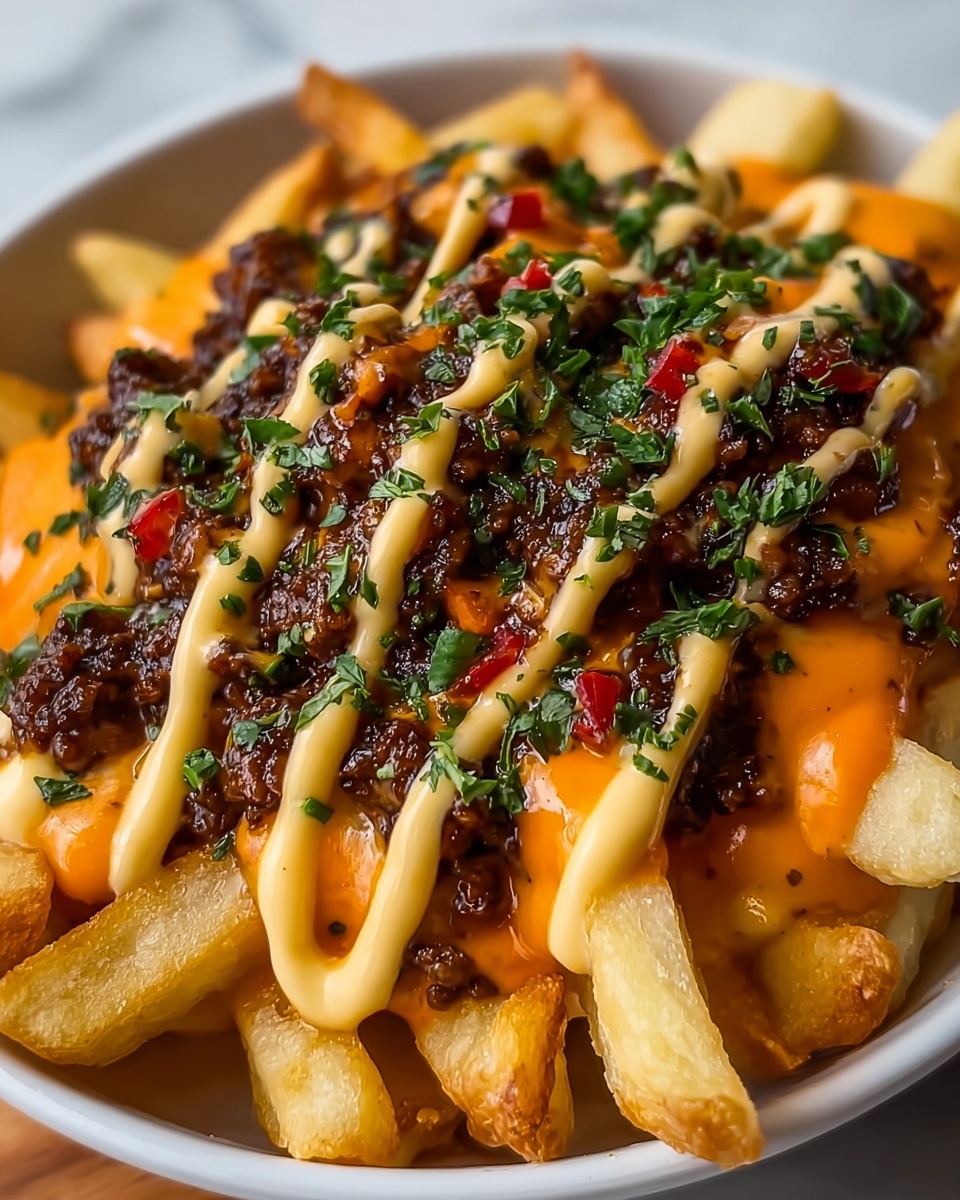
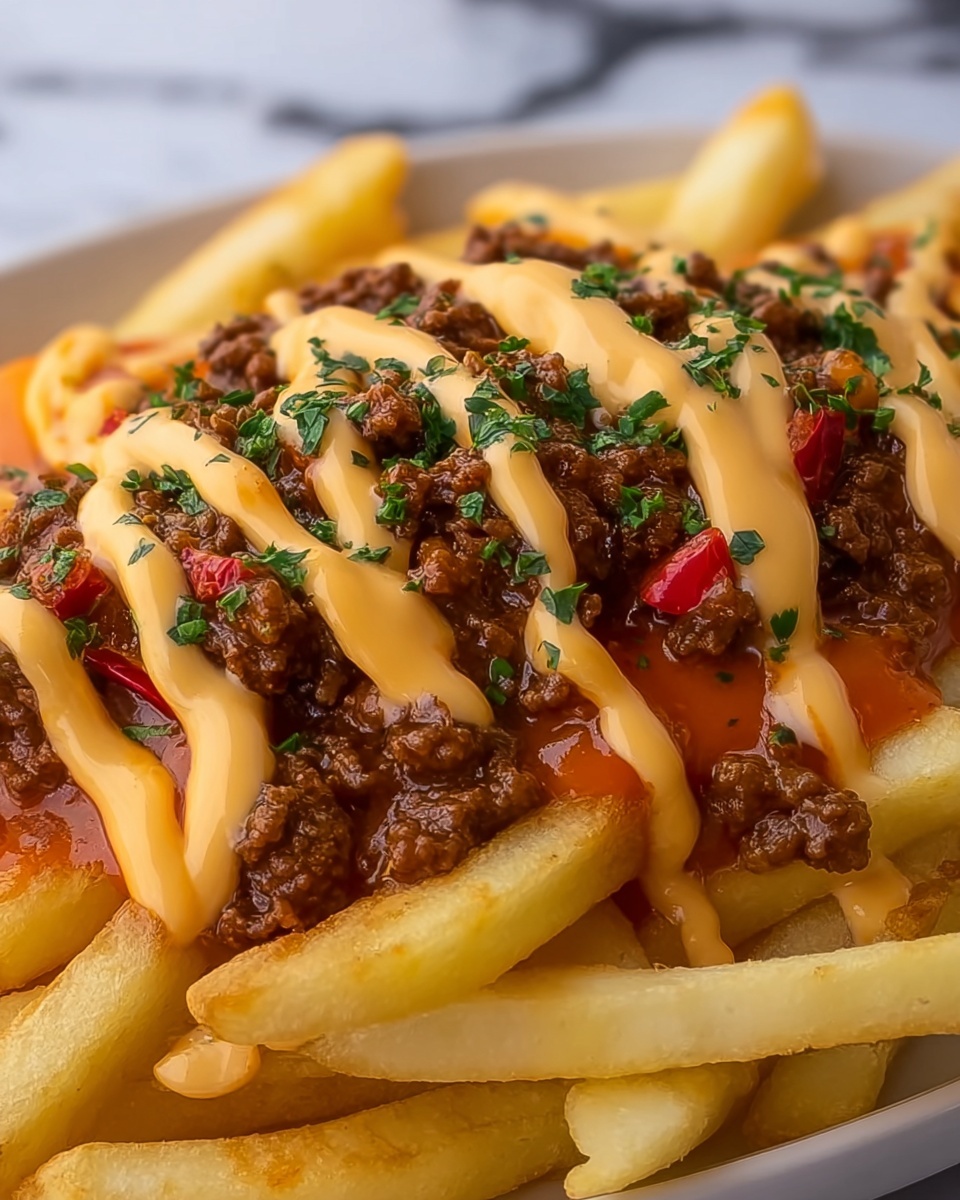
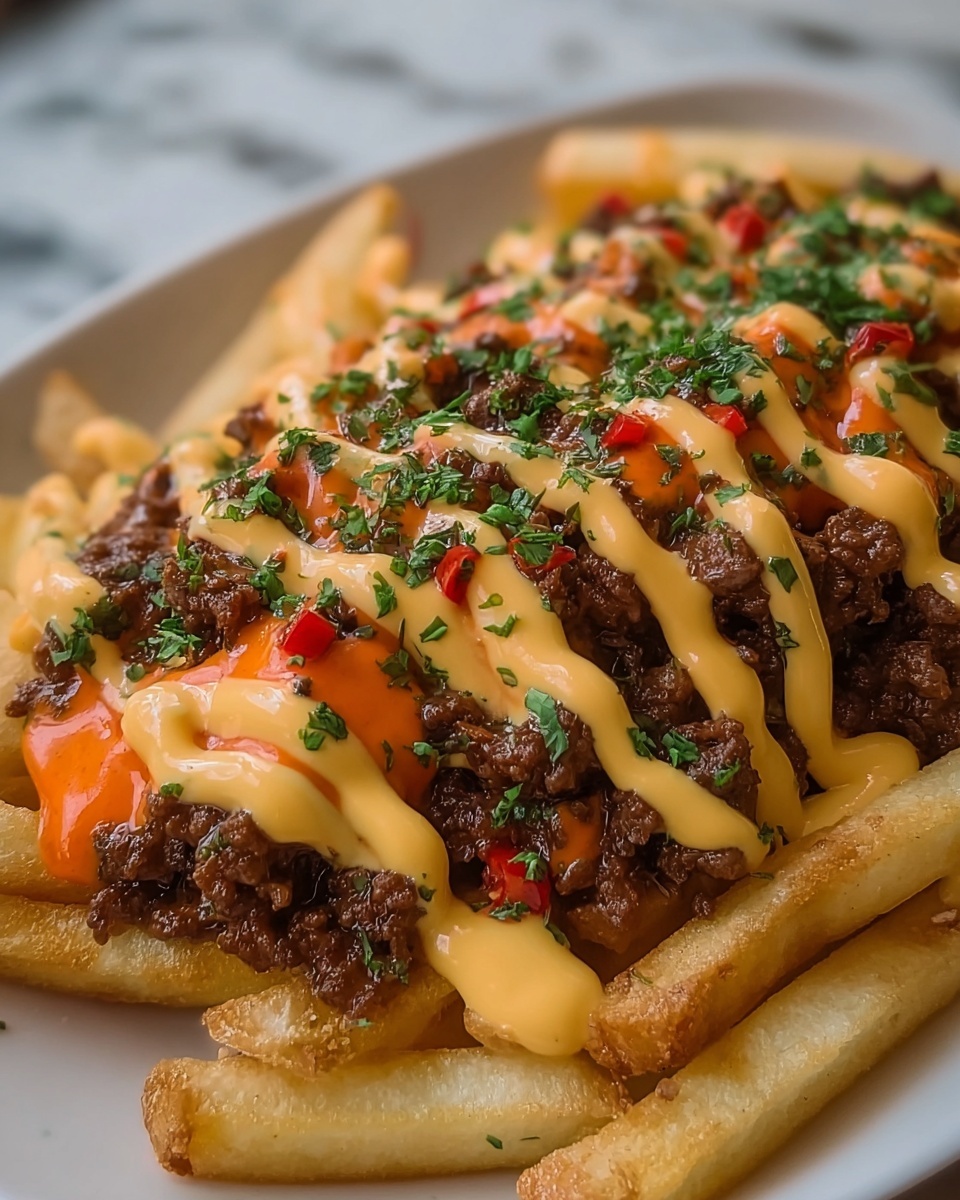
If you love bold, comforting flavors piled high on crispy fries, then you are going to adore this Nduja Beef Loaded Fries Recipe. It’s a vibrant twist on loaded fries that combines spicy, rich nduja sausage melded beautifully with savory ground beef, all crowned with melty cheese and fresh garnishes. Each bite bursts with smoky, tangy, and spicy notes, making it the ultimate crowd-pleaser whether for a casual night in or a fun gathering. Trust me, this is one of those dishes you’ll want to keep coming back to again and again.
Ingredients You’ll Need
The beauty of this recipe is in its simplicity. With just a handful of straightforward ingredients, you create layers of flavor and texture that make the dish truly special. Each component plays a vital role—from the crispy fries providing crunch to the nduja adding fiery depth.
- Frozen French fries or hand-cut potatoes: The crispy base that soaks up every bit of flavor perfectly.
- Ground beef: Adds hearty, meaty richness for a fulfilling bite.
- Nduja (spicy spreadable pork sausage): The signature ingredient delivering smoky heat and umami punch.
- Smoked paprika: Enhances the smoky undertones and adds warm color.
- Garlic powder: For an inviting, savory aroma that lifts every element.
- Salt and pepper: Essential seasonings to balance and enhance flavor.
- Shredded mozzarella or cheddar cheese: Melts gorgeously for that gooey, cheesy goodness.
- Sour cream (optional): Adds creamy coolness to offset the spice.
- Chopped chives or green onions: Bright, fresh bites that add color and crispness.
- Pickled jalapeños (optional): For an extra kick of tangy spice if you dare.
How to Make Nduja Beef Loaded Fries Recipe
Step 1: Cook the Fries
Start by preparing the fries until they are golden and delightfully crispy. Whether you choose frozen fries for convenience or hand-cut potatoes for a fresh take, baking them at 425°F ensures a perfect crunchy canvas that will hold all the toppings without getting soggy.
Step 2: Brown the Ground Beef
While the fries are cooking, heat a skillet over medium heat to brown the ground beef. Cooking until no pink remains and draining off excess fat sets up a lean, flavorful meat layer. This step is crucial to keep the loaded fries from becoming greasy and heavy.
Step 3: Melt in the Nduja and Spices
Next, stir the fiery nduja, smoked paprika, garlic powder, salt, and pepper into the beef. Allow the nduja to melt fully into the meat, creating a luscious, spicy beef mixture that’s bursting with flavor and ready to elevate your loaded fries.
Step 4: Layer Fries and Beef Mixture
Once the fries are beautifully crisp, spread them evenly on an oven-safe dish. Then, generously top them with your nduja beef mixture, making sure every fry gets a little of that spicy goodness. This layering is what makes this recipe so decadently good.
Step 5: Add Cheese and Melt
Sprinkle shredded mozzarella or cheddar cheese over the top, then pop the dish under the broiler for 2 to 3 minutes. Keep an eye on it until the cheese bubbles and melts into gooey perfection—this step brings everything together visually and flavor-wise.
Step 6: Garnish and Serve
Remove the fries from the oven and dollop on sour cream if you like. Sprinkle with fresh chopped chives or green onions, and add pickled jalapeños for an extra zing. Serve immediately while everything is warm, melty, and utterly inviting.
How to Serve Nduja Beef Loaded Fries Recipe
Garnishes
The final touches on your Nduja Beef Loaded Fries Recipe make all the difference. Fresh chopped chives bring a pop of color and mild onion crunch, while a dollop of sour cream soothes the heat with creamy coolness. Pickled jalapeños add brightness and extra spice, but they’re entirely optional depending on your heat tolerance.
Side Dishes
This dish is hearty and satisfying on its own, but you can balance the meal with simple, refreshing sides. A crisp green salad with lemon vinaigrette, grilled vegetables, or even a light coleslaw pairs beautifully, offering a fresh contrast to the indulgence of these loaded fries.
Creative Ways to Present
Want to make an impression? Serve these fries in a rustic cast iron skillet or on a wood board lined with parchment paper for that laid-back yet stylish vibe. You could even portion them into small ramekins or mini skillets for a fun party appetizer that lets each guest dive into their own spicy, cheesy heaven.
Make Ahead and Storage
Storing Leftovers
Any leftovers of the Nduja Beef Loaded Fries Recipe can be stored in an airtight container in the refrigerator for up to two days. Keep the garnishes separate until ready to serve again to maintain freshness and texture.
Freezing
While the fries are best enjoyed fresh and crispy, you can freeze the beef mixture on its own for up to a month. Defrost it thoroughly before reheating and assembling your fries to preserve the flavor and consistency.
Reheating
To bring your leftovers back to life, reheat in a hot oven at 375°F for 10-15 minutes to help restore the crispiness of the fries and warm through the beef and cheese evenly. Avoid microwaving if possible, as it can make the fries soggy.
FAQs
What exactly is nduja?
Nduja is a spicy, spreadable pork sausage from Southern Italy. It has a rich, smoky flavor with plenty of chili heat, which makes it perfect for adding depth and spice to dishes like these loaded fries.
Can I use fresh potatoes instead of frozen fries?
Absolutely! Hand-cut fresh potatoes work beautifully. Just be sure to cut them evenly and roast them until golden and crispy to get that perfect base for the toppings.
Is there a milder alternative to nduja?
If spicy food isn’t your thing, you can substitute nduja with a milder sausage or chorizo, but know that you’ll lose some of the unique smoky heat that makes this recipe special.
How do I make the fries extra crispy?
For maximum crispiness, bake fries on a single layer without overcrowding and use a light spray of oil. Baking at a high temperature like 425°F helps them get golden and perfect for holding toppings.
Can I make this recipe vegetarian-friendly?
You could swap the beef and nduja for plant-based sausage alternatives and a smoky seasoning blend, but the signature flavor of this Nduja Beef Loaded Fries Recipe comes from those meaty ingredients, so the taste will be different.
Final Thoughts
Once you try the Nduja Beef Loaded Fries Recipe, it will quickly become a favorite way to enjoy loaded fries with a spicy, indulgent twist. The combination of nduja’s fiery richness with juicy beef and melted cheese on crispy fries is nothing short of magical. So go ahead, gather those simple ingredients, and treat yourself to this delicious, shareable dish — your taste buds will thank you!
Print
Nduja Beef Loaded Fries Recipe
- Prep Time: 10 minutes
- Cook Time: 25 minutes
- Total Time: 35 minutes
- Yield: 4 servings
- Category: Snack
- Method: Baking
- Cuisine: Italian-American
Description
Nduja Beef Loaded Fries are a deliciously indulgent snack or meal featuring crispy golden fries topped with a spicy, flavorful mixture of ground beef and Nduja sausage, melted cheese, and optional garnishes like sour cream, chives, and pickled jalapeños. This recipe combines bold Italian flavors with classic comfort food for a crowd-pleasing dish ready in just 35 minutes.
Ingredients
Fries
- 1 lb frozen French fries or hand-cut potatoes
Beef Mixture
- 1/2 lb ground beef
- 2 tablespoons Nduja (spicy spreadable pork sausage)
- 1/2 teaspoon smoked paprika
- 1/2 teaspoon garlic powder
- Salt and pepper to taste
Toppings and Garnishes
- 1 cup shredded mozzarella or cheddar cheese
- 1/4 cup sour cream (optional)
- 2 tablespoons chopped chives or green onions
- 1 tablespoon pickled jalapeños (optional)
Instructions
- Cook the fries: Cook fries according to package instructions or bake at 425°F (220°C) until golden and crispy, ensuring they are evenly cooked and crisp on the outside.
- Brown the beef: In a skillet over medium heat, add the ground beef and cook until it’s no longer pink, breaking it apart with a spatula. Drain any excess fat from the pan to keep the mixture from being greasy.
- Add Nduja and spices: Stir in the Nduja, smoked paprika, garlic powder, salt, and pepper into the cooked beef. Continue cooking for 2–3 minutes, allowing the Nduja to fully melt and infuse the beef mixture with its spicy, smoky flavor.
- Arrange fries: Once fries are cooked, spread them out evenly on an oven-safe dish or tray to prepare for the cheese topping.
- Top with beef and cheese: Spoon the Nduja beef mixture evenly over the fries. Sprinkle the shredded cheese over the top, covering all the meat and fries.
- Broil to melt cheese: Place the tray under the oven broiler for 2–3 minutes or until the cheese is fully melted, bubbly, and slightly golden, watching carefully to avoid burning.
- Add garnishes: Remove from oven and garnish with sour cream, chopped chives or green onions, and pickled jalapeños if using, adding cool, fresh, and spicy notes to the dish.
- Serve immediately: Serve the loaded fries hot for the best texture and flavor experience.
Notes
- For crispier fries, spread them out in a single layer to avoid sogginess when loaded with toppings.
- You can substitute Nduja with spicy Italian sausage if unavailable, but the spreadable texture of Nduja is unique to this recipe.
- Sour cream and pickled jalapeños are optional but add a nice balance to the spicy meat and creamy cheese.
- Adjust seasoning to your preference, particularly the salt and pepper depending on the saltiness of the Nduja.
- This recipe can be doubled easily to serve a larger group.


