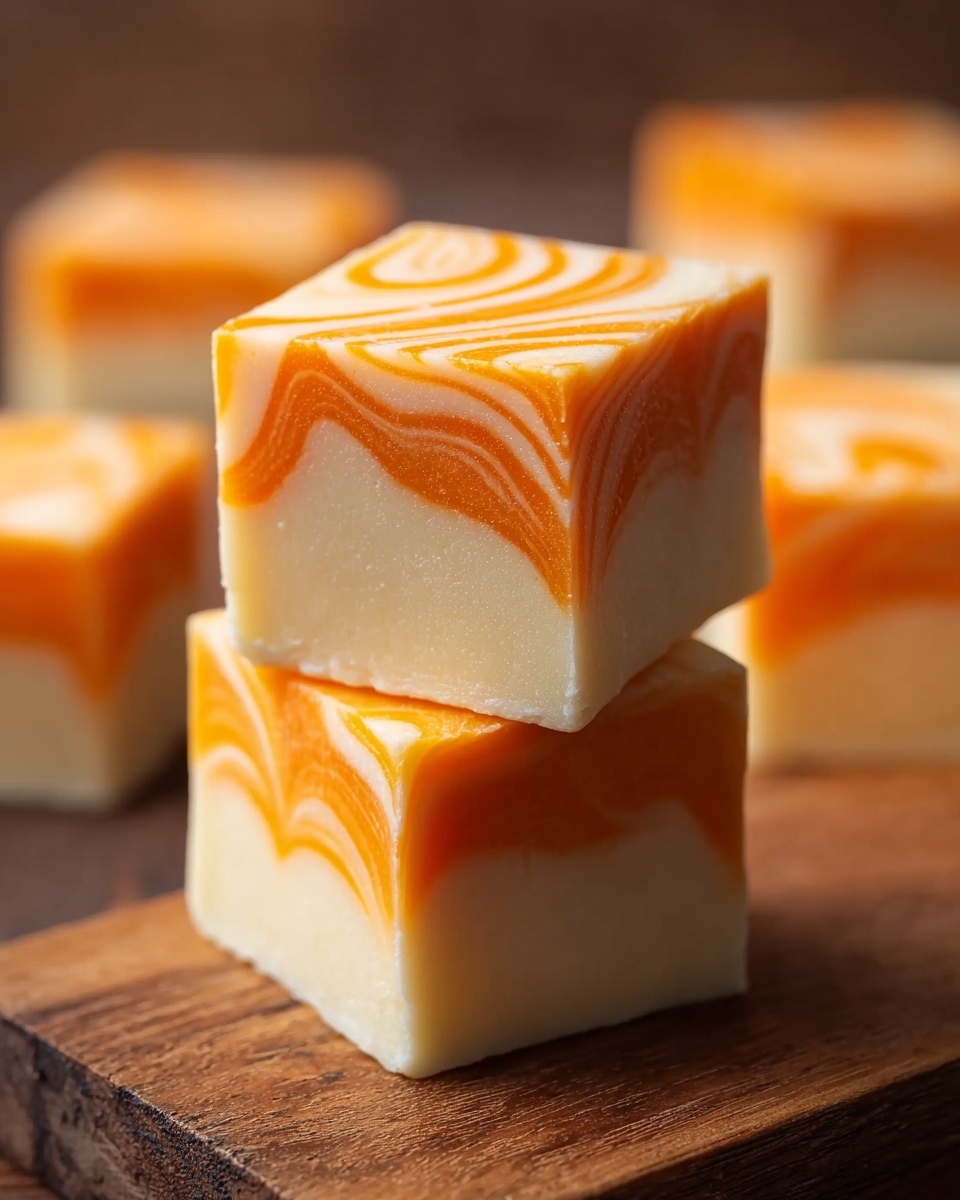
If you’re on the hunt for a sweet treat that bursts with nostalgic flavors and creamy texture, the Orange Dreamsicle Fudge Recipe is absolutely a must-try. It perfectly captures the iconic orange and vanilla swirl taste of that beloved frozen dessert, transforming it into a luscious fudge that’s rich, velvety, and simply irresistible. Whether you’re making it for a cozy night in or sharing it with friends at a gathering, this fudge promises to delight with every bite and bring a splash of sunshine to your snack time.
Ingredients You’ll Need
This Orange Dreamsicle Fudge Recipe relies on a handful of simple, everyday ingredients that combine harmoniously to create a flavor-packed, smooth fudge. Each component plays a crucial role in building its luscious texture and vibrant color, making this recipe both straightforward and sensational.
- Orange food coloring: Adds that iconic bright orange hue reminiscent of classic dreamsicles.
- Granulated sugar: The essential sweet base that helps create the fudgy consistency when cooked.
- Orange extract: Provides the authentic citrus flavor that defines the dreamsicle taste.
- White chocolate chips: Infuse creaminess and a subtle sweetness, balancing out the orange zest.
- Unsalted butter: Ensures a silky texture and rich mouthfeel without overpowering sweetness.
- Heavy cream: Adds luxury and smoothness to the fudge’s final texture.
- Marshmallow cream (or fluff): Gives the fudge a light, airy touch and helps it firm up with the perfect softness.
How to Make Orange Dreamsicle Fudge Recipe
Step 1: Prep Your Pan
First, line an 8×8-inch baking pan with parchment paper or lightly grease it. This step is a lifesaver because it prevents your creamy fudge from sticking and ensures you can easily lift it out when it’s set, making cutting and serving a breeze.
Step 2: Combine Butter, Sugar, and Cream
In a medium saucepan, melt the butter with the granulated sugar and heavy cream over medium heat. Stir constantly so nothing burns. Once melted and smooth, bring this mixture to a boil and let it cook gently for about five minutes. This process helps develop the fudge’s texture while dissolving the sugar perfectly.
Step 3: Add the Flavor and Color
Remove the saucepan from heat and stir in the marshmallow cream, orange extract, and those ten drops of orange food coloring. Mixing these together carefully ensures the fudge gets its signature creamy flavor and vibrant color in every bite.
Step 4: Melt in the White Chocolate
Next, fold in the white chocolate chips while the mixture is still warm. Stir continuously until the chocolate melts completely and the fudge mixture becomes irresistibly smooth and creamy. This step adds richness and balances the citrus notes beautifully.
Step 5: Pour and Smooth the Fudge
Pour your luscious mixture into the prepared pan and spread it out evenly with a spatula. Tap the pan gently on your countertop to settle the fudge and smooth the surface for a perfect finish once set.
Step 6: Cool and Set
Allow the fudge to cool at room temperature for about an hour, which helps it start to firm up gently. Then pop it into the refrigerator for two to three hours to achieve the perfect, sliceable consistency you want from a classic Orange Dreamsicle Fudge Recipe.
Step 7: Cut and Serve
Finally, once the fudge is firm and set, lift it out of the pan using the parchment paper edges and slice it into squares. Get ready to enjoy the dreamy, creamy bite of your homemade orange dreamsicle fudge!
How to Serve Orange Dreamsicle Fudge Recipe
Garnishes
To make your Orange Dreamsicle Fudge Recipe look as good as it tastes, consider sprinkling a little finely grated orange zest or a few white chocolate shavings on top. It adds an elegant touch and a subtle extra burst of citrus aroma with every bite.
Side Dishes
This fudge pairs wonderfully with light, refreshing accompaniments like a scoop of vanilla bean ice cream or a cup of hot herbal tea. The richness of the fudge contrasts beautifully with these sides, making each bite even more satisfying.
Creative Ways to Present
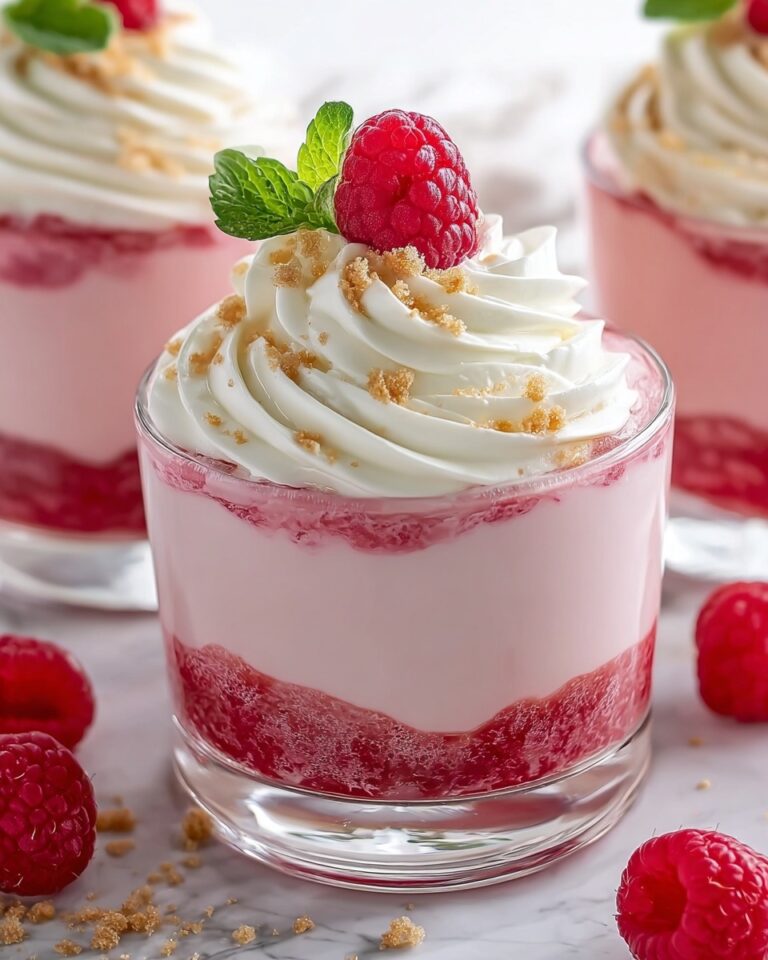
Try arranging your fudge squares on a bright, decorative plate or use mini cupcake liners to serve individual pieces. Another fun idea is to layer the fudge with whipped cream and fresh orange slices in small dessert glasses for a playful take on classic dreamsicle flavors.
Make Ahead and Storage
Storing Leftovers
Leftover Orange Dreamsicle Fudge Recipe keeps best when stored in an airtight container at room temperature or in the refrigerator. This preserves its creamy texture and flavor for up to two weeks, so you can enjoy it slowly without any worries.
Freezing
If you want to save the fudge for longer, freezing is a great option. Wrap the pieces tightly in plastic wrap and place in a freezer-safe bag or container. When properly stored, the fudge will stay delicious for up to three months.
Reheating
Since fudge is best enjoyed cold or at room temperature, reheating is not typically required. However, if you prefer a softer texture, simply let frozen fudge thaw in the refrigerator overnight or sit at room temperature for about 30 minutes before serving.
FAQs
Can I use real orange juice instead of orange extract?
While orange juice adds nice freshness, it might alter the fudge’s consistency and sweetness. The extract provides a concentrated, intense flavor without extra liquid, which is essential for the perfect fudge texture.
Is it possible to make this fudge dairy-free?
Yes, you can substitute with plant-based butter, dairy-free white chocolate chips, and coconut cream instead of heavy cream. Just keep in mind the texture might vary slightly but will still taste delightful!
How do I prevent the fudge from becoming grainy?
Constant stirring during the cooking process and careful timing when boiling the sugar mixture are key. Avoid overcooking or stirring too vigorously once the chocolate is added to keep the texture silky smooth.
Can I add other flavors to this Orange Dreamsicle Fudge Recipe?
Absolutely! A touch of vanilla extract can deepen the flavor, or a sprinkle of sea salt on top can enhance the sweetness. You might also experiment with adding finely chopped nuts for extra crunch.
How thick should the fudge be when I pour it into the pan?
The fudge mixture will be thick but still pourable. After spreading it evenly, gently tapping the pan helps eliminate air bubbles and levels the surface for a neat final cut.
Final Thoughts
This Orange Dreamsicle Fudge Recipe is a true celebration of sweet, creamy citrus bliss in every bite. It’s quick to make but feels incredibly special—perfect for sharing or indulging all by yourself. I encourage you to whip up a batch soon and enjoy the wonderful combination of dreamsicle flavors with a fudge twist that will undoubtedly become a staple in your dessert repertoire!
Print
Orange Dreamsicle Fudge Recipe
- Prep Time: 15 minutes
- Cook Time: 5 minutes
- Total Time: 3 hours 20 minutes
- Yield: 16 servings
- Category: Dessert
- Method: Stovetop
- Cuisine: American
Description
This Orange Dreamsicle Fudge is a creamy, dreamy treat that combines the nostalgic flavors of orange and white chocolate. With a smooth texture enhanced by marshmallow cream and a vibrant splash of orange color and extract, this fudge is perfect for satisfying your sweet tooth with a delightful citrus twist. Easy to make and wonderfully rich, it sets beautifully in the fridge for a luscious homemade candy experience.
Ingredients
Fudge Base
- 3/4 cup unsalted butter
- 3 cups granulated sugar
- 2/3 cup heavy cream
- 7 oz marshmallow cream (or fluff)
Flavorings and Color
- 3 tsp orange extract
- 10 drops orange food coloring
Chocolate
- 2 cups white chocolate chips
Instructions
- Prepare the Pan: Line an 8×8-inch baking pan with parchment paper or lightly grease it to prevent sticking. Set aside to make sure the fudge can be easily removed once set.
- Combine and Heat Ingredients: In a medium saucepan, combine the butter, granulated sugar, and heavy cream. Heat over medium heat, stirring constantly to melt the butter and dissolve the sugar. Bring the mixture to a boil and cook for about 5 minutes, stirring occasionally to prevent burning.
- Add Marshmallow and Flavorings: Remove the saucepan from heat. Stir in the marshmallow cream, orange extract, and orange food coloring thoroughly until the mixture is smooth and uniform in color.
- Melt White Chocolate: Add the white chocolate chips to the hot mixture and stir continuously until the chocolate is completely melted, and the fudge becomes creamy and well combined.
- Set the Fudge: Pour the fudge mixture into the prepared baking pan. Spread evenly with a spatula and gently tap the pan on the counter to even out the surface.
- Cool and Chill: Allow the fudge to cool at room temperature for about 1 hour to firm up slightly. Then transfer the pan to the refrigerator and let the fudge set completely, about 2 to 3 hours.
- Serve: Once fully set and firm, cut the fudge into 16 squares (or desired size) and serve your delicious Orange Dreamsicle Fudge.
Notes
- Use parchment paper to easily lift the fudge out of the pan without sticking.
- Make sure to stir constantly during the boiling process to prevent burning the sugar.
- For a stronger orange flavor, add a little more orange extract to taste.
- Store fudge in an airtight container in the refrigerator for up to 2 weeks.
- If the fudge is too hard after refrigeration, let it sit at room temperature for a few minutes before serving.


