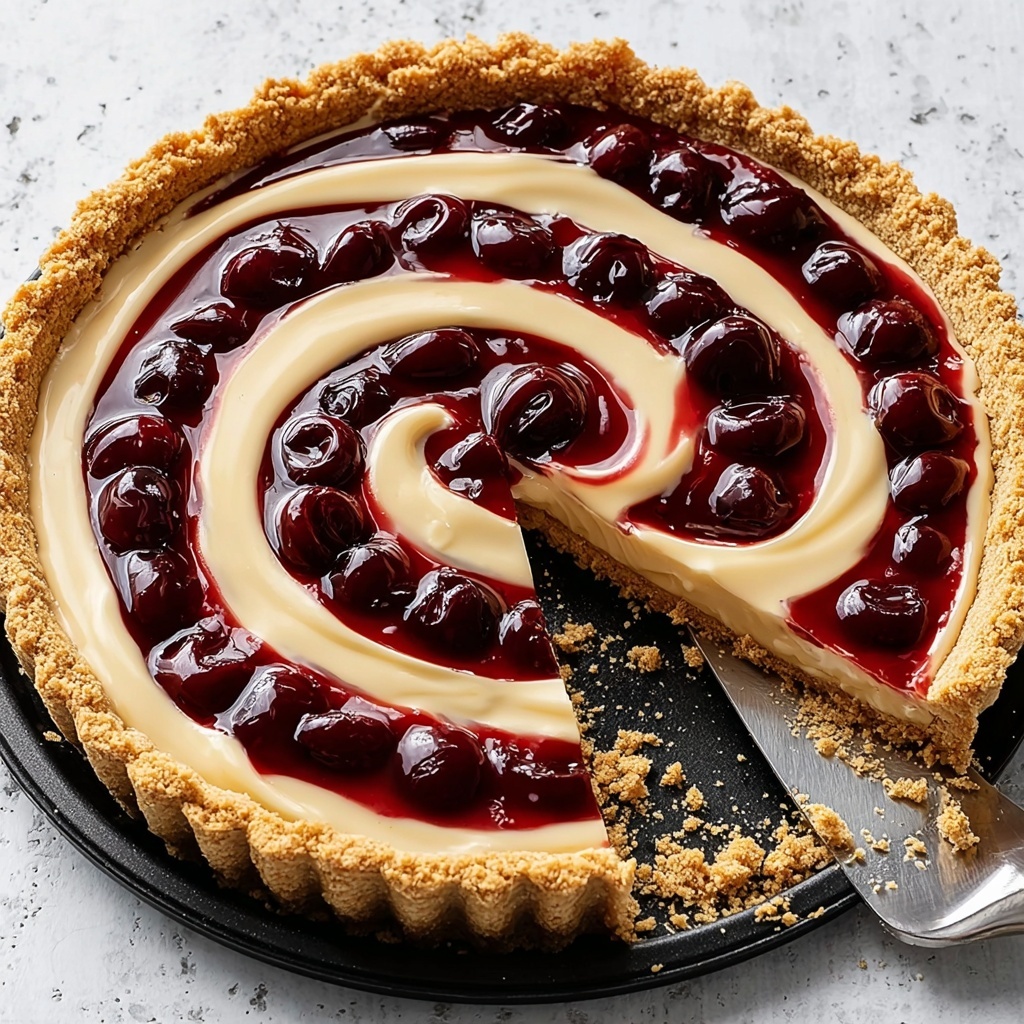
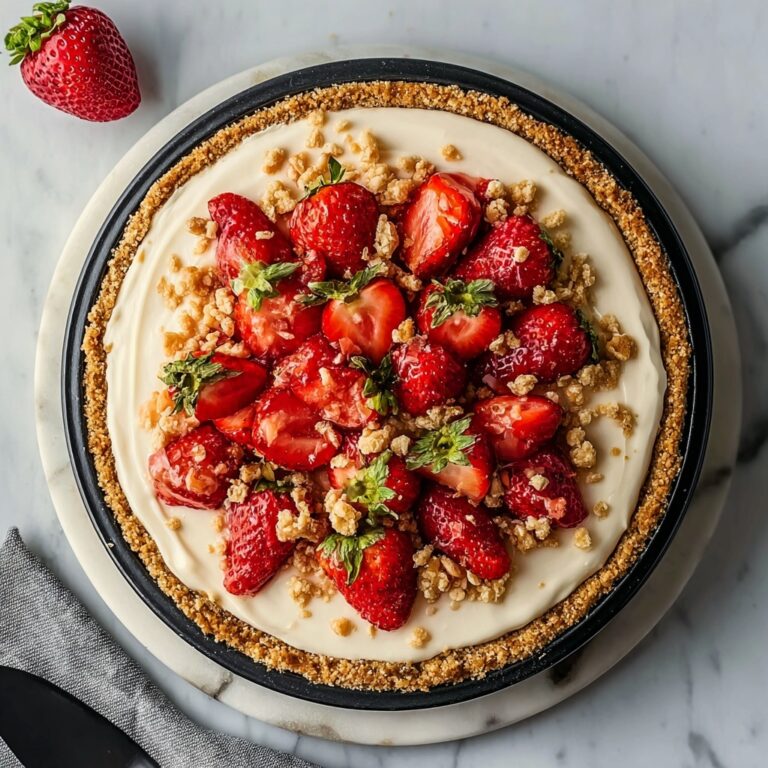
If you love the nostalgic combo of peanut butter and jelly but want to experience it in a decadent, new way, this Peanut Butter and Jelly Pie Recipe is going to blow your mind. Imagine creamy peanut butter filling nestled on a crisp Oreo crust, punctuated by luscious swirls of raspberry jam and topped with a smooth white chocolate and peanut butter ganache. It’s a fun twist on a childhood favorite that’s perfect for sharing, guaranteed to bring smiles at any gathering or cozy night in.
Ingredients You’ll Need
This Peanut Butter and Jelly Pie Recipe relies on simple, quality ingredients that each add their own magic. From the crunchy Oreo crust to the silky peanut butter filling and the rich ganache, every component is essential for that perfect balance of flavor and texture.
- 220g Oreo biscuits: The secret to a wonderfully crisp, chocolatey base that holds the whole pie together.
- 75g unsalted butter: Melts into the crushed Oreos to create a buttery, firm crust.
- 120g whipping cream: Whipped to soft peaks, adds airy lightness to the filling and richness to the ganache.
- 146g full-fat cream cheese: Brings smooth creaminess and a slight tang that beautifully complements peanut butter.
- 200g peanut butter: The star of the show, lending its signature nutty depth and silkiness.
- 150g white chocolate: Adds sweetness and a luscious texture to the ganache topping.
- Raspberry jam: Offers the classic jelly flavor with a vibrant pop of fruitiness and color.
How to Make Peanut Butter and Jelly Pie Recipe
Step 1: Prepare the Oreo Crust
Begin by crushing your Oreo biscuits finely and mixing them thoroughly with melted unsalted butter. This step is super important because the butter binds the crumbs into a sturdy, yet crumbly crust that sets the stage for all the creamy fillings to come. Press the mixture firmly into the bottom and sides of your pie dish, then pop it into the fridge to chill for at least 30 minutes. This chilling helps the crust firm up so it won’t fall apart when you slice the pie.
Step 2: Whip the Cream and Make the Filling
Next, whip the cream until it just holds soft peaks; this lightens the filling beautifully, making it fluffy and airy. Meanwhile, in a separate bowl, blend the cream cheese, peanut butter, a bit of icing sugar, and vanilla extract until smooth and creamy. The cream cheese adds that luscious tang while the peanut butter gives a dense, nutty richness. Gently fold the whipped cream into this mixture to keep it light yet indulgent.
Step 3: Assemble the Filling and Add the Jam Swirls
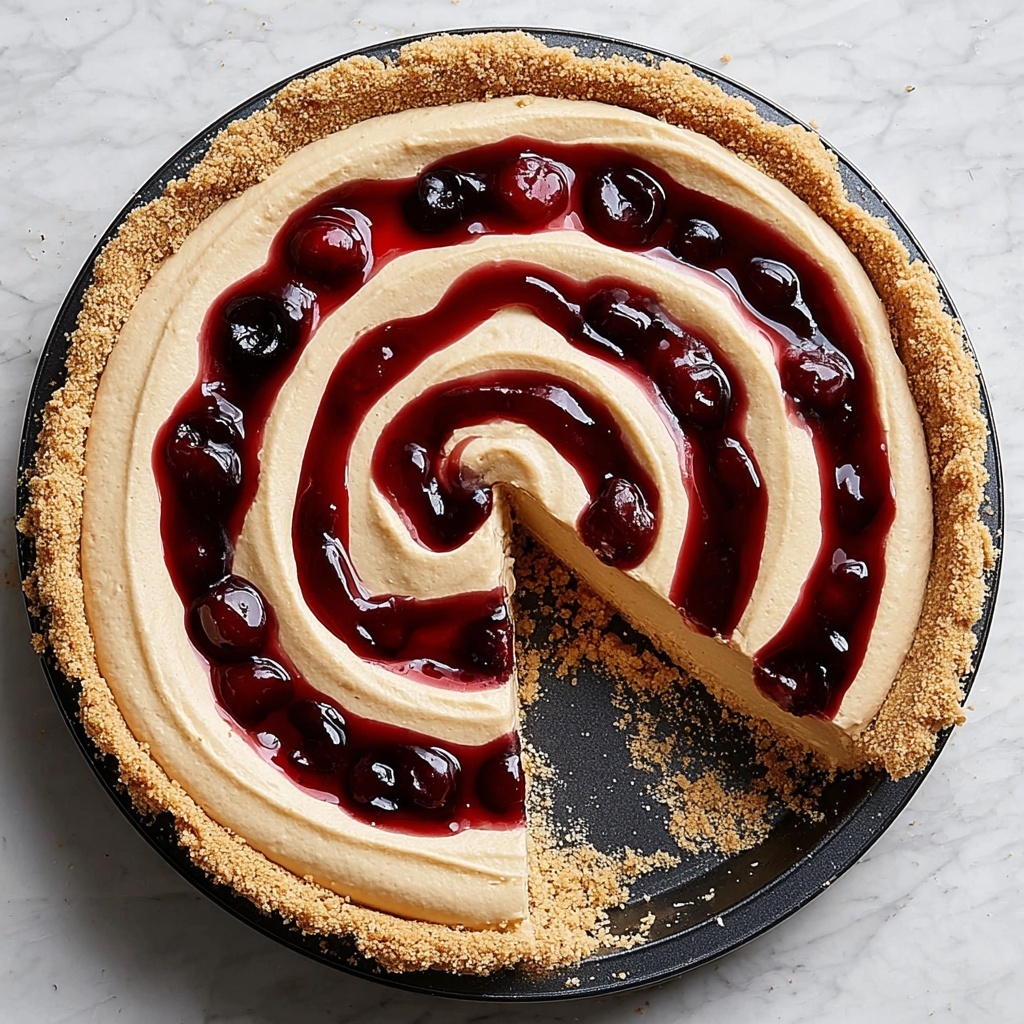
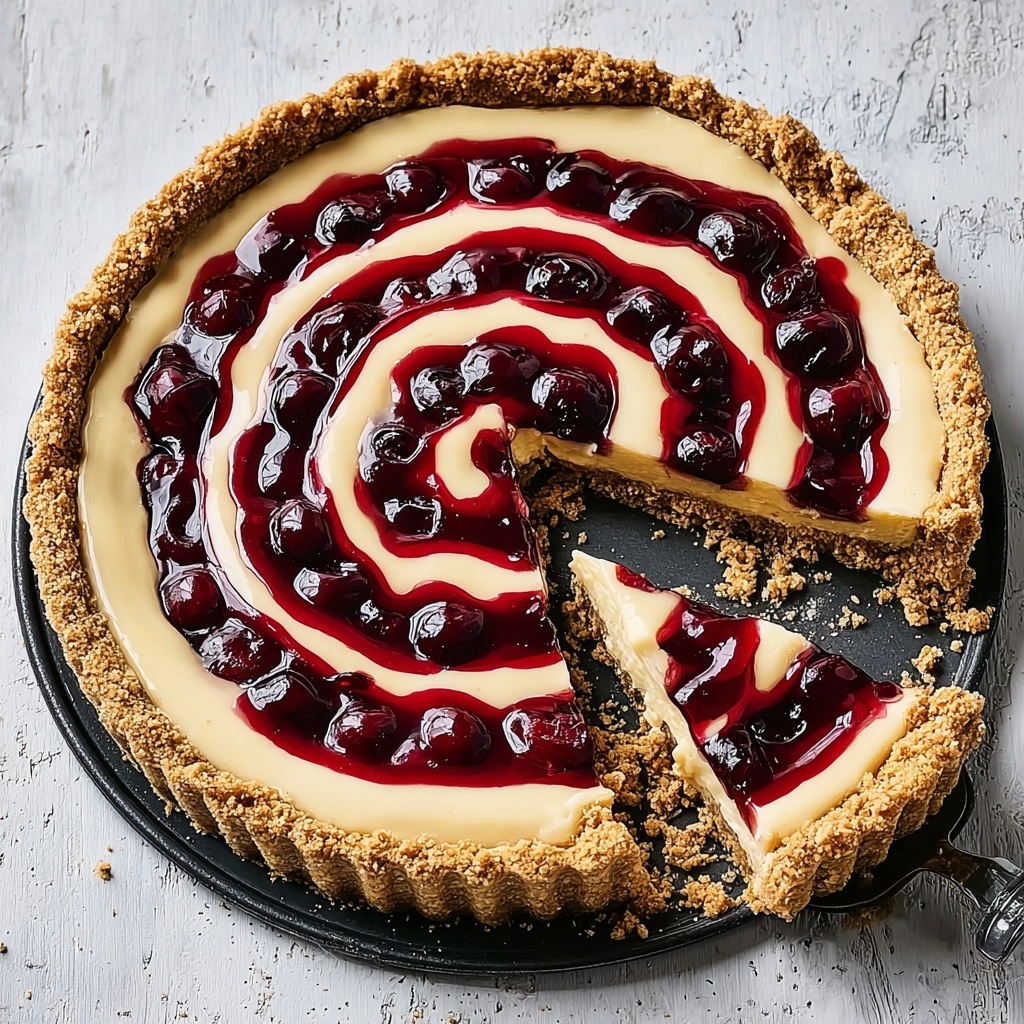
Spread your creamy peanut butter filling evenly over the chilled Oreo crust. Then, dollop generous spoonfuls of raspberry jam across the surface. Using a knife or skewer, gently swirl the jam into the filling, creating beautiful streaks of vibrant color and flavor. This element is what beautifully brings together the classic peanut butter and jelly pairing in a visually stunning way.
Step 4: Make the White Chocolate and Peanut Butter Ganache
The final flair is the ganache topping. Heat whipping cream along with butter and a touch of glucose (or substitute with light corn syrup if needed) just until warming but not boiling. Pour this hot mixture over chopped white chocolate, letting it melt into a smooth, glossy sauce. Stir in the peanut butter until completely incorporated, creating a silky, nutty glaze that will seal the pie with richness and a hint of sweetness.
Step 5: Chill and Set
Allow the ganache to cool slightly so it thickens just enough before pouring it gently over your pie filling. Smooth the surface and then pop the whole pie back into the fridge. Chill for at least 2 hours, or until fully set. This step is crucial for that perfect slice that holds together beautifully and delivers every flavor in harmony.
How to Serve Peanut Butter and Jelly Pie Recipe
Garnishes
To brighten up each slice, try topping with fresh raspberries or a small dollop of whipped cream. A sprinkle of crushed peanuts can also add extra texture and highlight the peanut butter flavor perfectly. These simple touches not only elevate the look but add contrasting freshness to the pie’s rich delight.
Side Dishes
This pie is wonderfully indulgent and almost a meal unto itself, but it pairs beautifully with a scoop of vanilla ice cream or a refreshing citrus fruit salad. The cool ice cream contrasts the creamy pie, while citrus cuts through the richness and keeps your palate refreshed.
Creative Ways to Present
For a fun twist, serve this Peanut Butter and Jelly Pie Recipe in individual mini tartlets or mason jars layered with alternating peanut butter filling and jam. You can also drizzle extra ganache over each serving table-side for a lovely presentation that wows your guests every time.
Make Ahead and Storage
Storing Leftovers
This pie stores beautifully in the fridge, covered tightly with plastic wrap or in an airtight container. It will stay fresh and delicious for up to 4 days, making it perfect to prepare ahead or for enjoying sweet treats over several days.
Freezing
You can freeze the pie for up to 1 month. Make sure to wrap it very securely with a couple of layers of plastic wrap and then foil to protect it from freezer burn. Thaw overnight in the refrigerator before serving to maintain its creamy texture.
Reheating
Because this is a no-bake, cream-based pie, reheating is not recommended. Serve chilled to enjoy the perfect texture and freshness that make this Peanut Butter and Jelly Pie Recipe so special.
FAQs
Can I use crunchy peanut butter instead of smooth?
Absolutely! Crunchy peanut butter will add a delightful texture to the filling and enhance the nutty flavor, just be mindful it might affect the smoothness of the swirl and ganache slightly.
What if I want to use a different kind of jam?
Feel free to experiment! Strawberry or grape jams are traditional alternatives that also pair beautifully with peanut butter. Just choose a jam you love to keep that sweet-and-savory balance.
Is there a substitute for white chocolate in the ganache?
You can substitute with milk chocolate if preferred. It will create a deeper, more caramel flavor that complements the peanut butter nicely, but the ganache might be a bit less sweet and lighter in color.
Can I make this pie vegan?
With some ingredient swaps like dairy-free cream cheese, coconut cream for whipping, vegan butter, and a dairy-free chocolate, you could adapt this recipe. The key is ensuring all substitutions blend well for the creamy texture.
How do I get nice clean slices when serving?
Use a sharp knife warmed in hot water and wiped dry before slicing each piece. This helps glide through the pie cleanly without pulling or tearing the layers.
Final Thoughts
This Peanut Butter and Jelly Pie Recipe is one of those rare desserts that feels both nostalgic and luxurious at the same time. It’s perfect for sharing with friends and family when you want to serve something a little special but still comforting. Give it a try—you might just find your new favorite way to enjoy two classic flavors combined with irresistible texture and style.
Print
Peanut Butter and Jelly Pie Recipe
- Prep Time: 20 minutes
- Cook Time: 0 minutes
- Total Time: 2 hours 20 minutes
- Yield: 8 slices
- Category: Dessert
- Method: No-Cook
- Cuisine: American
Description
This Peanut Butter and Jelly Pie is a decadent, no-bake dessert featuring a crunchy Oreo biscuit crust, creamy peanut butter and cream cheese filling, swirled with raspberry jam, and topped with a luscious white chocolate peanut butter ganache. Perfectly balanced between sweet and nutty flavors, this pie is sure to satisfy any dessert craving.
Ingredients
For the Crust
- 220g Oreo biscuits
- 75g unsalted butter, melted
For the Filling
- 120g whipping cream
- 146g full-fat cream cheese
- 200g peanut butter
- 50g icing sugar
- 1 tsp vanilla extract
- Raspberry jam for swirling
For the Ganache
- 150g white chocolate, chopped
- 60ml whipping cream
- 15g unsalted butter
- 15g glucose syrup
- 2 tbsp peanut butter
Instructions
- Prepare the crust: Crush the Oreo biscuits finely and mix them thoroughly with the melted unsalted butter. Press this mixture evenly into the base and slightly up the sides of a pie dish. Place the crust in the refrigerator and chill for 30 minutes to set firmly.
- Make the filling: Whip the 120g whipping cream to soft peaks. In a separate bowl, beat the full-fat cream cheese, peanut butter, icing sugar, and vanilla extract together until smooth and creamy. Gently fold the whipped cream into this mixture to maintain a light, airy texture.
- Assemble the pie: Spread the peanut butter and cream cheese filling evenly over the chilled Oreo crust. Dot the surface with spoonfuls of raspberry jam and use a skewer or knife to gently swirl the jam throughout the filling for a marbled effect.
- Prepare the ganache: Heat the whipping cream, unsalted butter, and glucose syrup together until just about to boil. Pour this hot mixture over the chopped white chocolate and let it sit for a minute to melt the chocolate. Stir gently until smooth and fully combined, then mix in the peanut butter until the ganache is glossy and uniform.
- Finish the pie: Allow the ganache to cool slightly but remain pourable, then pour it evenly over the filling layer. Refrigerate the completed pie for at least 2 hours, or until firmly set before serving.
Notes
- For best results, use full-fat cream cheese and whipping cream to ensure the filling is rich and creamy.
- The pie should be kept refrigerated until serving and is best eaten within 2 days for optimal freshness.
- You can substitute raspberry jam with any berry jam or preserves of choice for variation.
- Use a rubber spatula to carefully fold the whipped cream into the cream cheese mixture to keep the texture light.
- To crush Oreos easily, place them in a zip-top bag and use a rolling pin or food processor.

