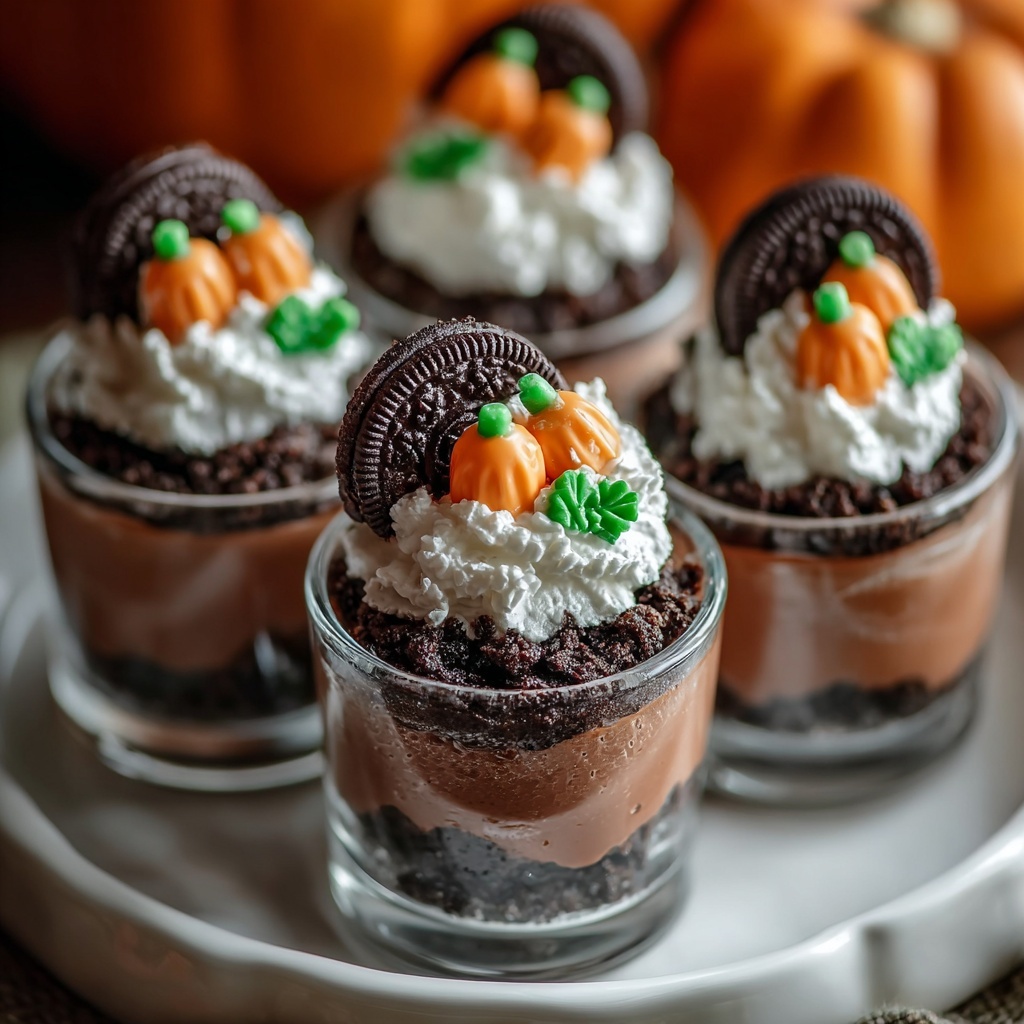
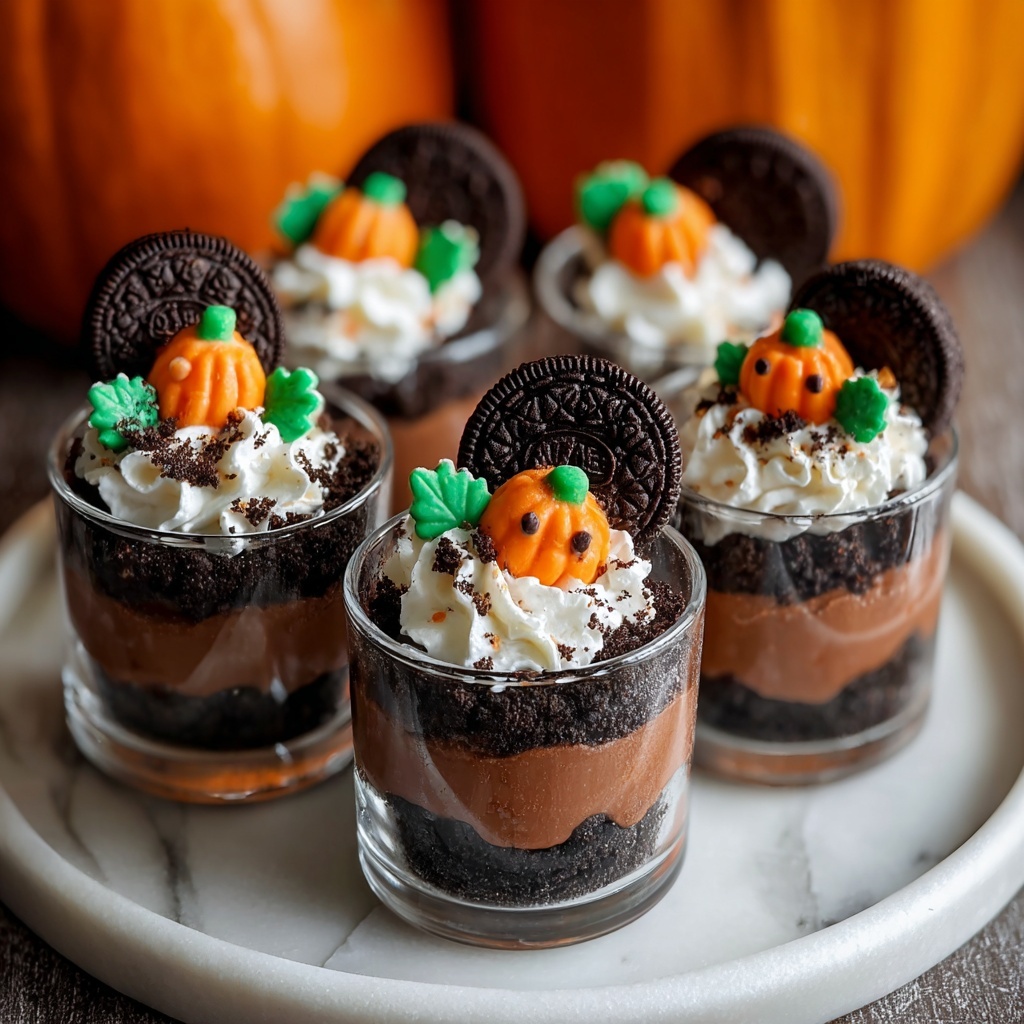
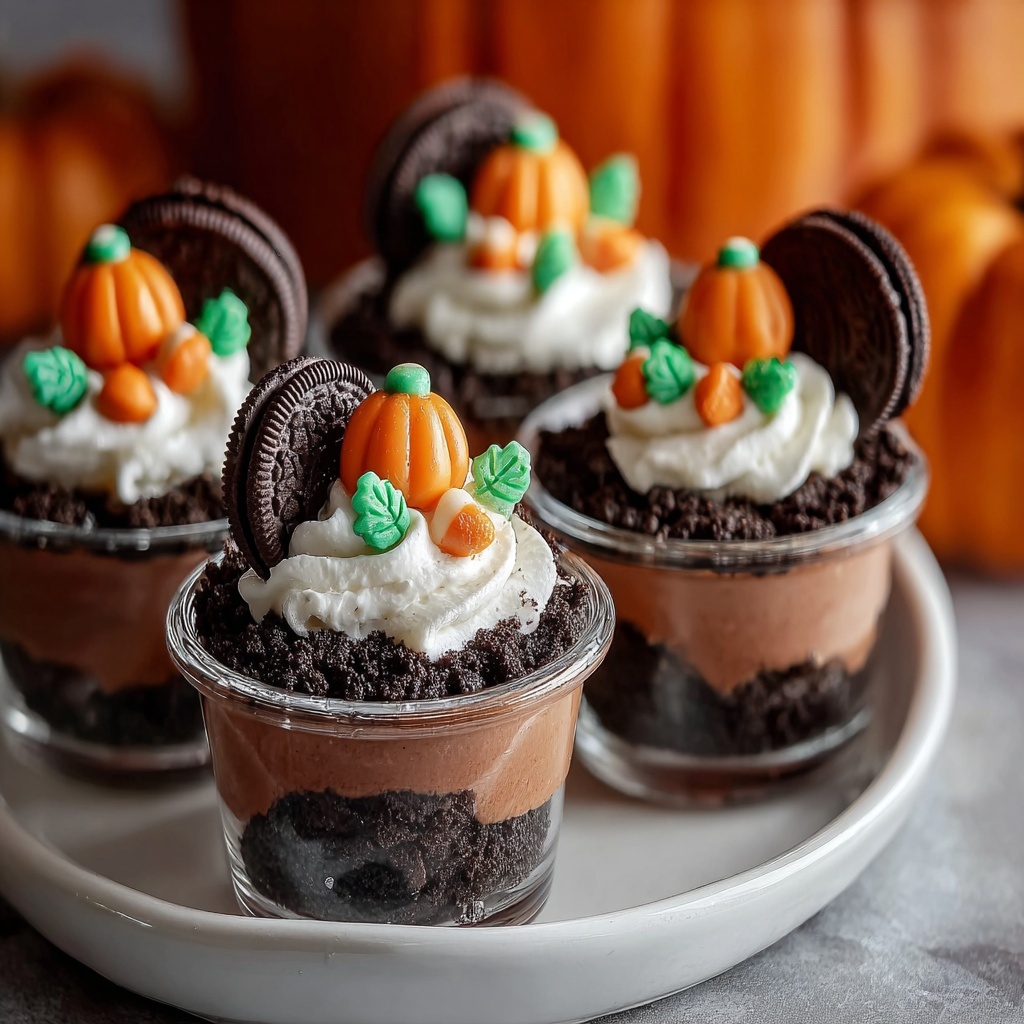
If you are looking for a fun, festive, and absolutely scrumptious treat to celebrate the season, the Pumpkin Patch Dirt Cups Recipe is your new best friend. This dessert captures the playful magic of a pumpkin patch right in your cup, blending layers of creamy chocolate pudding with rich, crumbly “dirt” made from crushed cookies, and finishing each parfait with a cute gummy pumpkin on top. It’s an irresistible combination that delights both kids and adults alike, perfect for Halloween parties, fall gatherings, or simply when you want a sweet pick-me-up that feels like autumn in every bite.
Ingredients You’ll Need
This Pumpkin Patch Dirt Cups Recipe turns simple ingredients into a spectacular dessert using a few key staples. Each element plays its part: the chocolate cookies offer a crumbly, earthy texture, the pudding brings creamy chocolate goodness, and the cream cheese mixture adds richness with a slight tang. The gummy pumpkins provide that whimsical seasonal touch, and optional decorative sprinkles make the cups look like a mini pumpkin patch ready to be admired before you dig in.
- Chocolate sandwich cookies: Crushed finely, they create the “dirt” base that gives this dessert its signature crunch and deep chocolate flavor.
- Cold milk: Essential for dissolving the pudding mix quickly and achieving a smooth, thick texture.
- Instant chocolate pudding mix: Provides the luscious chocolate layer that complements the cookie crumbs beautifully.
- Whipped topping: Adds lightness and fluffiness, balancing richness for a melt-in-your-mouth feel.
- Cream cheese: Gives a creamy tanginess that brightens the dessert and helps bind the filling together.
- Powdered sugar: Sweetens and smooths out the cream cheese mixture effortlessly.
- Gummy pumpkins: The charming edible decoration that makes this recipe festive and fun.
- Optional green decorative sprinkles or edible grass: For adding a playful, realistic touch to your pumpkin patch.
How to Make Pumpkin Patch Dirt Cups Recipe
Step 1: Crush the Cookies
Start by gathering your chocolate sandwich cookies in a sturdy resealable plastic bag. Use a rolling pin to crush them until they reach a fine crumb consistency, which creates the perfect “dirt” texture that’s both crunchy and moody-chocolate rich. Set these crumbs aside for layering later on.
Step 2: Prepare the Chocolate Pudding
In a large bowl, whisk together the cold milk and instant chocolate pudding mix briskly for about two minutes until you start to see thickening. Let the pudding sit for five minutes to firm up, ensuring a silky, luscious filling that will hold its layers well.
Step 3: Make the Cream Cheese Mixture
In a separate bowl, beat the softened cream cheese with the powdered sugar until it becomes smooth and creamy with no lumps. Gently fold in the thawed whipped topping, being careful to keep as much air in the mixture as possible so your dessert stays light and fluffy.
Step 4: Combine Pudding and Cream Cheese Mixtures
Carefully fold the cream cheese and whipped topping mixture into the thickened chocolate pudding until everything is well blended but still light. This blend will create the rich, indulgent center of your dirt cups with an irresistibly smooth texture.
Step 5: Assemble Your Dirt Cups
Grab your serving cups or glasses, and start by spooning a layer of the chocolate pudding mixture into the bottom of each one. This is the foundation of your pumpkin patch.
Step 6: Add the Cookie “Dirt”
Next, generously sprinkle a layer of your crushed cookie crumbs atop the pudding. This adds the signature soil texture and flavor that makes these cups so fun to eat.
Step 7: Layer Again
Repeat by adding another layer of the chocolate pudding mixture followed by more cookie crumbs. Keep building these layers until your cups are nearly full, capturing that beautiful contrast between creamy and crunchy.
Step 8: Decorate with Gummy Pumpkins
Top each cup with a single gummy pumpkin to evoke a playful pumpkin patch scene. If you’d like, add a sprinkle of green decorative sprinkles or edible grass to mimic real patch foliage and impress your guests with your creative touch.
Step 9: Chill Before Serving
Place the assembled dirt cups in the refrigerator for at least one hour. This chilling step helps the flavors meld and the texture set perfectly for a gratifying dessert experience.
How to Serve Pumpkin Patch Dirt Cups Recipe
Garnishes
While the classic gummy pumpkin adornment is a must-have for the Pumpkin Patch Dirt Cups Recipe, you can amp it up with a dusting of cocoa powder for extra chocolate intensity or a drizzle of caramel sauce for an added layer of sweetness that brings out the fall flavors even more.
Side Dishes
Pair these charming dirt cups with warm apple cider or spiced latte for an autumnal duo that’s bursting with seasonal vibes. If you want to keep things light, a simple fresh fruit plate with crisp apples and pears can provide a fresh contrast to the creamy, rich dessert.
Creative Ways to Present
Try serving the dirt cups in clear mason jars or mini terracotta pots lined with parchment to elevate the pumpkin patch effect visually. For party settings, label each cup with a fun name tag or type of pumpkin for interactive fun that delights guests of all ages.
Make Ahead and Storage
Storing Leftovers
Leftover Pumpkin Patch Dirt Cups should be stored tightly covered in the refrigerator. They tend to keep well for up to 3 days without losing their signature texture or flavor, making them a fantastic make-ahead dessert option for busy days.
Freezing
Freezing is not recommended for this recipe, as the pudding and whipped topping layers can separate and become watery once thawed. For best results, keep these treats refrigerated and enjoy fresh within a few days.
Reheating
Since this is a chilled dessert, reheating is unnecessary. Instead, allow refrigerated cups to sit at room temperature for 10-15 minutes before serving if you prefer the flavors to be slightly less cold. This brings out the depth of the chocolate and cream cheese layers beautifully.
FAQs
Can I use a different type of pudding in this Pumpkin Patch Dirt Cups Recipe?
Absolutely! While chocolate pudding offers rich, classic comfort, you could experiment with vanilla or butterscotch pudding for a tasty twist. Just keep in mind that changing the pudding flavor alters the overall taste and visual theme of your dessert.
What can I use instead of gummy pumpkins?
If you can’t find gummy pumpkins, mini candy corn pieces or orange jelly beans make great substitutions. Even small pumpkin-shaped sprinkles can carry on the festive theme nicely.
Is there a dairy-free version of this recipe?
Yes! You can use dairy-free instant pudding mixes, plant-based milk such as almond or oat milk, dairy-free cream cheese, and whipped topping alternatives to make a vegan-friendly version that keeps all the fun textures and flavors intact.
How long should I chill the dirt cups?
An hour in the refrigerator is sufficient for the flavors to meld and set properly. However, if you have more time, chilling them for up to 4 hours will only enhance their depth and texture.
Can I make this recipe ahead for a party?
Definitely. The Pumpkin Patch Dirt Cups Recipe is ideal for prepping a day in advance. Just assemble the cups, cover tightly with plastic wrap, and refrigerate until party time for a quick, crowd-pleasing fall dessert.
Final Thoughts
The Pumpkin Patch Dirt Cups Recipe is a delightful way to bring warmth, fun, and indulgence into your dessert rotation. It’s simple to make, irresistibly tasty, and perfect for celebrating the cozy autumn season. Next time you want to wow your friends or family with a charming, memorable treat, be sure to whip up a batch – trust me, these dirt cups will quickly become a beloved favorite in your household!
Print
Pumpkin Patch Dirt Cups Recipe
- Prep Time: 0h 20m
- Cook Time: 0h 0m
- Total Time: 1h 20m
- Yield: 6 servings
- Category: Dessert
- Method: No-Cook
- Cuisine: American
- Diet: Vegetarian
Description
Pumpkin Patch Dirt Cups are a delightful no-bake dessert perfect for fall festivities or Halloween parties. Layers of creamy chocolate pudding, sweetened cream cheese, and crunchy chocolate cookie crumbs create a fun ‘dirt’ effect, topped off with adorable gummy pumpkins and optional green sprinkles or edible grass for a festive touch.
Ingredients
Base Ingredients
- 1 package (15.25 oz) chocolate sandwich cookies, crushed
- 3 cups cold milk
- 2 packages (3.9 oz each) instant chocolate pudding mix
Cream Cheese Mixture
- 1 tub (8 oz) whipped topping, thawed
- 1 package (8 oz) cream cheese, softened
- 1 cup powdered sugar
Toppings
- 1 package gummy pumpkins
- Optional: green decorative sprinkles or edible grass
Instructions
- Crush the Cookies: Place the chocolate sandwich cookies in a resealable plastic bag and crush them into fine crumbs using a rolling pin. Set aside the crushed cookies.
- Prepare the Pudding: In a large mixing bowl, whisk together cold milk and instant chocolate pudding mix for about 2 minutes until thickened. Let it stand for 5 minutes to allow it to set further.
- Make the Cream Cheese Mixture: In a separate bowl, beat softened cream cheese and powdered sugar until smooth and creamy. Gently fold in the thawed whipped topping until well incorporated.
- Combine Mixtures: Fold the cream cheese mixture into the chocolate pudding until the mixture is uniform and smooth.
- Assemble the Dirt Cups – First Layer: Spoon a layer of the chocolate pudding mixture into the bottom of each serving cup or glass.
- Add Cookie ‘Dirt’ Layer: Sprinkle a generous amount of crushed cookie crumbs over the pudding layer to create the dirt effect.
- Repeat Layers: Continue layering pudding mixture and cookie crumbs, alternating until the cups are filled to the desired level.
- Decorate: Top each cup with a gummy pumpkin and optionally add green decorative sprinkles or edible grass for a festive appearance.
- Chill: Refrigerate the assembled dirt cups for at least 1 hour before serving to allow the flavors to meld and the dessert to set firmly.
Notes
- For best results, use cold milk to help the pudding thicken properly.
- The dessert can be prepared a day in advance and stored in the refrigerator.
- You can substitute regular whipped topping with dairy-free or vegan alternatives if desired.
- Use a rolling pin or food processor to crush cookies; food processor yields finer crumbs.
- Optional green sprinkles or edible grass add a more realistic ‘patch’ effect but can be omitted.

