
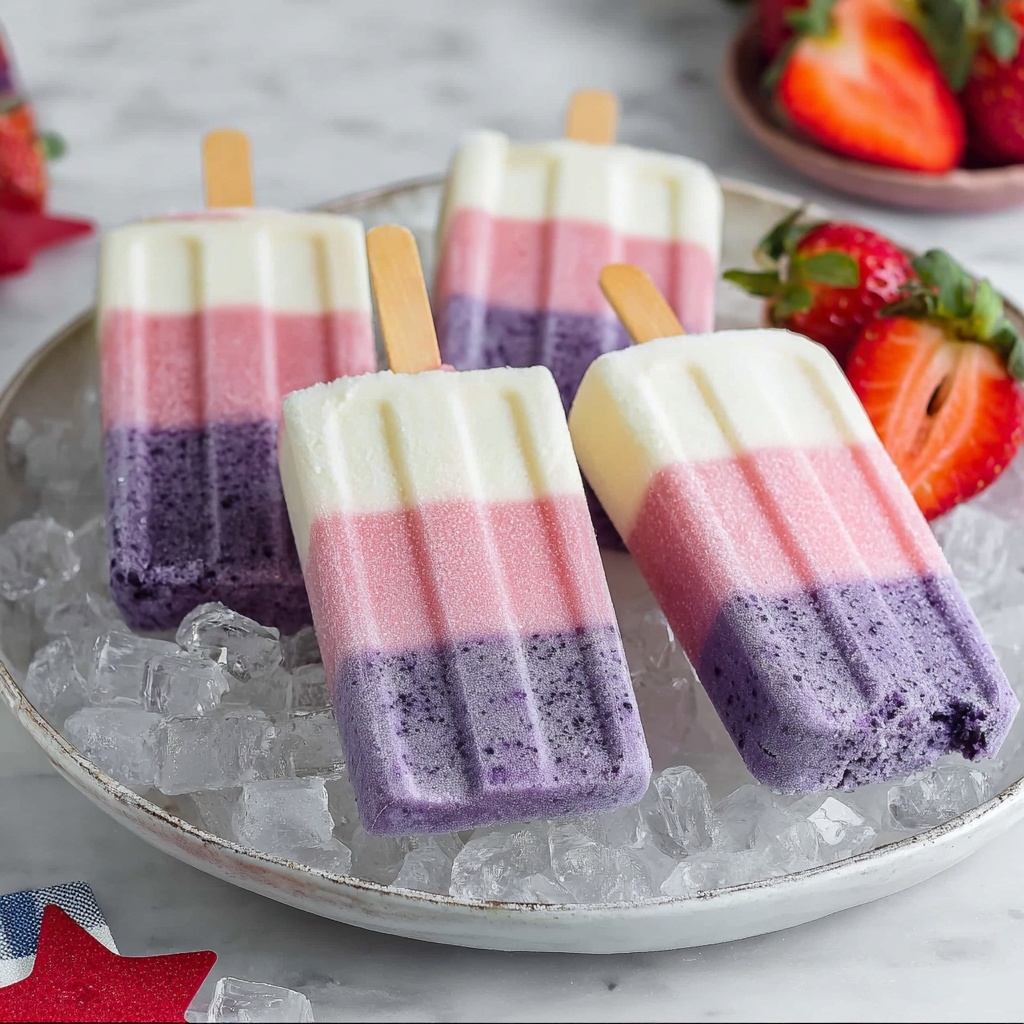
If you’re on the hunt for a refreshing treat that captures the vibrant spirit of summer, the Red White and Blueberry Yogurt Popsicles Recipe is your new best friend. This fun, colorful recipe is not only visually appealing with its patriotic hues but also delivers a creamy, fruity burst of flavor in every bite. Made from natural fruits and creamy Greek yogurt, these popsicles are light, satisfying, and perfect for cooling down on warm days. They balance sweet, tangy, and creamy elements beautifully, making them a fantastic snack for both kids and adults alike.
Ingredients You’ll Need
Getting these popsicles on the table is surprisingly simple thanks to a handful of fresh ingredients that work together to create those iconic red, white, and blue layers. Each component is key, from the tangy strawberries to the lush blueberries and creamy Greek yogurt, giving the popsicles their irresistible texture and flavor.
- Chopped strawberries (1 cup): Fresh strawberries bring vibrant color and juicy sweetness that kick off the red layer perfectly.
- Granulated sugar (1½ tablespoons, divided): Just enough sugar to enhance the natural sweetness of the fruits without overpowering them.
- Water (¾ cup, divided): Lightens the fruit blends and helps create a smooth consistency for easy freezing.
- Plain Greek yogurt (3 cups, divided): The creamy base lending the popsicles their luscious texture and tangy bite.
- Red and blue food coloring (optional): Enhances the natural hues of the fruit for that bold patriotic look.
- Blueberries (1 cup): Juicy blueberries add the perfect pop of blue color and a sweet-tart flavor.
- Banana (1 chopped): Provides a smooth, natural sweetness to balance the berries and add a creamy white layer.
How to Make Red White and Blueberry Yogurt Popsicles Recipe
Step 1: Prepare the Strawberry Layer
Begin by blending the strawberries with half a tablespoon of sugar and a quarter cup of water. Pulsing just enough to combine them yields a fresh, bright puree. Then fold in one cup of Greek yogurt to get that creamy texture. If you want your popsicles to look extra festive, add a few drops of red food coloring – it’s totally optional but makes a stunning pop of color. Keep this mixture chilled until it’s time to assemble.
Step 2: Blend the Blueberry Layer
Follow the same process with the blueberries, pairing them with sugar and water to soften their deep flavor. Blend with another cup of Greek yogurt to keep things smooth and creamy. Adding blue food coloring here is also optional but it helps intensify those gorgeous royal hues, bringing the “blue” in red, white, and blue to life beautifully.
Step 3: Make the Banana Layer
The banana layer acts as your “white” component in this trio. Blend the chopped banana with the remaining Greek yogurt and a little water if necessary for a silky consistency. This naturally sweet layer balances perfectly between the bold berry flavors, completing the patriotic trio.
Step 4: Layer and Freeze the Popsicles
Begin by spooning the blueberry mixture into the bottoms of your popsicle molds and insert sticks. Freeze this layer solid for about two hours. Next, add the banana mixture in as the middle white layer, freezing again until firm. Finish by topping off with the vibrant strawberry mixture, then freeze your popsicles completely for the best texture and snap. Patience pays off here because these layers make your popsicles not only a delight to eat but a joy to behold.
How to Serve Red White and Blueberry Yogurt Popsicles Recipe
Garnishes
To jazz up these popsicles at your next gathering, try sprinkling chopped fresh mint or shredded coconut on top right before serving. These garnishes add a pop of flavor and a touch of elegance without overshadowing the stars of the show — the fruity layers themselves.
Side Dishes
Pair your Red White and Blueberry Yogurt Popsicles Recipe with light snacks like crunchy granola bars, fresh fruit salad, or even a bowl of mixed nuts. These sides complement the cool, creamy pops while keeping the overall experience fresh and satisfying.
Creative Ways to Present
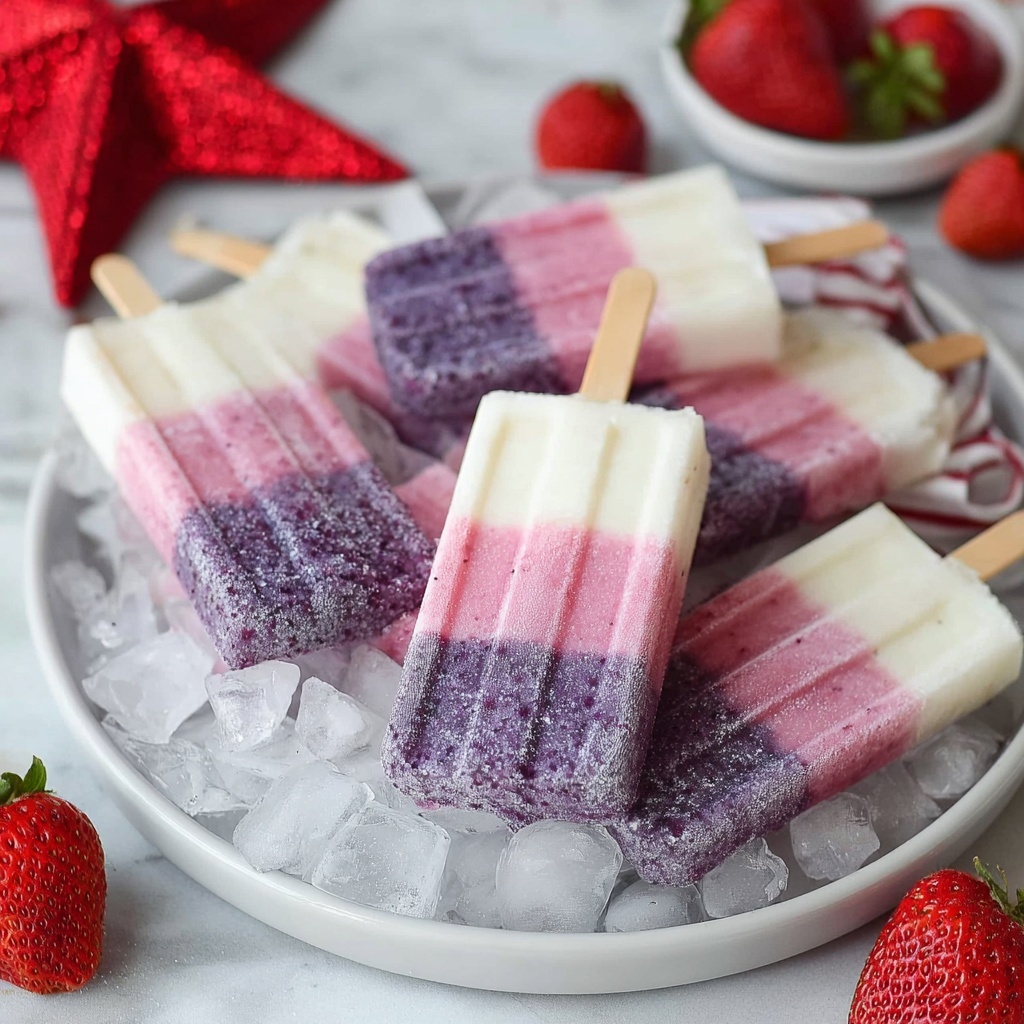
If you want to make your popsicles even more festive, consider using clear molds so the colorful layers are fully visible. You can also wrap each popsicle in wax paper tied with a thin ribbon for a charming summer party presentation. Another fun idea is to serve them on a plate decorated with fresh berries and edible flowers, making dessert time feel truly special.
Make Ahead and Storage
Storing Leftovers
Since these popsicles are best enjoyed frozen, keep any extras sealed in an airtight container or wrapped tightly in plastic wrap to prevent freezer burn. Stored properly, they’ll stay fresh and delicious for up to two weeks, so you can savor the flavors long after you make them.
Freezing
Freezing is straightforward with this recipe. Once layered, let the popsicles freeze completely—ideally overnight—to guarantee they hold their shape and texture well. Avoid opening the freezer frequently while they set to prevent melting layers.
Reheating
These popsicles are designed to be a cold treat, so reheating isn’t recommended. If you notice they’ve hardened too much in the freezer, just let them sit at room temperature for 5 minutes before serving to soften slightly and release their flavors.
FAQs
Can I use flavored yogurt instead of plain Greek yogurt?
You can, but plain Greek yogurt keeps the flavor balanced and creamy without extra sweetness, allowing the fruit to shine through. Using flavored yogurt might make the popsicles overly sweet or alter the taste profile.
Is it necessary to use food coloring?
Not at all! The food coloring is purely optional and serves to enhance the vibrant red and blue hues. The natural fruit colors will still make your popsicles look beautiful and delicious.
Can I substitute other fruits for strawberries and blueberries?
Absolutely! Raspberries, blackberries, or even mangoes can be creative swaps that keep the layers colorful and fresh. Just make sure to balance sweetness and texture for the best results.
How long do these popsicles take to freeze?
Each layer requires about two hours to freeze solid before adding the next, so plan for around six hours total. For fully frozen popsicles, overnight freezing works best.
Can kids safely help make these popsicles?
Yes! This recipe is very kid-friendly and perfect for little hands eager to blend fruit and layer colors. It’s a fun way to introduce them to healthy snacking with a creative twist.
Final Thoughts
The Red White and Blueberry Yogurt Popsicles Recipe is such a joyful way to enjoy fresh fruit and creamy yogurt in a cool, vibrant treat. Whether you’re hosting a summer barbecue or just want to brighten a hot day, these popsicles are sure to bring smiles and satisfaction. I can’t wait for you to try making this refreshing recipe and watch your friends and family delight in every colorful bite!
Print
Red White and Blueberry Yogurt Popsicles Recipe
- Prep Time: 5 minutes
- Cook Time: 0 minutes
- Total Time: 6 hours 5 minutes (including freezing time)
- Yield: 8 popsicles
- Category: Dessert
- Method: Freezing
- Cuisine: American
- Diet: Vegetarian
Description
These vibrant Red White and Blue Popsicles are a refreshing and healthy treat perfect for warm days and festive occasions. Made with real fruit purees, creamy Greek yogurt, and a touch of sweetness, these popsicles feature layers of strawberry, blueberry, and banana for a naturally patriotic color theme. Optional food coloring enhances the hues without compromising the wholesome ingredients, making them a delicious and visually appealing frozen dessert.
Ingredients
Strawberry Layer
- 1 cup chopped strawberries (167 grams)
- ½ tablespoon granulated sugar (6 grams)
- ¼ cup water (57 grams)
- 1 cup plain Greek yogurt (227 grams)
- Red food coloring (optional, 3 drops)
Blueberry Layer
- 1 cup blueberries (170 grams)
- ½ tablespoon granulated sugar (6 grams)
- ¼ cup water (57 grams)
- 1 cup plain Greek yogurt (227 grams)
- Blue food coloring (optional, 3 drops)
Banana Layer
- 1 banana (chopped)
- ½ tablespoon granulated sugar (6 grams)
- ¼ cup water (57 grams)
- 1 cup plain Greek yogurt (227 grams)
Instructions
- Prepare Strawberry Layer: Blend the strawberries with ½ tablespoon sugar and ¼ cup water until well combined. Add 1 cup Greek yogurt and blend until fully smooth. Optionally add 3 drops of red food coloring to enhance the color. Set this mixture aside and keep refrigerated until ready to use.
- Prepare Blueberry Layer: Repeat the blending process with blueberries, ½ tablespoon sugar, ¼ cup water, and 1 cup Greek yogurt. Add 3 drops of blue food coloring if desired to intensify the color. Keep this mixture refrigerated as well.
- Prepare Banana Layer: Blend the chopped banana with ½ tablespoon sugar, ¼ cup water, and 1 cup Greek yogurt until creamy and smooth. No food coloring is necessary for this layer.
- Assemble Popsicles: Pour a layer of the blueberry mixture into the bottom of each popsicle mold. Insert popsicle sticks if the mold doesn’t include them. Freeze this layer for about 2 hours until solid.
- Add Middle Layers: Pour a layer of either the banana or strawberry mixture over the frozen blueberry layer, alternating layers if desired. Freeze again until solid, approximately 2 hours.
- Add Final Layer and Freeze: Add the last layer of mixture (whichever remains) on top of the previously frozen layer. Freeze the popsicles fully, at least 4 hours or overnight, before serving to ensure they are completely firm.
Notes
- Use fresh or frozen fruit, but adjust for extra moisture if needed.
- Adding food coloring is optional; the natural fruit colors work well.
- To avoid fruit chunks, blend thoroughly for a smooth texture.
- Use plain Greek yogurt for a creamy texture and added protein.
- If you don’t have a popsicle mold, small paper cups and wooden sticks make a great substitute.
- The popsicles can be stored in the freezer for up to one month.
- Let popsicles sit at room temperature for a few minutes before unmolding to ease removal.
