If you’ve been searching for a fresh twist on a beloved classic, this Shredded Apple Pie Recipe is exactly what your dessert dreams are made of. Imagine tender, grated apples melded lovingly with cinnamon, rich butter, and vanilla, all baked in a flaky deep-dish crust that’s easy to make using a frozen shell. The texture is uniquely delightful — soft, moist, and packed with cozy apple flavor that’s perfect for sharing with friends and family. Whether it’s for a holiday feast or a simple weekend treat, this recipe brings a homestyle warmth and comforting sweetness to your table.
Ingredients You’ll Need
This recipe calls for simple, pantry-friendly ingredients that come together to create a deliciously balanced pie. Each component plays a key role: from the sweetness of sugar to the warmth of cinnamon, and from the buttery richness to the fresh zestiness of shredded apples, it’s a beautiful harmony you’ll want to revisit again and again.
- Granulated sugar, 1 cup: Adds the perfect sweetness without overpowering the natural apple flavor.
- Salted butter, 1/2 cup (softened): Provides that luscious, creamy richness and helps with a tender filling.
- All-purpose flour, 2 Tablespoons: Acts as a gentle thickening agent to keep the filling just right.
- Vanilla extract, 2 teaspoons: Brings a lovely aromatic depth that elevates the entire pie.
- Ground cinnamon, 1 teaspoon: Adds warmth and a classic spice note that complements the apples perfectly.
- Tiny pinch of salt: Balances the sweetness and enhances all the flavors.
- Large eggs, 2: Help bind the filling and give a silky texture that holds it all together.
- Red Delicious apples, 3 large (peeled and grated, about 3 cups): The star ingredient, shredded for an exciting texture and intense apple taste.
- Unbaked frozen deep-dish pie shell, 1: Makes prep a breeze and provides a satisfyingly crisp base.
How to Make Shredded Apple Pie Recipe
Step 1: Get Your Oven Ready and Prep the Apples
Start by preheating your oven to 350 degrees Fahrenheit. As soon as you grate the apples, don’t forget to squeeze out any excess juice—this is a crucial step to avoid a soggy pie. Using fresh, firm Red Delicious apples will ensure your filling has the best texture and flavor profile.
Step 2: Beat Together the Base Ingredients
In a large bowl, grab your electric hand mixer and blend the sugar, softened butter, flour, vanilla, cinnamon, salt, and eggs on medium speed. Mixing these ingredients until just combined creates the perfect creamy base that will hold all the apple goodness together.
Step 3: Fold in the Shredded Apples
Now it’s time to gently fold the prepared shredded apples into your buttery mixture. This step is where the magic begins, as the apples distribute evenly and soak up the lovely, spiced batter. When your filling is ready, pour it into the unbaked deep-dish pie shell and spread it out evenly for consistent baking.
Step 4: Bake to Perfection
Place your pie on a large cookie sheet to catch any bubbling over, then bake it in the oven for 50 minutes to an hour. Start checking around the 50-minute mark—the filling should be set but still moist, not dry. This patient step ensures the pie’s custardy texture shines through.
Step 5: Cool and Enjoy
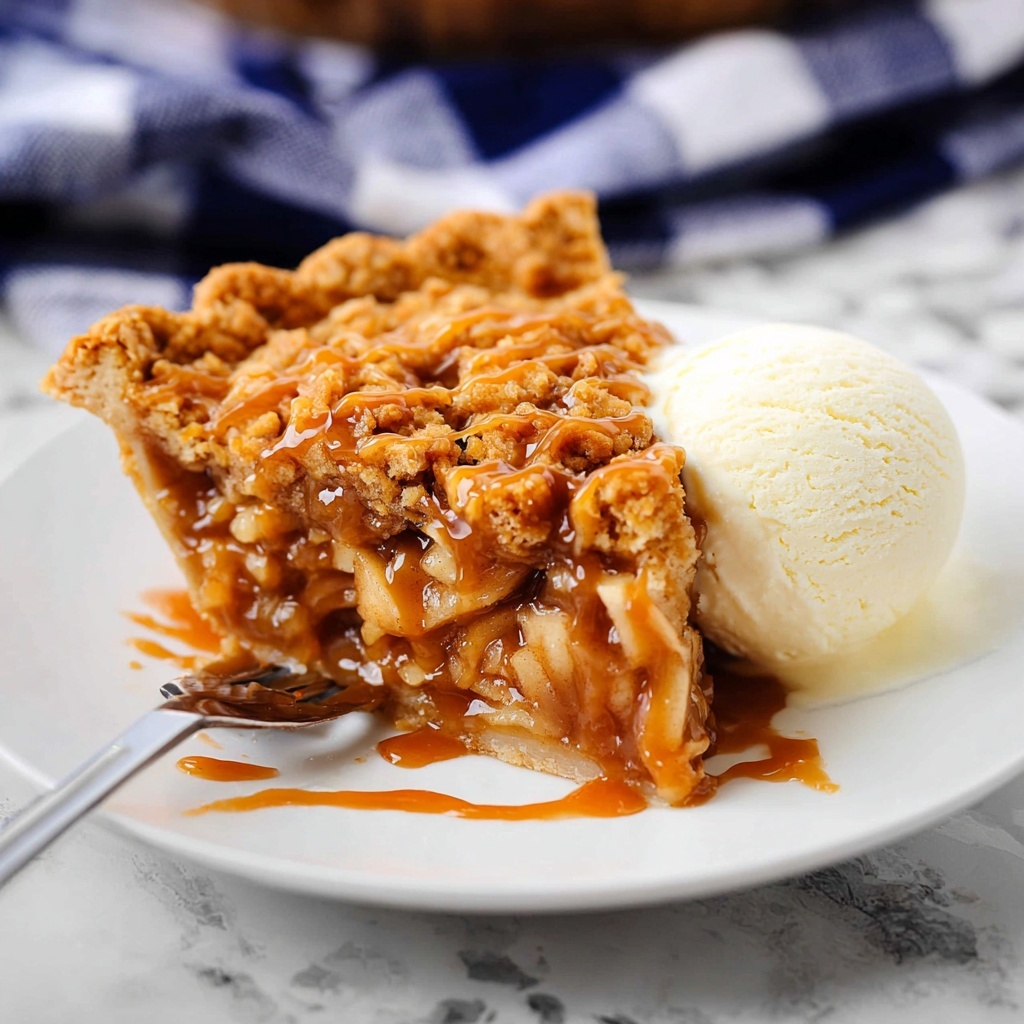
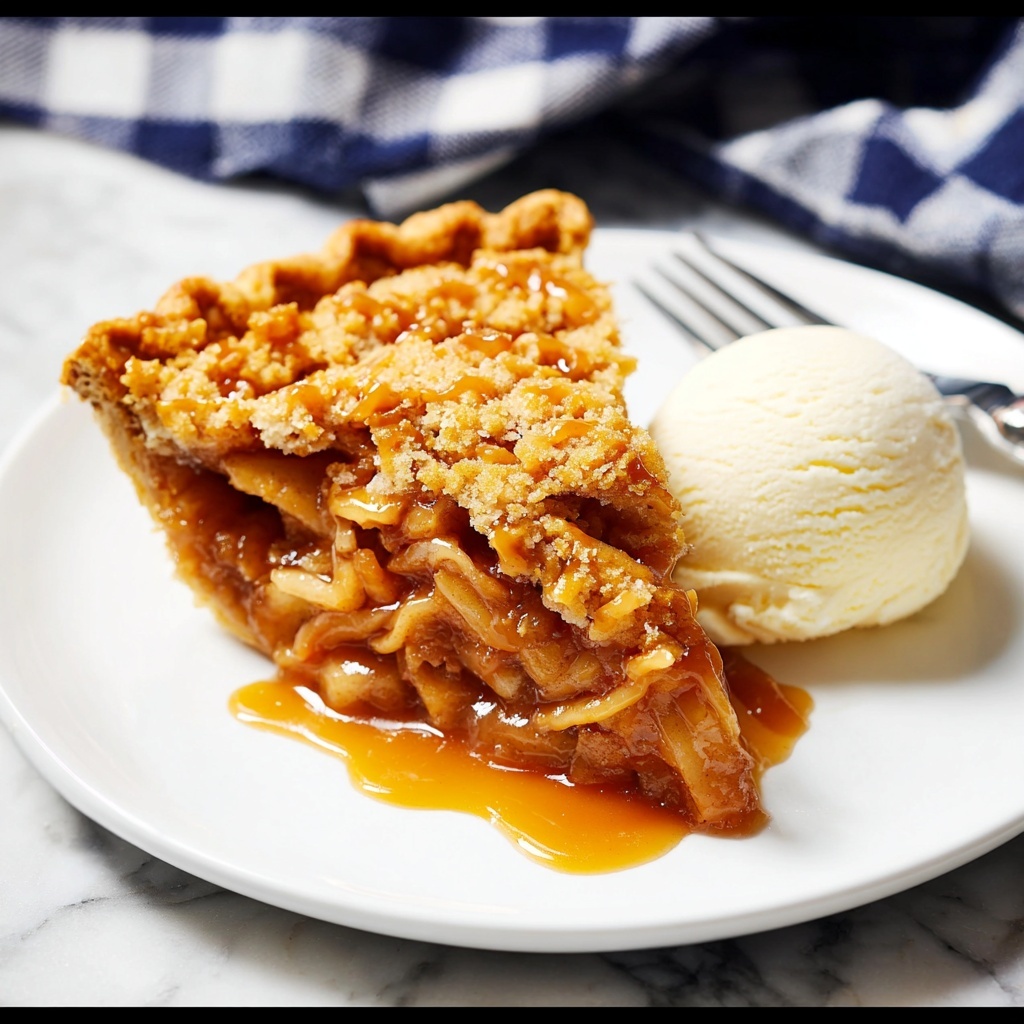
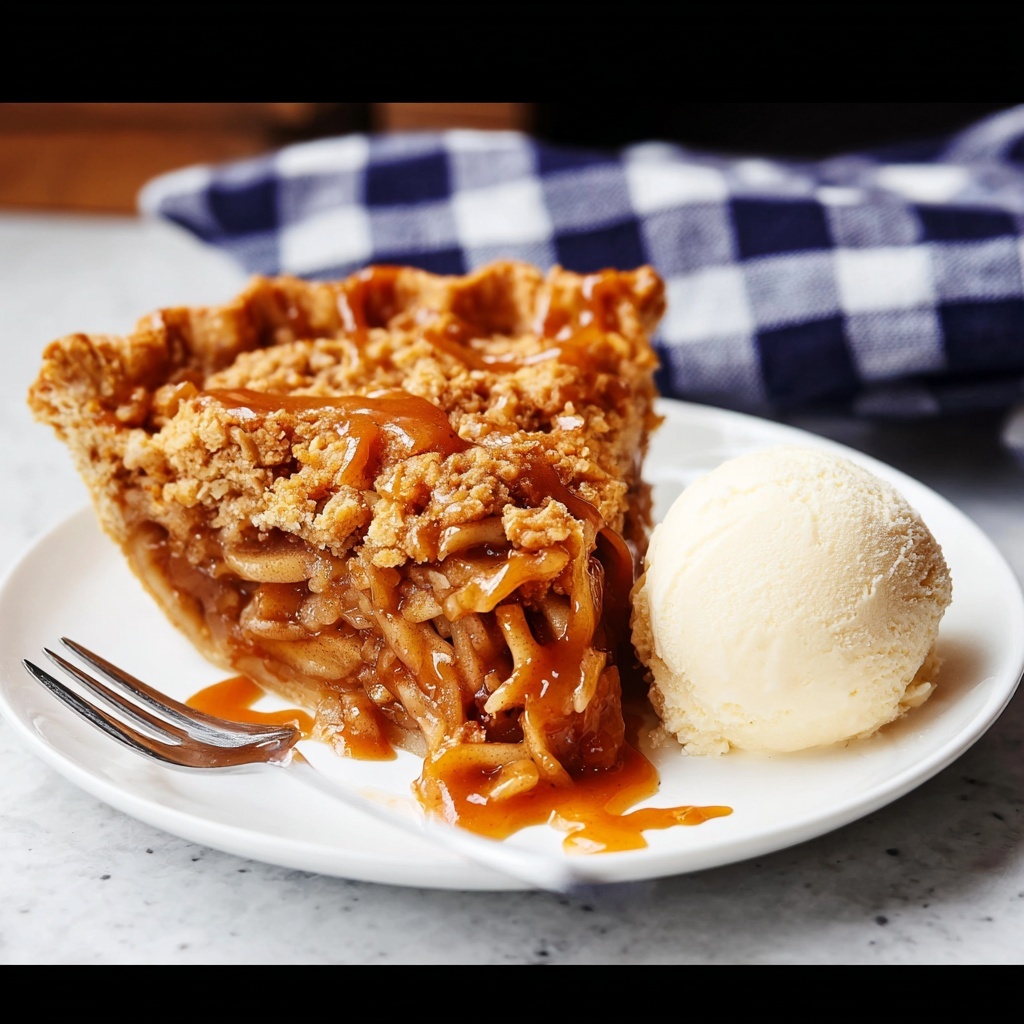
Once it’s out of the oven, allow your pie to cool and rest for about an hour before slicing. Serving it warm is ideal, especially with a scoop of vanilla ice cream and a drizzle of caramel sauce to elevate this gem of a recipe into something truly irresistible.
How to Serve Shredded Apple Pie Recipe
Garnishes
A sprinkle of powdered sugar or a dusting of cinnamon works beautifully as a simple garnish. But if you’re looking to impress, topping each slice with whipped cream, vanilla ice cream, or rich caramel sauce makes the experience even more indulgent and inviting.
Side Dishes
Pairing this pie with a warm cup of spiced tea or freshly brewed coffee creates a cozy vibe for your dessert time. For something a little heartier, serve alongside a crisp green salad with a tangy vinaigrette to balance out the sweetness.
Creative Ways to Present
Try serving the pie in mini ramekins for personal-sized portions or alongside a cheese board featuring sharp cheddar, which surprisingly complements the spiced apple flavors brilliantly. You can even turn leftovers into a delectable apple pie parfait layered with yogurt and granola for breakfast flair.
Make Ahead and Storage
Storing Leftovers
After enjoying your pie, cover any leftovers tightly with plastic wrap or store in an airtight container in the refrigerator. It will stay fresh for about 3 to 4 days, making delicious next-day snacks or desserts easy to enjoy.
Freezing
If you want to keep your apple pie around longer, freezing is a great option. Wrap the cooled pie tightly in plastic wrap and then in aluminum foil to prevent freezer burn. It keeps well for up to 2 months and can be thawed overnight in the fridge before reheating.
Reheating
To bring your chilled or frozen pie slices back to life, warm them gently in the oven at 325 degrees Fahrenheit for about 15 minutes. This slow reheating protects the crust’s crispness and revives that cozy, just-baked flavor we all love.
FAQs
Can I use other types of apples for this Shredded Apple Pie Recipe?
Absolutely! While Red Delicious apples offer natural sweetness and a mild flavor, you can try Granny Smith for tartness or Honeycrisp for a sweeter bite. Just ensure you grate and drain excess juice properly to maintain the pie’s texture.
Is it necessary to use a frozen deep-dish pie shell?
Not necessarily, but frozen deep-dish pie shells save a lot of time and effort without sacrificing taste. If you prefer, you can use homemade pie crust or a refrigerated one—just make sure it’s deep-dish style to hold all the juicy filling comfortably.
Can this recipe be made gluten-free?
Yes! Substitute the all-purpose flour with a gluten-free flour blend and use a gluten-free pie crust. The texture and flavor will remain wonderfully close to the original, making it suitable for gluten-sensitive friends and family.
How do I prevent the pie from becoming soggy?
Squeezing out the excess liquid from the grated apples is crucial, as it removes extra moisture that could soak the crust. Also, baking on a cookie sheet catches overflows and helps maintain a crisp base.
Can I add nuts or raisins to this recipe?
Yes, adding chopped walnuts, pecans, or raisins can add delightful pops of texture and flavor. Fold them into the filling just before pouring it into the crust. It’s a fun, customizable twist on the classic shredding apple pie recipe.
Final Thoughts
This Shredded Apple Pie Recipe is a heartwarming dessert that brings a fresh take to a family favorite. Simple ingredients with easy steps combine to give you a pie that’s moist, flavorful, and irresistibly comforting. I can’t wait for you to try it out and share it with the people you love—there’s nothing quite like the joy of homemade apple pie to make your kitchen feel like home.
Print
Shredded Apple Pie Recipe
- Prep Time: 20 minutes
- Cook Time: 50 minutes to 1 hour
- Total Time: 1 hour 20 minutes
- Yield: 8 servings
- Category: Dessert Pie
- Method: Baking
- Cuisine: American
Description
This Shredded Apple Pie is a delicious twist on traditional apple pie, featuring grated Red Delicious apples combined with a buttery cinnamon-sugar filling baked in a flaky deep-dish pie shell. The pie is easy to prepare and yields a moist, flavorful dessert perfect for warm servings with vanilla ice cream and caramel sauce.
Ingredients
Pie Filling
- 1 cup granulated sugar
- 1/2 cup salted butter, softened
- 2 tablespoons all-purpose flour
- 2 teaspoons vanilla extract
- 1 teaspoon ground cinnamon
- Tiny pinch of salt
- 2 large eggs
- 3 large Red Delicious apples, peeled and grated (about 3 cups grated)
Crust
- 1 unbaked frozen deep-dish pie shell (such as Marie Callender’s)
Instructions
- Prepare the oven and apples: Preheat your oven to 350°F (175°C). After peeling and grating the apples, squeeze out any excess liquid to prevent soggy filling.
- Mix the filling: In a large bowl, beat together the sugar, softened butter, flour, vanilla, cinnamon, salt, and eggs using an electric hand mixer on medium speed until well combined and smooth.
- Combine apples and pour into crust: Gently fold the shredded apples into the batter. Pour the mixture into the unbaked pie shell, spreading it out evenly. Place the pie on a large cookie sheet to catch any drips during baking.
- Bake the pie: Bake the pie in the preheated oven for 50 minutes to 1 hour. Begin checking at 50 minutes by gently shaking the pie; the center should be set and not jiggly.
- Cool and serve: Carefully remove the pie from the oven and let it cool and rest for 1 hour. Serve each warm slice with vanilla ice cream and caramel sauce for an indulgent treat.
Notes
- Make sure to squeeze out excess liquid from the grated apples to avoid a soggy filling.
- Using a large cookie sheet under the pie helps catch any overflow and keeps your oven clean.
- Letting the pie rest before serving helps the filling to set fully for cleaner slices.
- Red Delicious apples are preferred for their sweetness and texture, but you can substitute with other sweet apple varieties like Fuji or Gala.
- Serving warm with vanilla ice cream and caramel sauce enhances the flavor experience.


