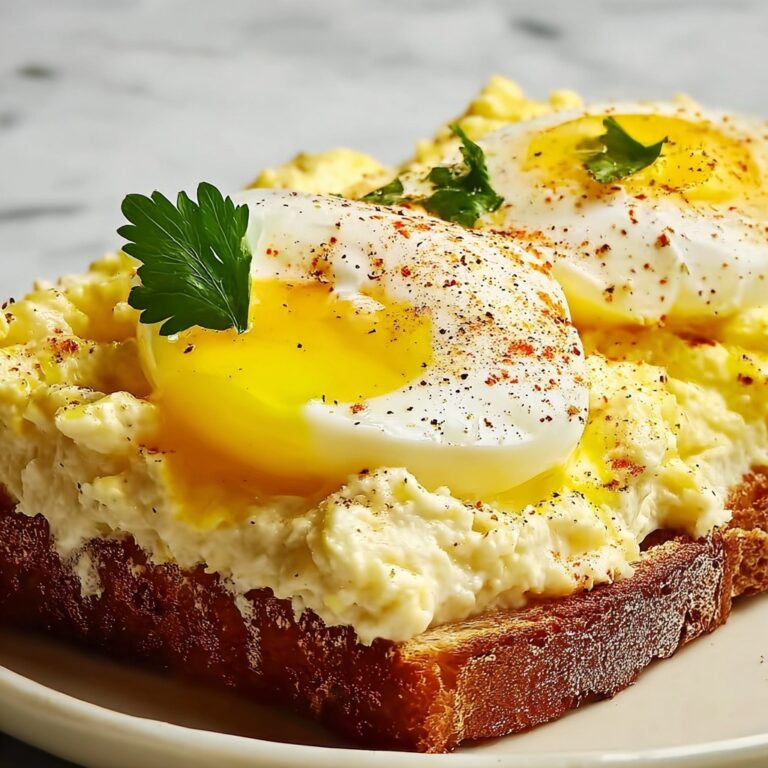
If you are craving a comforting twist on your favorite sushi, then the Spicy Salmon Sushi Bake: 7 Comforting Flavors to Savor Recipe is exactly what you need. This dish combines perfectly cooked sushi rice, creamy spicy salmon, and layers of bold flavors that come together in a warm, baked casserole form. It’s a fantastic, crowd-pleasing way to enjoy sushi in a cozy, sliceable style that feels like a warm hug with every bite. Whether you’re a sushi lover or someone looking to try something new and fun, this recipe will have you hooked from the first forkful.
Ingredients You’ll Need
This recipe relies on a handful of simple but essential ingredients that each play a unique role in building the flavor and texture profile of the dish. From the sticky sushi rice base to the creamy, spicy salmon topping, every element is carefully chosen to bring out the best comforting taste.
- Sushi rice: The foundational grain that becomes perfectly sticky and soft, essential for that authentic sushi bake texture.
- Water: Used to cook the rice to fluffy perfection without drying it out.
- Rice vinegar: Adds a subtle tang that brightens the rice and balances the richness of the salmon.
- Sugar: Sweetens the vinegar mixture to round out the sushi rice with a mellow flavor.
- Salt: Enhances all the flavors and prevents the rice from tasting flat.
- Salmon (cooked and flaked): The protein powerhouse delivering buttery, savory notes that are central to this bake.
- Mayonnaise: Adds creaminess and helps bind the spicy salmon topping.
- Sriracha: Infuses a perfect hit of spicy heat to awaken the dish without overpowering it.
- Sesame oil: Delivers warm, nutty undertones that promise depth in every bite.
- Nori sheets: Cut into strips, these add a familiar oceanic flavor and a crisp texture contrast when garnished.
- Green onions: Fresh, crunchy, and vibrant, they brighten up the final presentation with a mild bite.
How to Make Spicy Salmon Sushi Bake: 7 Comforting Flavors to Savor Recipe
Step 1: Prepare the Sushi Rice
Start by rinsing the sushi rice under cold water until the water runs clear to remove excess starch. This step is crucial for achieving that perfect, slightly sticky texture without becoming mushy. Combine the rice with water in a pot, bring it to a boil, then reduce the heat, cover, and let it simmer gently for 20 minutes, allowing the rice to cook thoroughly and absorb all the water.
Step 2: Season the Rice
While the rice is cooking, mix rice vinegar, sugar, and salt in a small bowl until completely dissolved. Once the rice is done and still warm, gently fold in the vinegar mixture. This seasoning step gives the rice that essential sushi tang and sweetness, which balances the creamy and spicy salmon topping later on.
Step 3: Layer the Rice in a Baking Dish
Spread the seasoned rice evenly in a baking dish. This layer will be the comforting base of your sushi bake, holding all the flavors together. Make sure it’s packed lightly but uniformly to create a stable foundation for the salmon topping.
Step 4: Prepare the Spicy Salmon Mixture
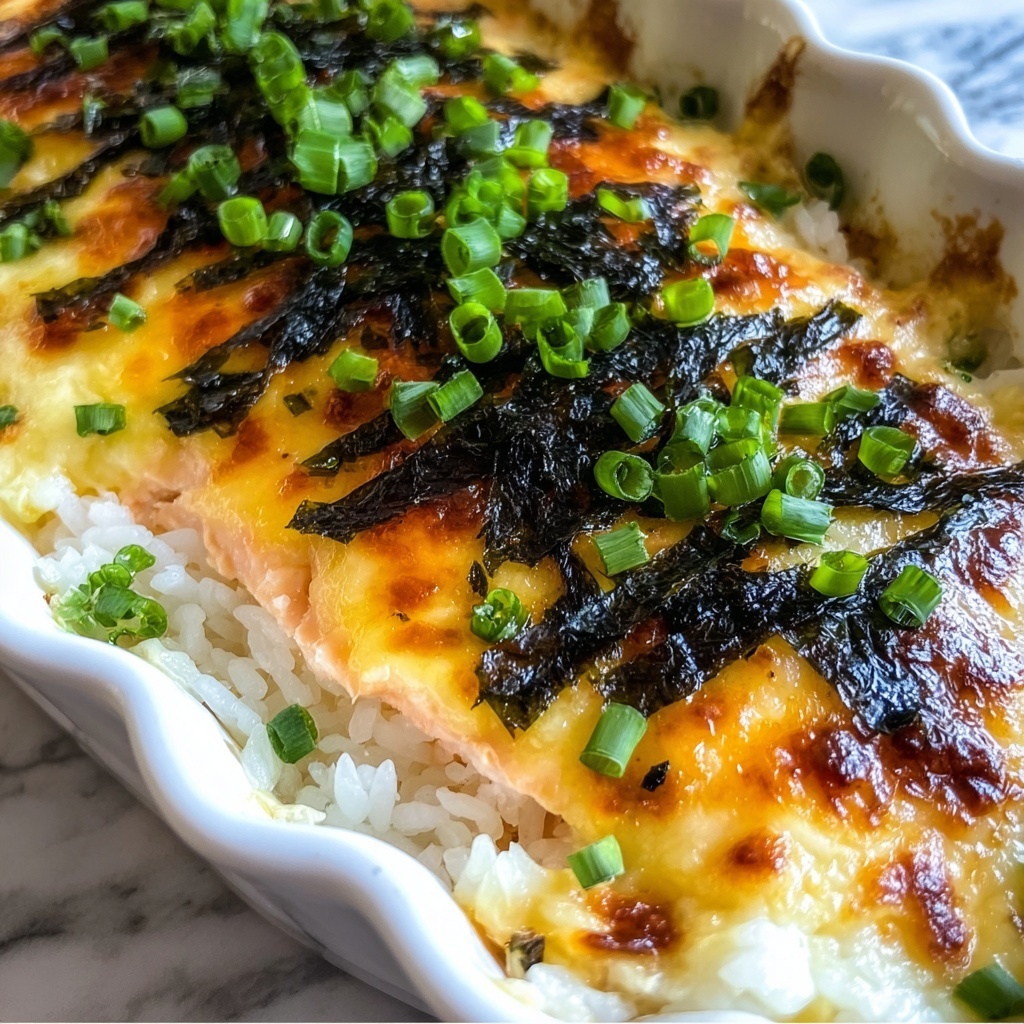
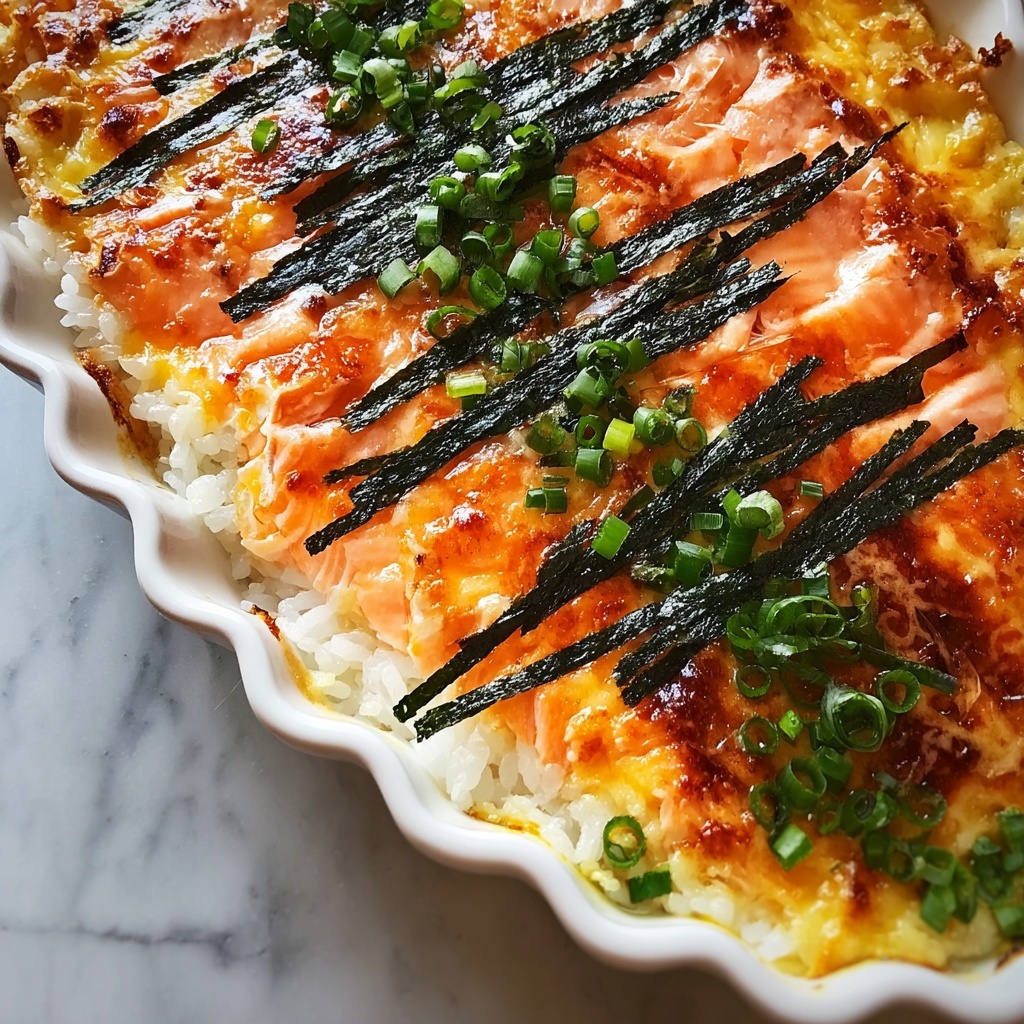
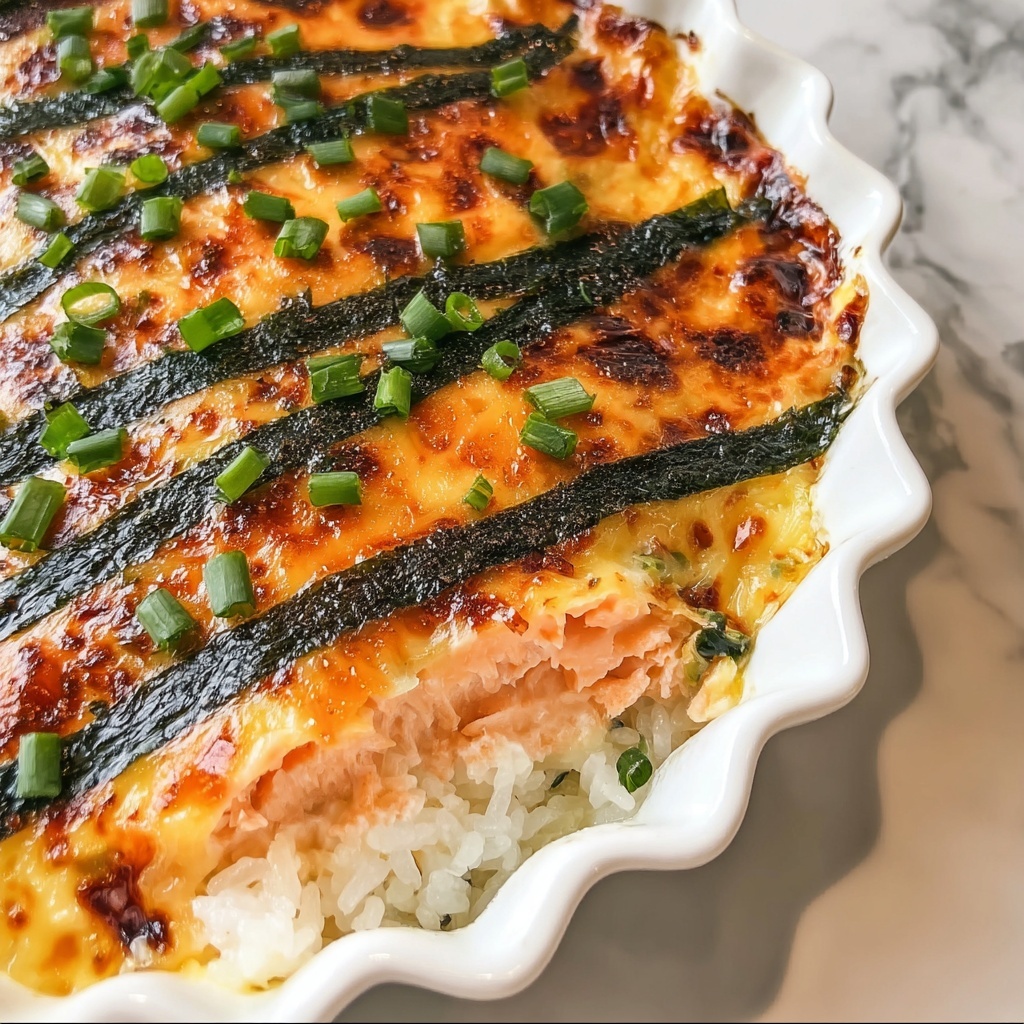
In a bowl, combine the cooked and flaked salmon with mayonnaise, sriracha, and sesame oil. Mixing these ingredients carefully brings out a luscious, creamy, and mildly spicy topping, balancing heat and richness with the nutty aroma of sesame oil. This mixture is the flavor star of the Spicy Salmon Sushi Bake: 7 Comforting Flavors to Savor Recipe.
Step 5: Assemble and Bake
Spread the spicy salmon mixture evenly on top of the rice layer. Pop the dish into a preheated 350°F oven and bake for about 15 minutes. Baking melds the flavors beautifully and warms the dish through, transforming it into a cozy, comforting meal that’s inviting and delicious.
Step 6: Garnish Before Serving
Once baked, remove the dish from the oven and garnish with strips of nori and freshly sliced green onions. These garnishes add the final lovely touches: crunch, freshness, and that unmistakable sushi vibe which makes the dish feel complete and vibrant.
How to Serve Spicy Salmon Sushi Bake: 7 Comforting Flavors to Savor Recipe
Garnishes
Besides the nori strips and green onions, you can add a sprinkle of toasted sesame seeds or a drizzle of extra sriracha for more heat. These small extras enhance both texture and visual appeal, inviting everyone to dig in eagerly.
Side Dishes
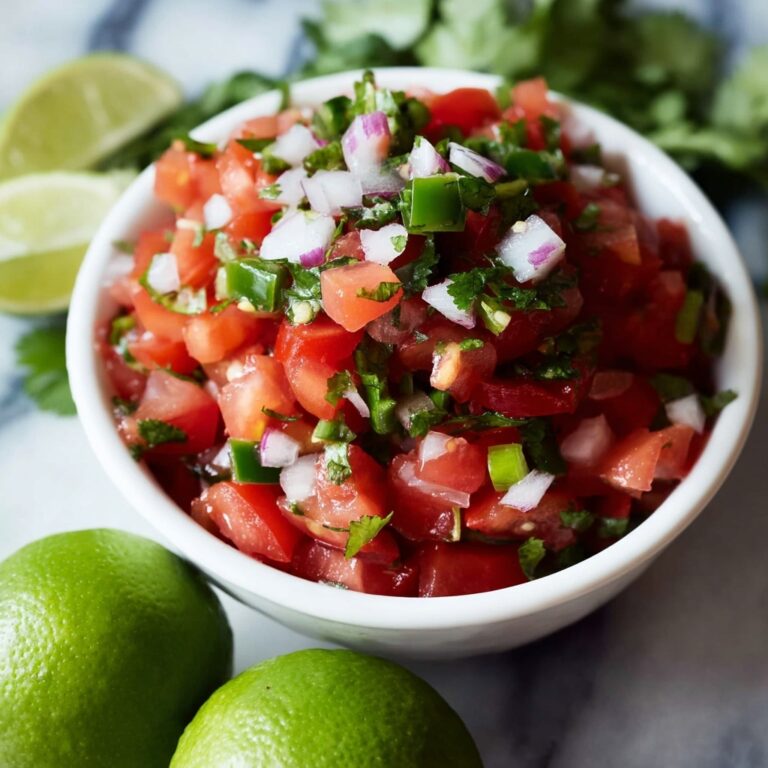
This sushi bake pairs wonderfully with simple side dishes such as a crisp cucumber salad, pickled ginger, or miso soup. These sides provide refreshing contrasts and cleanse the palate between bites of the rich, creamy bake.
Creative Ways to Present
Serve the sushi bake straight from the baking dish for a cozy, family-style experience, or slice it neatly into squares and plate with dollops of wasabi and soy sauce for dipping. You can also place portions on small individual plates topped with extra garnish to make an elegant appetizer or party dish.
Make Ahead and Storage
Storing Leftovers
Store leftovers in an airtight container in the refrigerator for up to 2 days. The flavors tend to deepen overnight, making it a fantastic dish to enjoy as next-day lunch or dinner.
Freezing
You can freeze individual portions wrapped tightly in plastic wrap and foil for up to one month. Thaw overnight in the refrigerator before reheating to maintain texture and flavor.
Reheating
Reheat the sushi bake in a preheated oven at 350°F for about 10-12 minutes until warmed through. Avoid microwaving if possible, as the texture of the rice can become gummy. Oven reheating brings back that fresh-baked charm.
FAQs
Can I use raw salmon for this recipe?
For safety and texture reasons, it’s best to use cooked salmon in this bake. Raw salmon could lead to uneven cooking and may not be safe to eat once baked.
Is there a substitute for mayonnaise?
If you prefer a lighter or different texture, you can use Greek yogurt or vegan mayo. Each will slightly change the flavor but still keep the creamy consistency required for the spicy salmon topping.
How spicy is this dish?
The heat level can be adjusted easily by modifying the amount of sriracha used. Start with two tablespoons as in the recipe, but feel free to add more or less depending on your spice tolerance.
Can I make this gluten-free?
Yes! Just ensure that your sriracha and mayonnaise are gluten-free versions, and you’ll have a delicious gluten-free comfort dish.
What is the best way to eat sushi bake?
The best way is with a fork, making sure to get a bit of the rice and salmon mixture with every bite to enjoy the full flavor combination the Spicy Salmon Sushi Bake: 7 Comforting Flavors to Savor Recipe offers.
Final Thoughts
There’s truly something magical about how the layers of this Spicy Salmon Sushi Bake: 7 Comforting Flavors to Savor Recipe come together to create a cozy yet exciting flavor experience. It’s approachable enough for a weeknight meal but special enough to serve to guests. I hope you’ll enjoy making it as much as you’ll love eating it — it’s one of those dishes that feels like a warm, delicious hug no matter the day.
Print
Spicy Salmon Sushi Bake: 7 Comforting Flavors to Savor Recipe
- Prep Time: 15 minutes
- Cook Time: 40 minutes
- Total Time: 55 minutes
- Yield: 4 servings
- Category: Casserole
- Method: Baking
- Cuisine: Japanese
Description
This Spicy Salmon Sushi Bake is a comforting and flavorful dish that combines classic sushi ingredients into a warm, baked casserole. Featuring perfectly cooked sushi rice topped with a creamy, spicy salmon mixture and finished with crisp nori strips and fresh green onions, it’s an easy way to enjoy sushi flavors at home with minimal effort.
Ingredients
Rice Base
- 2 cups sushi rice
- 2 1/2 cups water
- 1/3 cup rice vinegar
- 2 tablespoons sugar
- 1 teaspoon salt
Salmon Topping
- 8 ounces cooked and flaked salmon
- 1/4 cup mayonnaise
- 2 tablespoons sriracha
- 1 teaspoon sesame oil
Garnish
- 1 sheet nori, cut into strips
- Green onions, for garnish
Instructions
- Preheat Oven: Preheat your oven to 350°F (175°C) to prepare for baking the sushi casserole.
- Rinse Rice: Rinse the sushi rice under cold water until the water runs clear to remove excess starch, ensuring tender, separate grains.
- Cook Rice: In a pot, combine the rinsed rice and 2 1/2 cups of water. Bring to a boil, then reduce heat to low, cover, and simmer for 20 minutes until rice is cooked through and water is absorbed.
- Prepare Vinegar Mixture: While rice cooks, mix rice vinegar, sugar, and salt in a small bowl until the sugar and salt fully dissolve.
- Season Rice: Once the rice is cooked, transfer it to a bowl and gently fold in the vinegar mixture, spreading out the rice to cool slightly.
- Arrange Rice: Spread the seasoned sushi rice evenly in a baking dish to form a base layer.
- Mix Salmon Topping: In a separate bowl, combine the cooked, flaked salmon with mayonnaise, sriracha, and sesame oil, mixing until smooth and well blended.
- Spread Salmon Mixture: Evenly spread the spicy salmon mixture over the rice layer in the baking dish.
- Bake: Place the baking dish in the preheated oven and bake for 15 minutes, allowing the flavors to meld and the topping to warm.
- Garnish and Serve: Remove from oven and garnish with strips of nori and sliced green onions before serving for added texture and color.
Notes
- Use medium-grain sushi rice for the best texture.
- Adjust the amount of sriracha to control the spiciness level.
- For a creamier topping, you can add a bit more mayonnaise.
- This dish can be served warm or at room temperature.
- Leftovers can be refrigerated and reheated for up to 2 days.


